

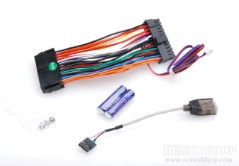
Just looking at the box you know this is going to be something special. The box features a photo of the unit in action, and has lots of marketing fluff on the back of the box listing the units benefits and features. Opening the box, we are met with a standard iMon remote control. Beneath this is the Antec Veris unit itself, which has all the necessary wires and cabling already attached. The other goodies include 2 AAA batteries (for the remote), internal to external USB adapter, motherboard power cable and mounting screws.
The remote control is pretty standard by this point, as we’ve seen this same unit included in many HTPC cases. The top of the remote control has two power buttons and standard media controls. Below this is a small D-pad surrounded by navigation controls. The D-pad is analog and is mostly used to drive your computer’s mouse. The features around the ring include simulating right-click, left-click, keyboard/mouse mode, and other navigation controls.
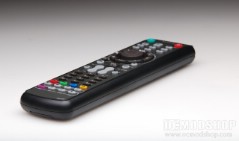
Below this control ring is the “Home” button (which can be programmed to run any media application). Below these are the volume, channel, numerical buttons (usually to change channels), and Red, Green, Blue, and Yellow buttons (by default mapped to Video, Music, Pictures, and TV). Below this row of colored buttons are other nifty features, like Bookmark, Thumbnail, Zoom, Full Screen, and DVD functions (DVD mode, Menu, Subtitle, and Audio).
The main display unit looks absolutely beautiful. The front is black plastic, and is adorned with two anodized aluminum control knobs. The top of the display features the LCD display itself, along with a large “go” button, that can be used to launch any pre-determined application, like Windows Media Center. Beneath that is a round infrared sensor, which takes input from the remote control.
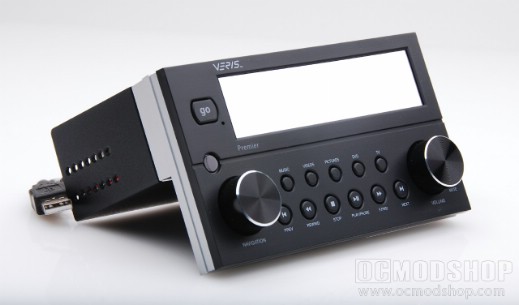
The sides of the unit have holes pre-drilled which allow you to mount to your front case using standard case screws. The back of the unit has a simple circuit board (which has SoundGraph silkscreened onto it), with leads already attached for USB and the motherboard power switch. A ribbon cable attaches the actual display and controls to this circuit board. There are two blank pins which will take the power lead from the front of your case… more on this during the installation section.
The bottom bank is the control portion of the display. On the left of the display is a Navigation jog dial, which is notched to provide tactile feedback when in use. This knob works best with software that can be navigated using up and down arrows, like Media Center, iTunes, or the included iMedian HD software. Turning the knob clockwise issues an “up arrow” command, and turning counterclockwise issues a “down arrow” command. These commands work in any application that has focus, so I was even able to scroll through a web page in Internet Explorer. The knob can be pressed in to select an item.
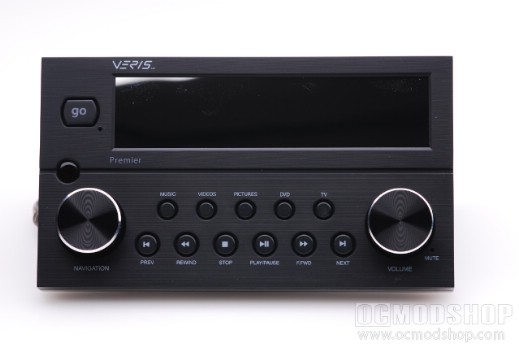
To the right of the navigation wheel are standard media controls. The top row of buttons selects Music, Videos, Pictures, DVD, or TV. These buttons go directly to the corresponding sub-area of Windows Media Center (or other software). The bottom row are standard media navigation buttons (Previous, Rewind, Stop, Play/Pause, Forward, and Next. To the right of the media buttons is the Volume knob. Of course, clockwise turns the volume up, counterclockwise turns the volume down, and pressing the knob mutes the sound.


