

At this point it is very easy to toggle through each fan channel and adjust its setting. Just click the “mode” button and one of the fan channels will start blinking, starting with “fan 1”. Use the jog dial to adjust the RPMs up or down, depending on your noise/performance preferences. It takes a few minutes for the actual RPMs to catch up, and they do not necessarially reflect the RPMs you’ve dialed to. For example, if I change one of my fans to 50000 RPM, the fan may not actually go that high, so our test fan topped out at 1440 RPM. When we wanted to adjust this channel again, it was set at 5000 RPM, so we had to unnecessarially dial down to reach the fan’s maximum before we could actually lower the fan’s RPM. If a fan goes too low then it will idle (and that threshold depends on the fan). The RPM setting is saved when it is changed, your fan settings will be just as you left them when you power up again.
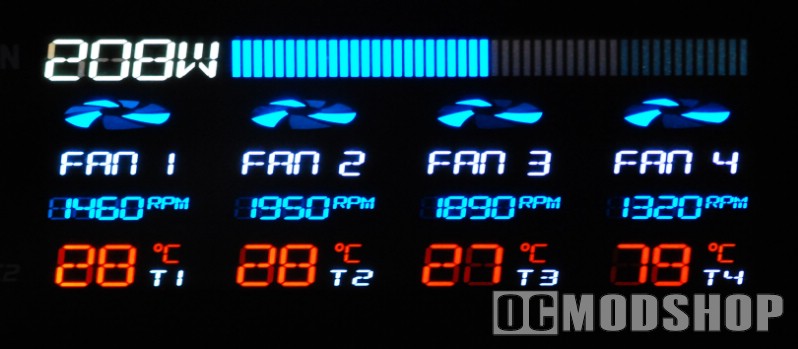
There is a good amount of adjustment to get your fans tweaked to your liking, and you cannot depend on the dialed setting. A fan may stall if too little power is applied, and the unit beeps an alarm and flashes the afflicted channel. A tiny bar graph showing the amount of voltage applied would be a much better visual, in my opinion.
You can also put a particular channel in “standby mode” by toggling to the fan channel you want to alter, and then press the Jog Dial. The fan icon for that channel turns off, which also silences any alarm on that channel. You can also go back to “default settings” (1500RPM on all channels) by pressing the Mode button for 3 seconds.

The power usage gauge is pretty much spot-on, as it agreed with our independent power consumption meter. It is very interesting to see the effects of turning things on and off to see their real power consumption, although it takes a few seconds for the gauge to adjust. For example, using this gauge we found out that our Coolit Beverage Chiller consumed between 10 to 12 watts, way beyong what USB was meant to deliver (which is why the Chiller needs a strong source to power it). Most overclockers will use this tool to determine the power effects of overclocking their processor and memory.
Even though the power gauge only goes up to 800 W, this should be enough for even the power user, as we confirmed that even a modern PC doesn’t consume as much as you might think. Our test rig is no slouch (Intel E6600 with 8GB of RAM and 8800GT) and only consumes 210 Watts at idle and 270 Watts with both the CPU and video card under full load. It must also be noted that the temperature readout is in Celsius only, and cannot be changed to Fahrenheit

