
Let’s start with the router. There are many brands of router and each has a slightly different way to log into them. This they cover in the manual that came with the router. If you have misplaced the manual, then you can find a new copy on your manufacturers web site. Click any of the images in this post for a larger image.
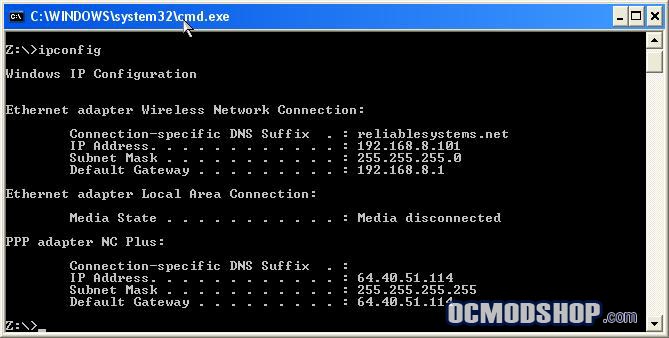
The first thing you need to do is log into your router. For my examples, I will be using a LINKSYS router, which is one of the most popular brands today. LINKSYS routers come with a software package to help you get them setup. Because of this, often people do not know what IP address their IP address is or, more importantly, the IP address of their router. There is a simple way to get his information. I most windows operating systems, you can open a command prompt window and type the command “ipconfig” to get the information you need. What you are looking for is the “Default Gateway”. In the case of my example it is “192.168.8.1”. The default gateway is the path that all information bound for the internet will take to get there.
After you find you “Default Gateway”, open a web browser (most of these routers work best with Internet Explorer as some of the content can be active) and, in the address bar, type in the IP address. The LINKSYS routers will prompt you for a username and password. Other routers will take you to a page with blanks to enter the username/password.
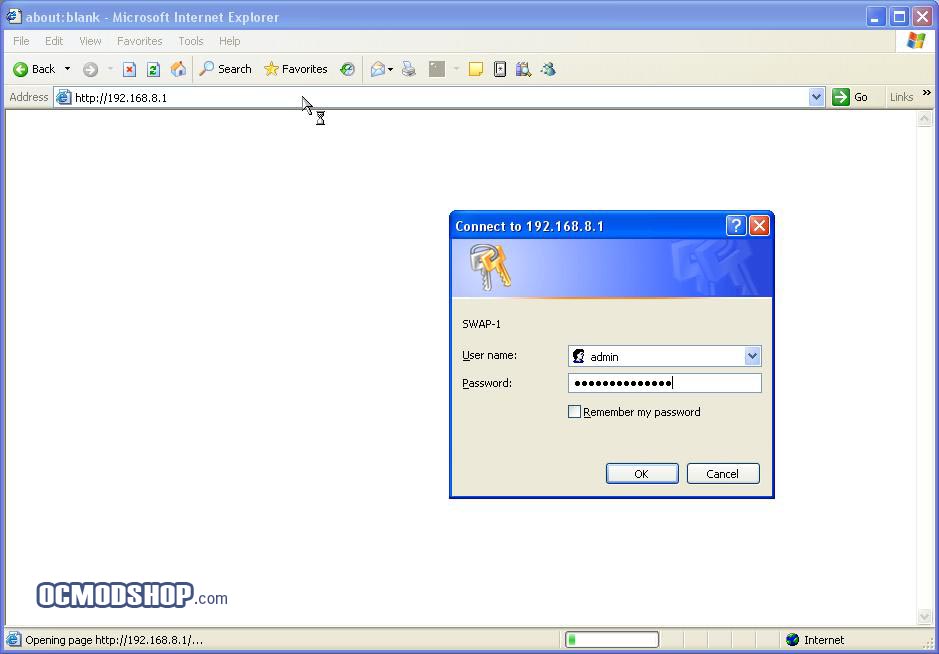
(SECURITY RULE NUMBER ONE: Make sure you change the default password of the router, which is often “admin” or blank. If you do not, all if these steps to secure your router are for not)
If this is a new router that you just took out of the box, it may walk you through a wizard to set it up. For purposes of this example, I am assuming that this is a router that has already been setup and is being used. Since we are focusing on wireless security, I am going to move right to the “Wireless” tab in the router, where I can go to “Wireless Security”. By default, “Security Mode” is set to disabled. If you click on the drop down, you will see multiple options. Not all routers have all of the options seen in the example. Some may have more, some may have less. I am going to walk through each of the four options shown in the screen shot.
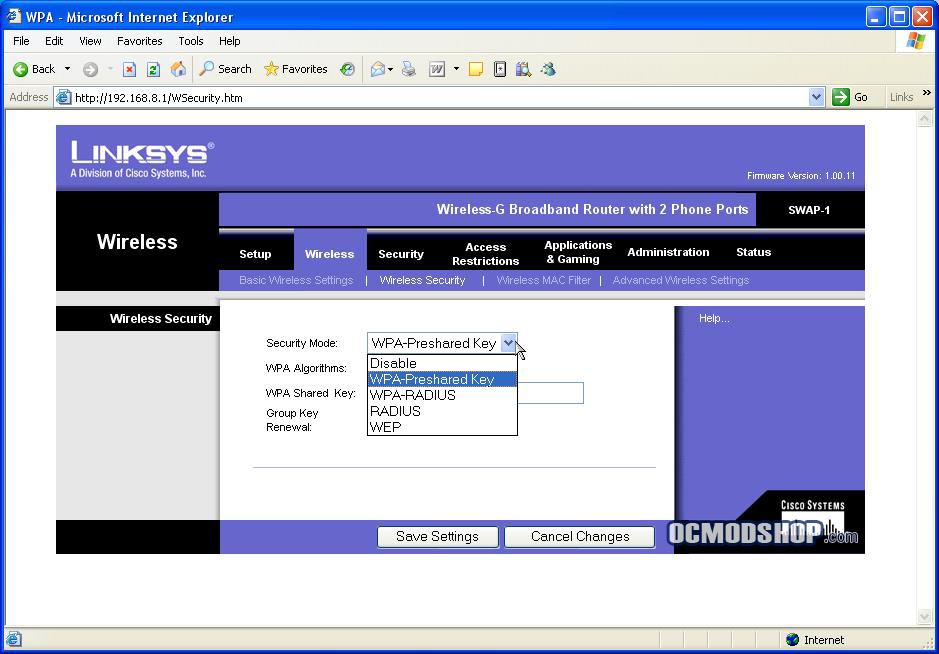
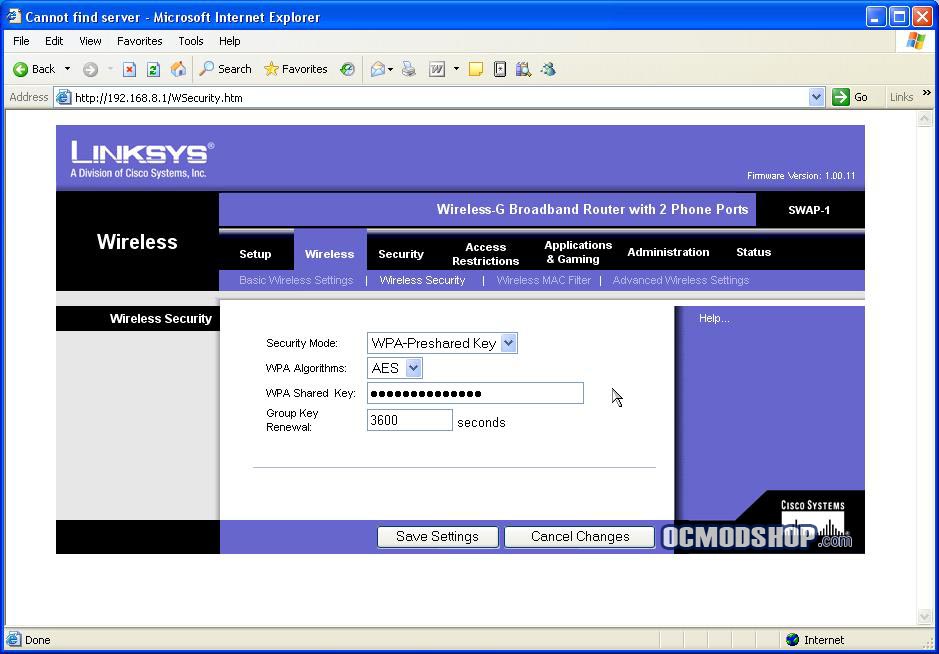
WPA-Preshared Key (WPS-PSK) – WiFi Protected Access is a very secure method of protecting your data. Each packet of data that is send between your wireless router and your wireless device is encrypted with a different encryption key. What this means is that if someone were to “capture” a packet of data, crack the encryption string and then try to read the rest of your data, they would fail. The chances of the same encryption string being used a second time are very small. Some of the newest routers are now using WPA2, which migrated the key generation from 24-bit to 48-bit, virtually elimination the thought of duplicating a key. The Preshared Key portion of this security mode means that you assign “password” that you share with each authorized user. They enter the “password” once and their device takes care of the rest of the security from there. Personally, I recommend a “passphrase”. This can be anything you want it to be, and I always recommend leaving the spaces and punctuation in the phrase. The longer the phrase, the less likely someone is to guess it. The AES encryption algorithm is my personal recommendation, because AES uses a 128-bit, 192-bit or 256-bit key, making this option the most secure. Some routers let you choose the bit strength. This LINKSYS does not, but I believe defaults to the 256-bit standard. TKIP is not an encryption algorithm, but a “key exchange” protocol. While still secure, it is not as strong as AES and also makes for a slower connection as there is more overhead for your routers processor. TKIP is a software base protocol, where AES is hardware.
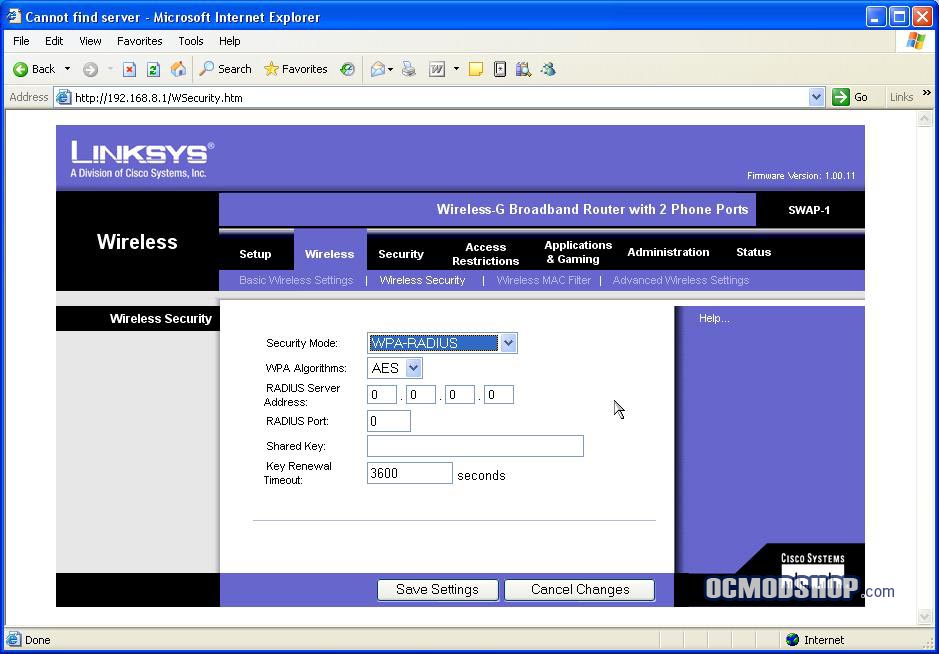
WPA-RADIUS – This is similar to WPA-PSK in that the encryption key changes with each packer. The difference is that you now need a Radius server. This allows you to “authorize” specific devices to access your network. When a device tries to connect, the access point looks at the “authorized” list on the Radius server, and if it finds the device listed (usually by MAC address(more on this later) ) then the device is allowed to access the network and the WPA encryption process takes over from there. This is by far the most secure method of making your data and network private. The catch…you need a Radius server and you need to know how to set it up properly. This is usually something that only large businesses do because of the high overhead of this operation.
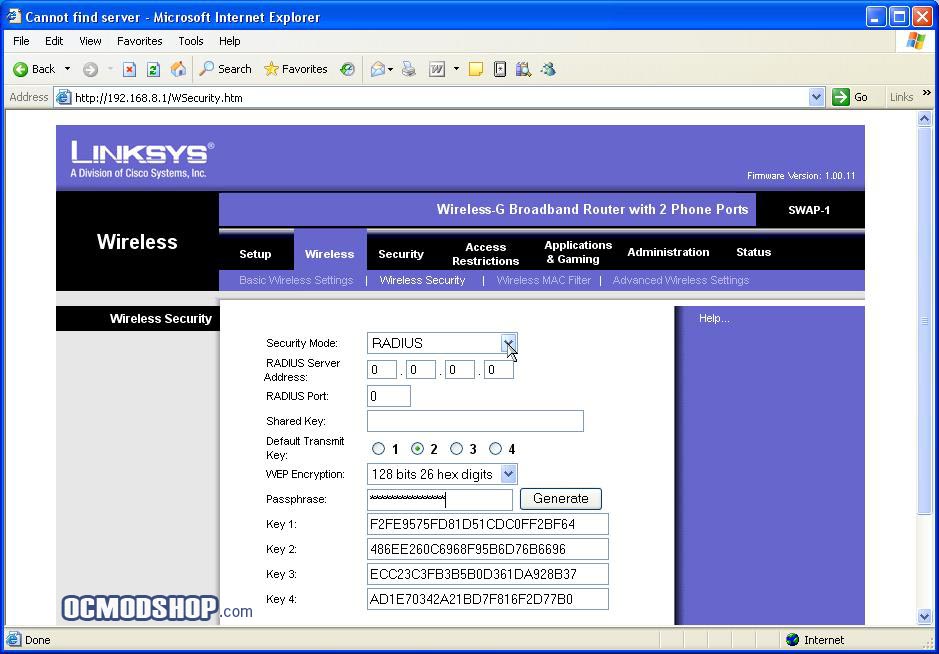
RADIUS – RADIUS is an Authentication, Authorization and Accounting protocol. It is what most ISP use to authenticate users who connect. In the case of WiFi security, RADIUS typically uses the devices MAC address, and sometimes a username/password combination to authenticate the user, authorize the device and account for the connection the the network. Again, the catch is that you need a RADIUS server, so this is yet again a tool the large organizations usually implement. In the case of this particular LINKSYS Router, the RADIUS option also makes use of WEP (see below) to provide the encryption method, and you can enter a “passphrase” and have the WEP keys automatically generated for you. Not all routers have this option, meaning the keys have to be generated manually.
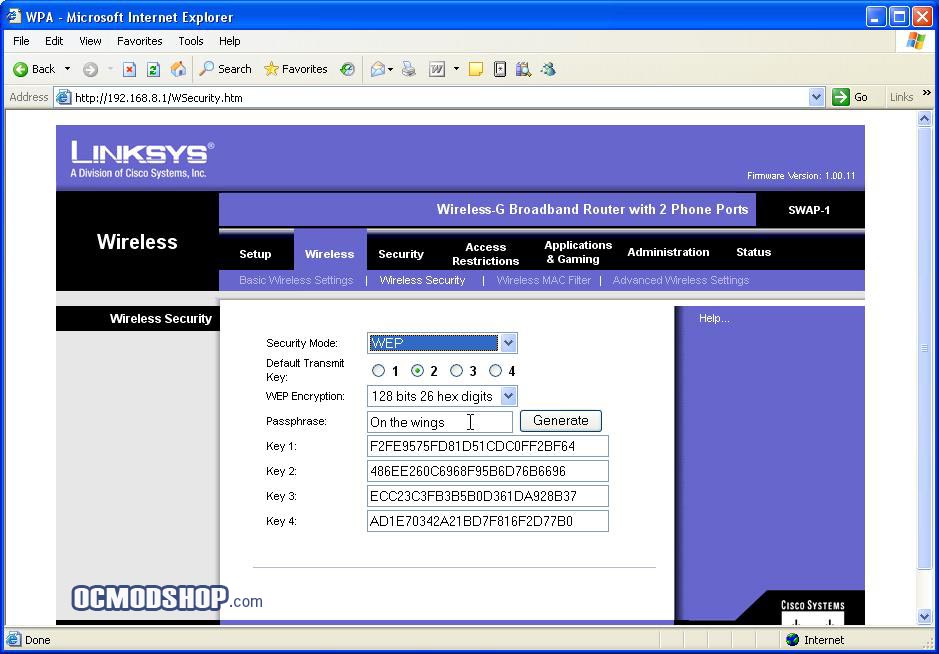
WEP – Wired Equivalent Privacy uses an encryption key that is entered by the user of the wireless router. In the case of this LINKSYS Router, you can also enter a “passphrase” and have the keys generated automatically. You typically have the option of 64-bit or 128-bit encryption (some routers offer higher bit counts, but not many devices support this), which sounds pretty good, and for many people is adequate protection. The drawback to this is that the encryption key never changes, so if the key becomes compromised, then your security of gone. You also have to manually enter a complex encryption key on each device that is going to use access your network, and you have to do it accurately…twice. WEP usually lets you create four keys as well as setting a default key. WEP is the original, and least secure, option for wireless security, but any security is better then “wide open”, or no security.
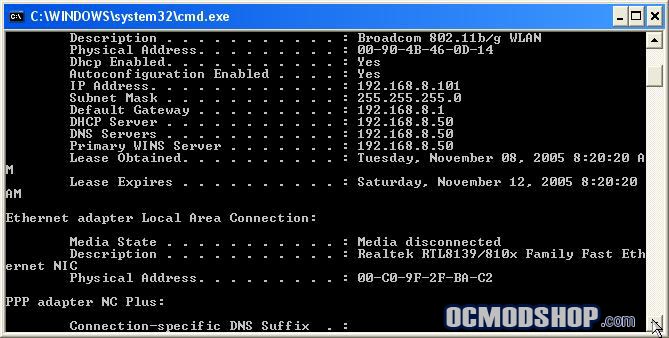
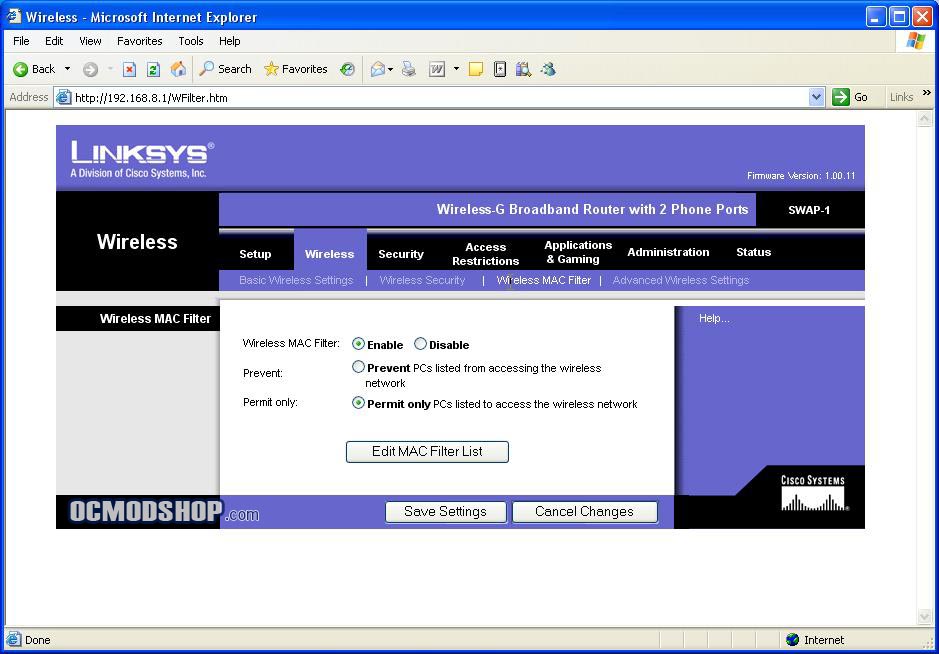
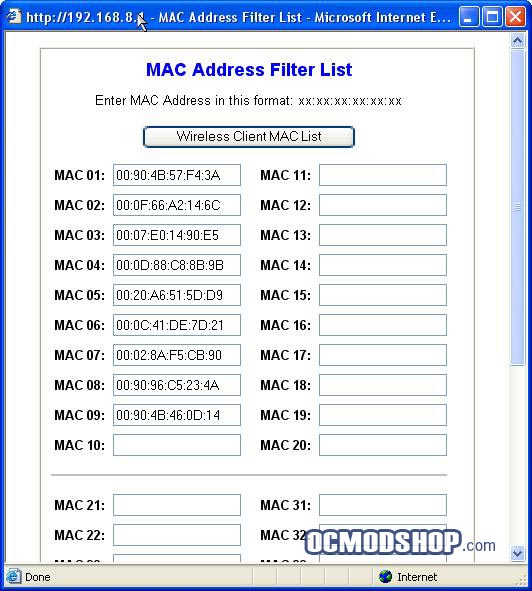
One more option for even greater security is Wireless MAC Filtering. At this point, most all routers support this feature. Every network access device, wired or wireless, has a unique identifier called a MAC Address (Media Access Control address). These address can be found on a sticker on the device, or by opening a command window on your Windows system and typing “ipconfig /all”. The “Physical Address” is the MAC Address.
Enabling the Wireless MAC Filter and setting the “Permit only…” option is the first step. You then need to edit the MAC Filter List to add the MAC address of the devices that are going to be allowed to access the router. Even if this is that only thing you do, and you never setup WPA or WEP, your security will be increased.
Limiting the devices that attach to your router as well as implementing one of the encryption options is going to save you a lot of potential headaches, as well as keeping your neighbors off the broadband connection that you are paying for.