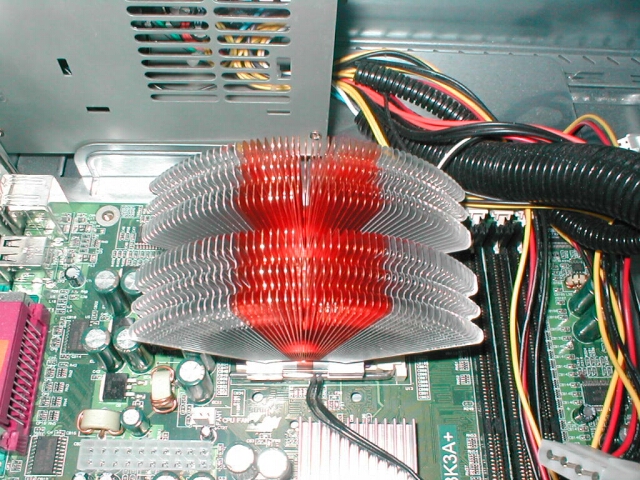
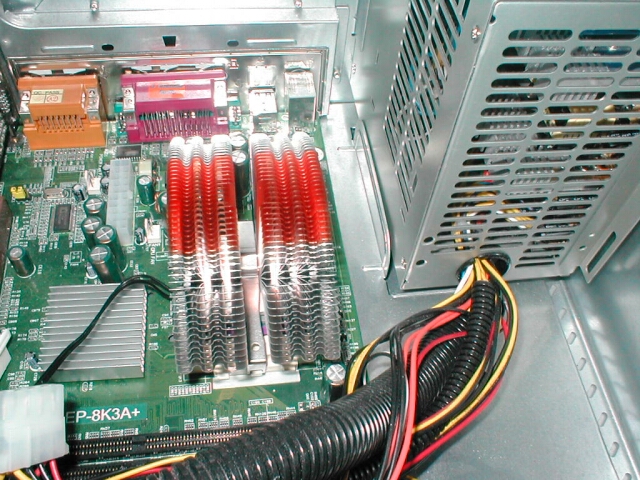
Installation of the 6000alcu was as simple as installing the 6000cu. All you need to do is drop the clip into the groove, place the heatsink on the core, and use the clip tool to attach the clip to the socket.
Installation of this heatsink is really easy and really fast because of the tool that you get. Usually a lot of people are worried about installing heatsinks because a lot of the time a screwdriver is needed to get the clip into place which can be a bad thing because screwdrivers slip very easy and can damage your motherboard. I think that this heatsink looks really cool installed and if you have a window you can display something different than the standard heatsink.
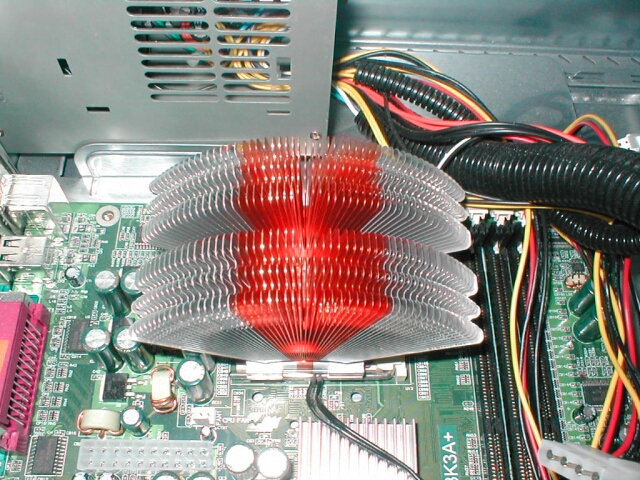
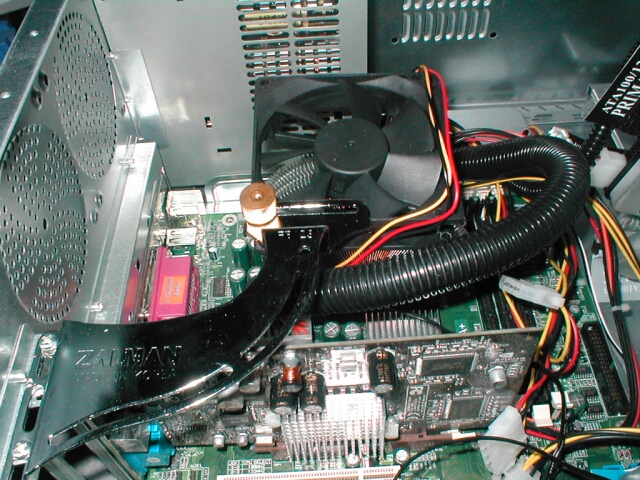
After the heatsink is installed you need to install the fan bracket. To install it you just screw three of the screws into the expansion slot screw holes. When the fan bracket is installed you will need to position the fan over the heatsink by using the gold knob on the arm. After you have your bracket and fan installed you can use your fan control device or go directly into a motherboard header if you do not want to use it.
Test Bed
- EPoX 8K3A+
- Cooler Master ATC-101
- Athlon XP 1800+
- 512MB Corsair 3200
- 80GB Maxtor ATA133 HDD
- 3DPower Geforce 3
- Sound Blaster Live! Value
- Pioneer 16x slot load DVD
- 10/100 NIC
- Floppy
Like always I will be using Artic Silver 3 for testing. For the testing of this heatsink I will not be using the external thermal probe like I always do because the EPoX 8K3A+ is able to read the onboard diode of the Athlon XP and Thoroughbred CPUs, or so I have been told by EPoX tech support.
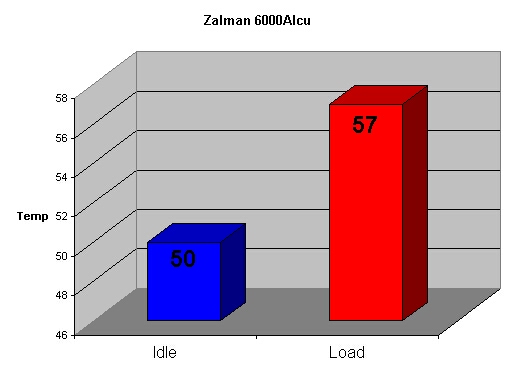
I will be using only the normal mode to test this heatsink because it was getting a bit hot to test it under silent mode. To get the idle temperatures I booted up the computer and let it sit for about 20 minutes and to get the load temps I used Prime95
As you can see this heatsink does not perform as well as I expected and the load temperature is a little too hot for my comfort. The Zalman 6000AlCu can handle up to an Athlon XP 2000+ as it states on their website and it can handle this 1800+ as well but the temps are just a little too high for me. The idle temperature ended up being 50 degrees Celsius while the load temps ended up being 57 degrees Celsius.
Conclusion
Well the 6000alcu does not perform as well as the 6000Cu but that is expected because of the aluminum being used rather than it being all copper. Even though the performance is not the best in the world you must take into mind that this heatsink is designed to keep your CPU at a good temperature and at the same time having it be quiet.
There are so many good things about this heatsink which I like. I like that it’s very easy to install, that it’s quiet, you get a lot of stuff and spare parts and that it looks cool. I would not recommend this heatsink to you if you are looking to overclock but if you are looking for a light, quiet, decent performing, easy to install heatsink with a lot to offer I would recomend this to you.
Overall I am going to give this heatsink an 7.5/10. I would like to thank ZalmanUSA for giving me this heatsink to review. You can pick this heatsink up along with all the other Zalman products from Sharka Corporation
Pros
- Very cool looking
- Very quiet
- Thermal compound included
- Fan control device included
- Spare parts included
- Easy to install
- Great clip design
- Lots of CPUs supported
Cons
- Does not perform as well as 6000Cu
- Better heatsinks on the market