

iMon displays have always had a goofy implementation, in my opinion. Even in pre-installed units, connecting this panel to your computer is not exactly straighforward. The display takes power directly from your motherboard power cable, and also acts as a “power button proxy” as it sits in-between your case’s power button and the motherboard. This configuration is set up this way so that the unit is always on, even if your PC is off (which allows you to turn on your PC from the remote control).
To install, you need to first free up two 5.25″ case bays. It’s probably best to route the wires through the front, complete all the connections, and then mount the display last. Attach the power cable (which is basically two wires that pull 3.3 volts from your power supply’s motherboard cable). Next, attach the USB cable to an internal USB port. An adapter is included which allows you to plug the standard USB plug into your motherboard’s USB pinout. The end has 5 pins, but the fifth pin being a dummy pin so you have to plug it into the part of your USB lead which has free space to the right of the fourth pin.
You can check prices on the Antec Multimedia Station products right here.
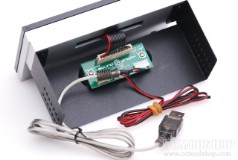
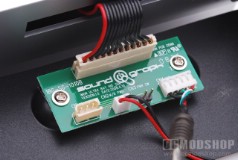
At this point you can in theory run the unit, but the display will remain on even after you turn off your computer, and you won’t be able to remotely turn on your PC. You must now connect your case’s power switch to the display’s circuit board. Unplug your power switch lead from your motherboard, and attach it to the two exposed pins on the small circuit board (which is more of a pain than it sounds). Now attach the iMon’s 2-pin power switch cable to your motherboard’s Pwr Switch pins.
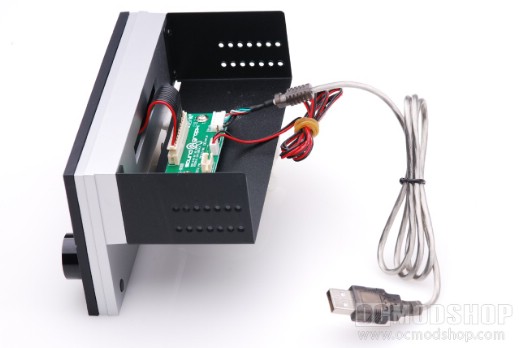
There are now a lot of extra loose wires in your case, which require some creative routing to make it look nice. There are several improvements that could be implemented with installation, but this is not a problem for the vendors, but with iMon itself. Instead of a motherboard-extension cable for power, why not use a small plug that just passes the power through, and taps the necessary 3.3 volts? Another alternative could be to use a standard molex connector, making the unit take 5v. If the display really only needs 3 volts, then why not include a simple circuit to condition the power (which would also provide overvolt protection)? I understand why this method was used: so the display can take IR signals when the host PC is off, but honestly, there’s got to be a better way to do this.


