

Got your computer’s innards all nice and clean? Good. Now to avoid destroying your internal components while you root around inside there, try to remember to touch some bare metal on the case as often as possible. This will prevent ESD, or electrostatic discharge. Walking across the carpet and touching a doorknob? That can be thousands of volts. It only takes 30 volts to destroy your motherboard’s components. Touch that case. Even better would be to get an ESD wrist strap, if you plan on catching the Upgrade Bug.
Now, look on the motherboard for any identifying names or model numbers. Sometimes it’s right there in your face, usually near the CPU. It can be hard to find at times, and then sometimes there’s no trace at all. For those of you who have no idea, there’s a handy little free program you can download called CPUID that will give you all the info you need for this upgrade, including what kind of memory you already have installed. Download that program, install and run it, and get your motherboard info. Once you know what you have, find the manufacturer’s page for it and it will let you know what memory it supports.
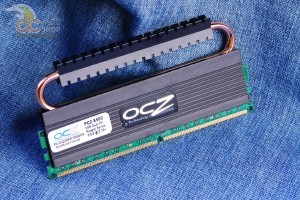
For this tutorial, I ordered a 2GB stick of DDR2 PC-6400 to go with the 2GB I already have installed. This is memory is only clocked at 800Mhz, and while my motherboard supports over 1000Mhz, I want to try to match it to the memory I already have installed. However fast your memory is, if they are mismatched they will only run as fast as your slowest stick. If you want to do a full upgrade and max out what your mobo can handle, by all means. Just make sure you get all the exact same brand, speed, and voltage for optimal results. I don’t really care about speed on a PC that I use to watch movies all day, and 4GB will be more than enough for HD, so I’m sticking with the slower 800Mhz.


2 comments
No problem!
Thanks!
Comments are closed.