

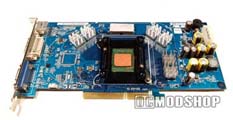
The memory sinks must be mounted before installing the main heatsink, and is a fairly straightforward process… just peel off the protective adhesive backing and stick on your ram. They fit nicely over the most card’s square RAM chips, but will not completely cover the memory on cards that use older or cheaper memory (like a value edition Radeon 9800). Thermalright includes 8 ram-sinks, although 6 are going to be used for most installations (the other 2 ram chips are overshadowed by the heatsink, and require thermal padding to connect the RAM to the main heatsink).
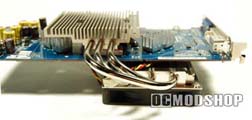
The back fan is slim enough to not get in the way of components that may be behind the video card, but it will block the SLI connector of some PCI Express cards (your mileage may vary). This cooler was too tall to fit in our SilverStone LC10 HTPC case (which has the same dimentions as a standard desktop case), so this cooler is only recommended for a case with more height, such as a mid-tower case.
The heatsink is not very flexible in terms of its reusability. Once you take the time to install this heatsink, you better keep it on forever. The main heatsink just comes too close to the memory units above the GPU, which forces you to use one or more ineffective thermal pads to bridge the gap between the heatsink and some of the memory modules. You keep adding layers of thermal padding until the gap is completely filled. Where are you going to find more of this thermal padding if you decide to install this heatsink on another video card? Let’s face it… if you’re buying an expensive third-party heatsink then you’re probably going to use it when you upgrade to the next generation video card.
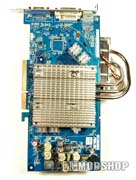
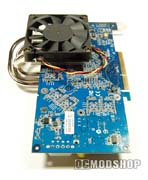
There are lots of little pieces to lose, which is easily done on a black work surface like mine. I was in the middle of installing the sink when I realized that some of the tiny installation hardware was missing! I had to pull the white box out of the garbage and found the hardware tucked at the bottom of the long dark tube. Once installed the heatsink can pivot slightly, and the extra length of the heatsink becomes an effective lever to test such pivoting.
The mounting base hardware is secured using adjustable arms, which must be adjusted, and can take some working to achieve the right fit. Once the positioning is correct, the screws are tightened to secure the black metal mounting frame to the GPU. You may have to use an included silicon shim to protect the GPU.
With the mounting hardware installed, we can attach the actual heatsink. We prepared the card with some thermal paste on the GPU. We took off excess and rubbed it into the contact surface on the actual heatsink. The heatsink, pipes and radiators are fully assembled and cannot be taken apart, so the heatsink must be slid into position. Since thermal padding must be installed on the memory before actual mounting, there is extra height that must be cleared, and this padding is very effective at smearing thermal compound all over the card as the sink slips past searching for the mounting mechanism.
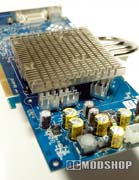
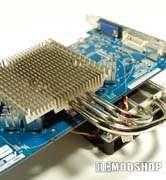
With the sink positioned we can now secure it to the mounting base with included screws. This is the time you will discover if you installed the mounting hardware correctly. If you over-tighten the arms, then the mounting base will warp and be out of reach for all of the heatsink’s corners. Therefore mounting the heatsink is a trial-and-error process until the mounting mechanism is “just so”. Once the sink is installed correctly it feels very sturdy and has a more techno-industrial look to it. Depending on how tight you mounted the base, the sink will wobble slightly with a little pressure.

