Today I’m going to be reviewing the Asetek Waterchill kit from, you guessed it, Asetek Inc. This is the full package with a nice Hydor L30 pump, a heatercore-style radiator, a sturdy acrylic reservoir, CPU, GPU, and Chipset waterblocks. I’m sure any hardcore techie has heard of this company by now. They first gained fame with their Vapochill cooling system, a phase-change cooler for your PC (if this makes
no sense to you, it’s basically a refrigerator condensed down into a heatsink). The Vapochill still remains at the top of the pack when it comes to extreme cooling, but its high price and potential need to insulate your components against condensation have kept the masses away. The Waterchill is Asetek’s way of becoming a bit more mainstream, and they’ve designed this kit with ease of use in mind. Do they manage to simplify things and maintain top cooling performance? Read on to find out!
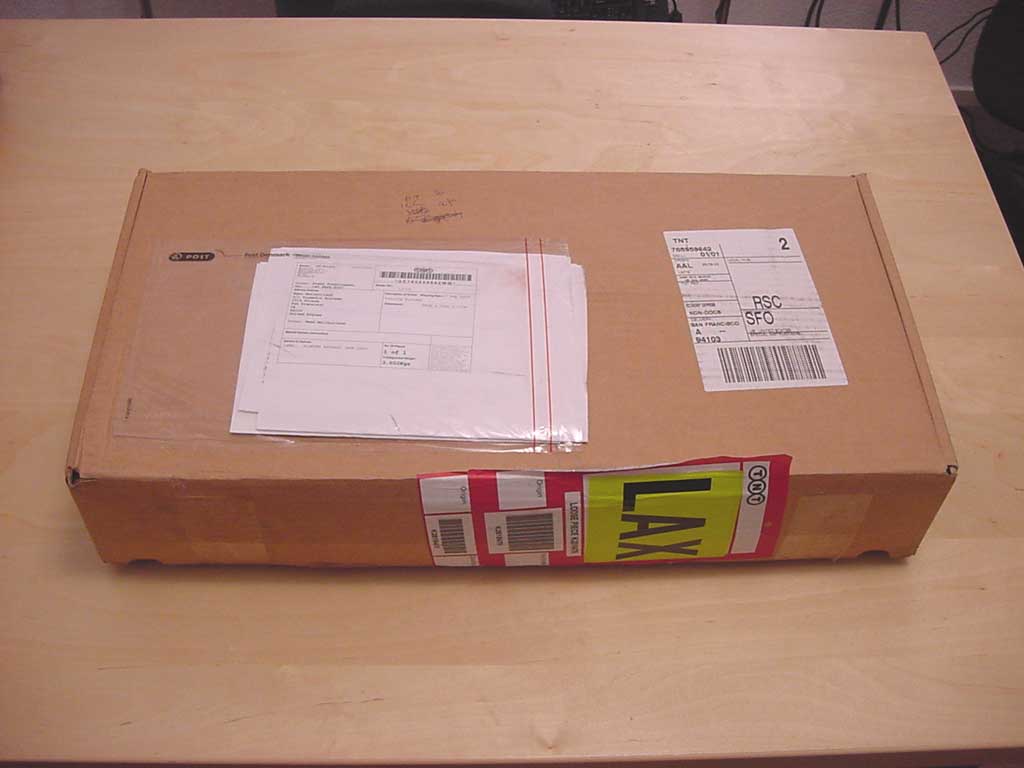
The kit I received was shipped to me all the way from their headquarters in Denmark. It came in a decently sized box about 2’x1’x4″ and wasn’t exceptionally heavy.
I expected to find another box inside, but this shipping box was also the product box! Efficient use of materials, I must say. Opening it up, the contents were neatly packed and organized. The eggcrate-style foam seemed to keep everything in order during its long flight to San Francisco.
Alright, enough about the packaging – let’s see what we have inside!
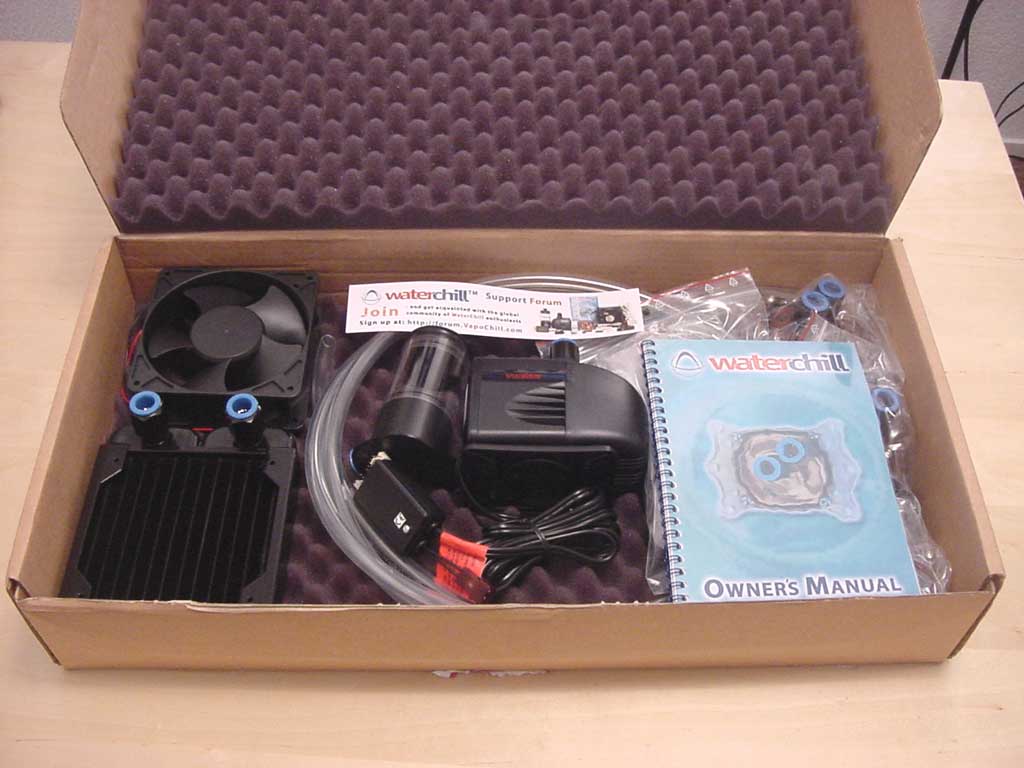
THE GOODS
I’ll start with the heart of any watercooling system, the pump. A crappy pump can lead to crappy performance. The Waterchill comes with a Hydor L30 pump, rated at 1200 liters per hour (that’s about 320 gallons per hour to us Americans) – not too shabby! The pump runs a 6′ head, and looking at it’s flow graph it holds up pretty well under low pressure. It’s not especially big, and that’s a good thing if you plan on getting it to fit in your case. Asetek slightly modifies the pump by adding in quick-connect fittings rather than the traditional hose-barbs.
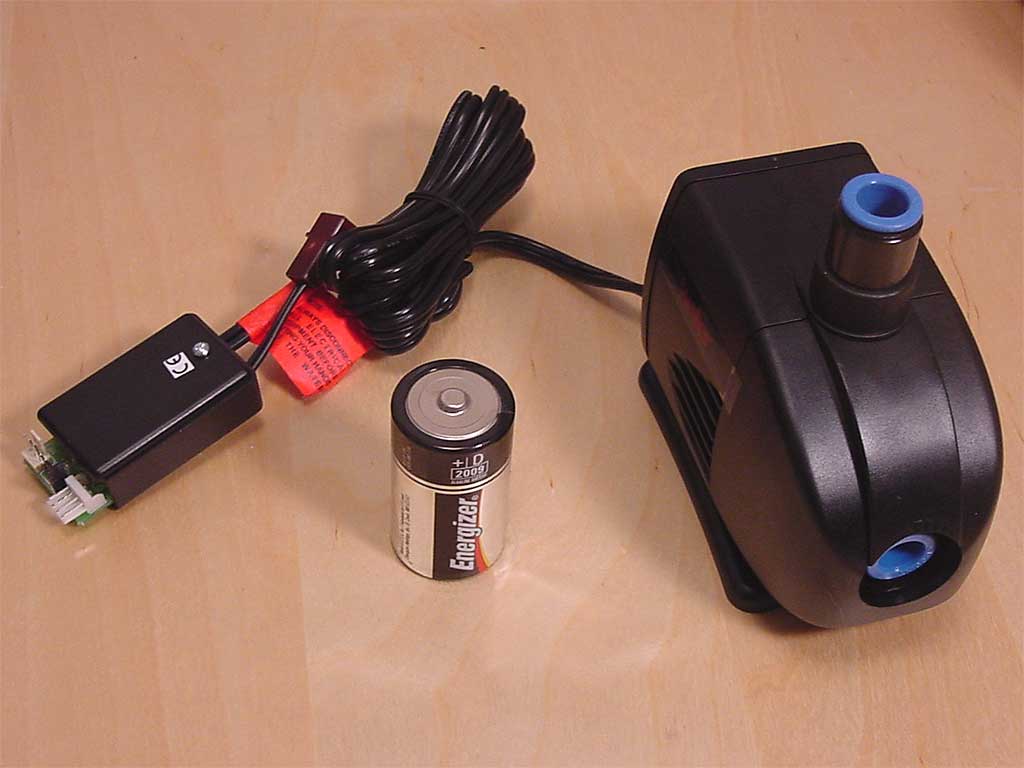
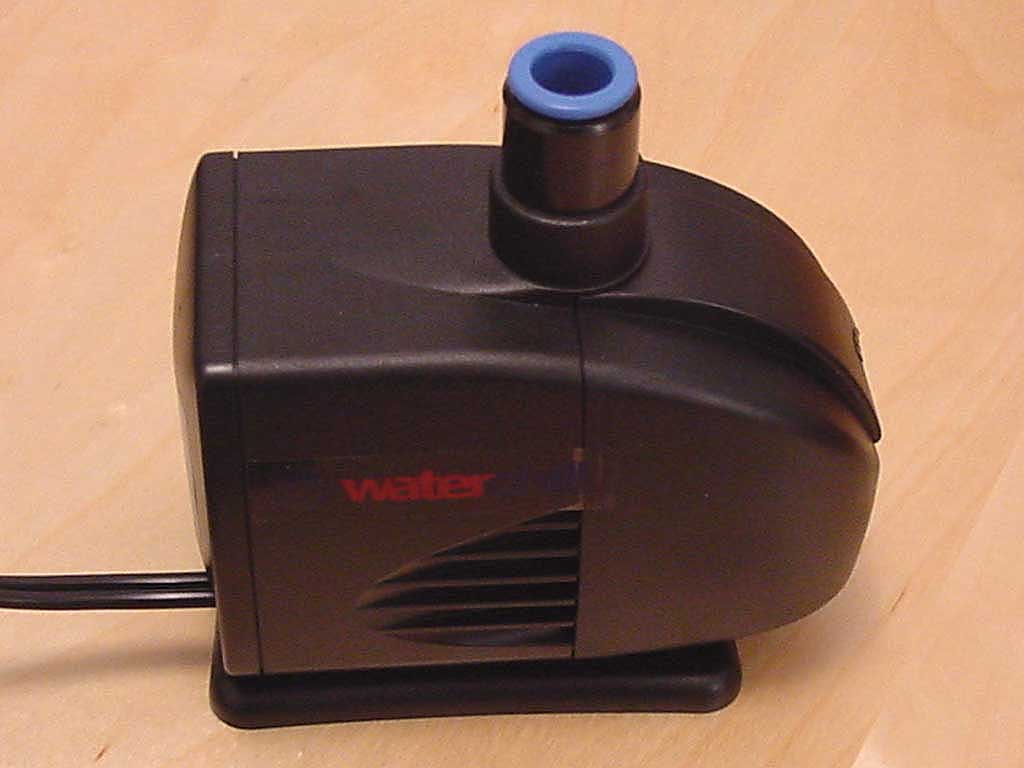
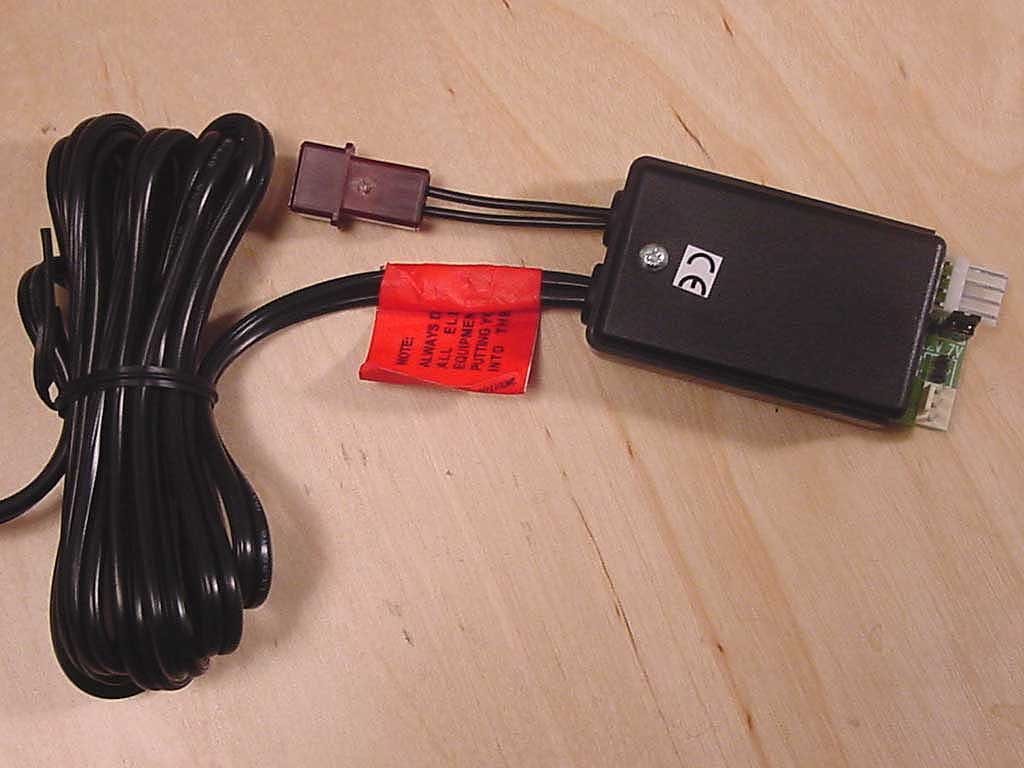
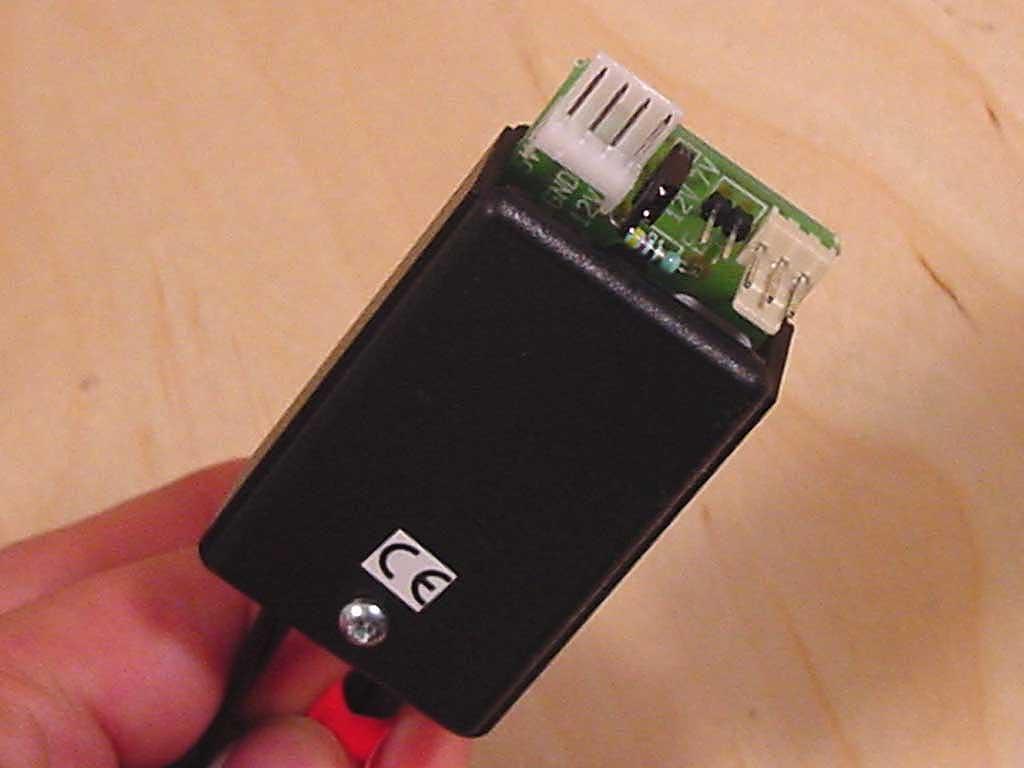
Attached to the pump is the relay and fan controller. A relay is a device that basically turns the pump on and off when you turn the computer on and off. The fan controller allows you to select between 7v or 12v operation by setting a jumper, thus allowing for quiet cooling, or louder but more effective cooling. You’ll also see a small two-prong connector. That attaches to a cable that runs through a PCI slot-cover (included) to a hermaphrodite connector (I know, it made me laugh too). Regarding hermaphrodite connectors, you know how connectors are referred to as male and female? These are both.
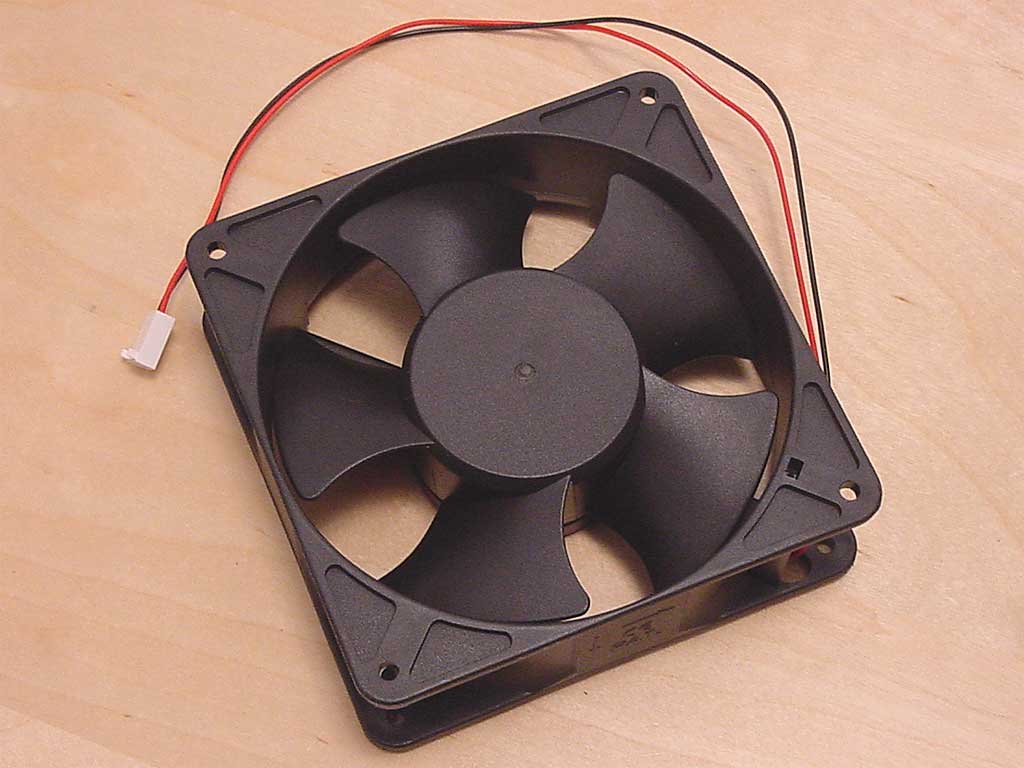
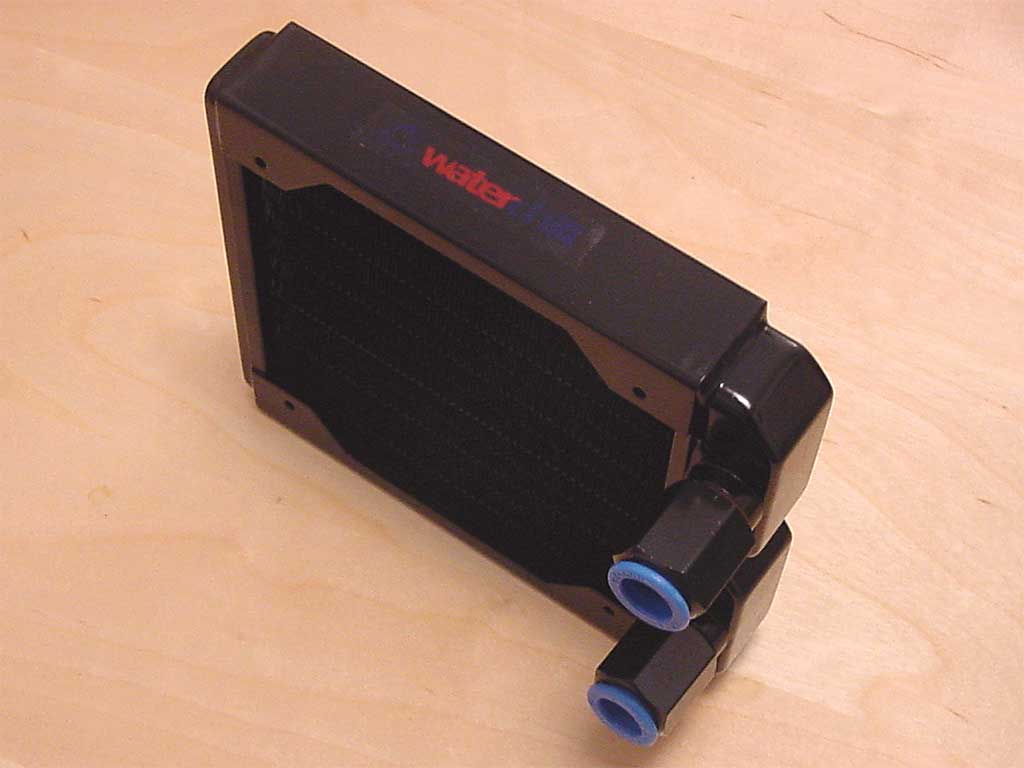
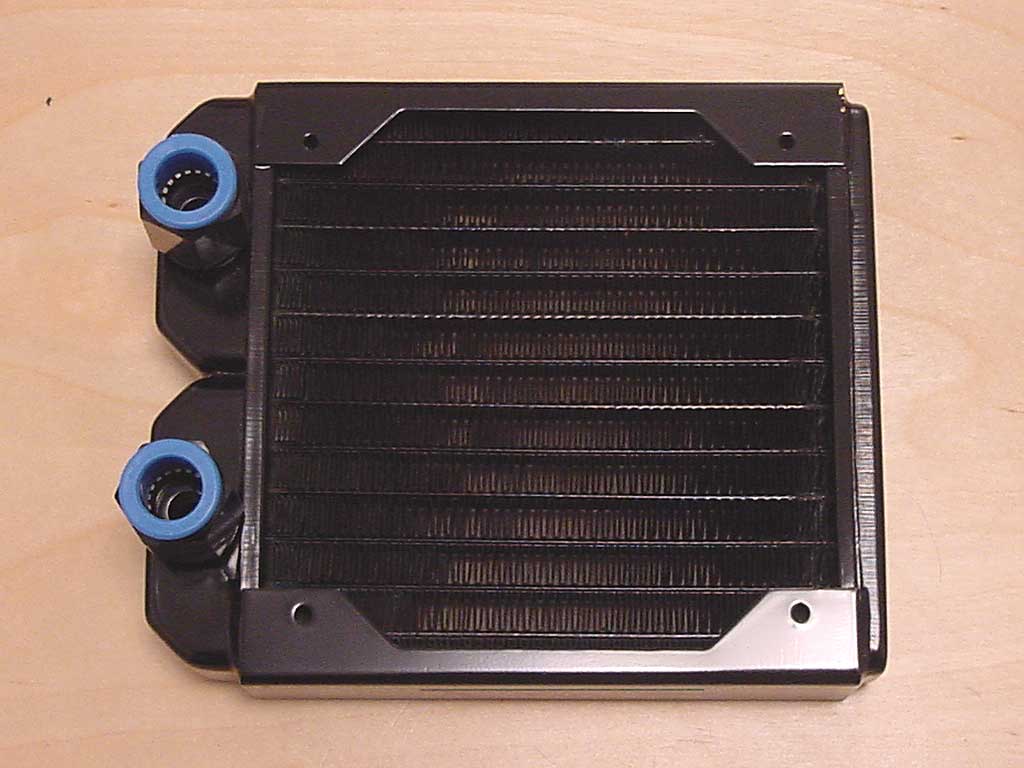
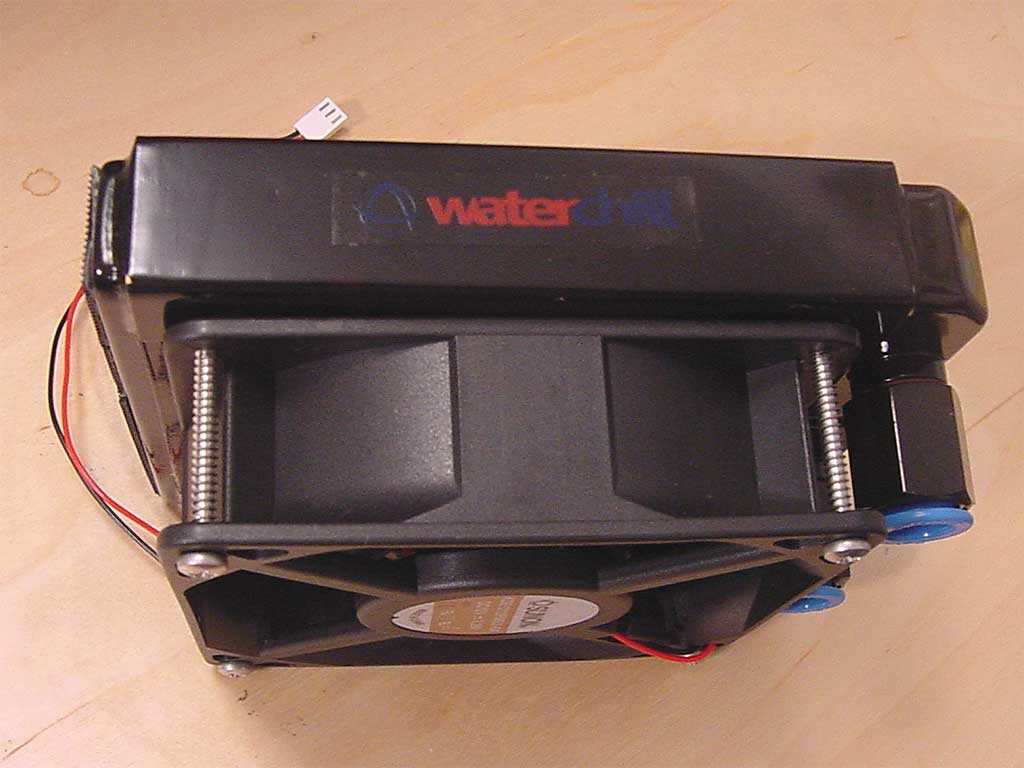
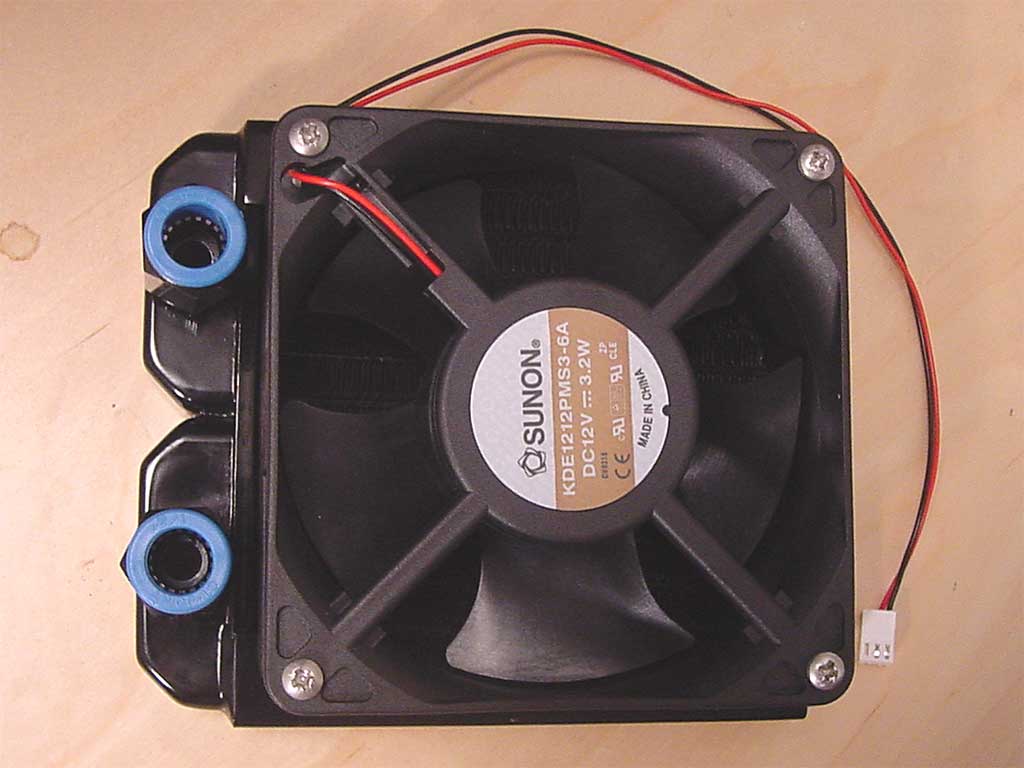
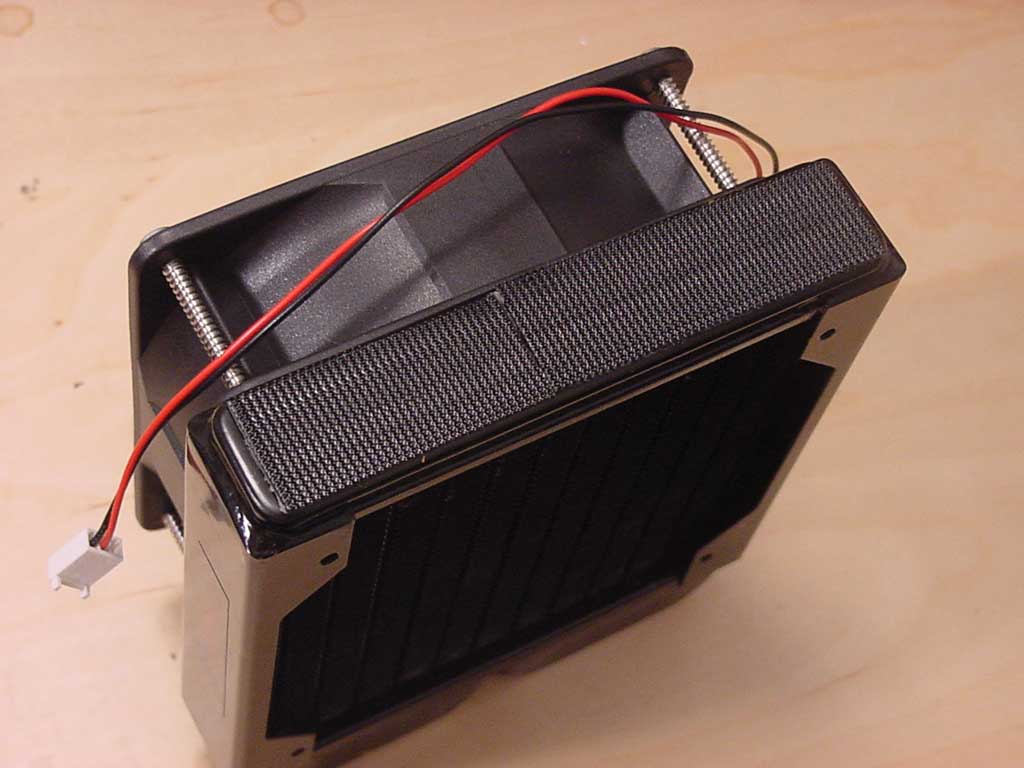
Next up is the heatercore-style radiator and the big 120x38mm Sunon fan. Don’t be scared by the fan’s size, it’s not that loud (and it still manages to push 83 CFM @ 12v). The heatercore rad differs from traditional radiators in that it doesn’t just attach fins to tubing, it actually pumps water through channels in the fins to greatly increase heat dissipation. And without the many 180 degree turns found in traditional rads, heatercores are less restrictive to pumps. I have previously used an ’87 Chevette heatercore in a previous setup, this one is MUCH smaller. The heatercore has holes to mount two 120mm fans, but only one fan is included. Not to worry, this allows you to mount the fan in the most convenient side of the radiator in your particular setup. I must say this rad bears a striking resemblance to the Black Ice Pro radiator, but it isn’t marked as such.
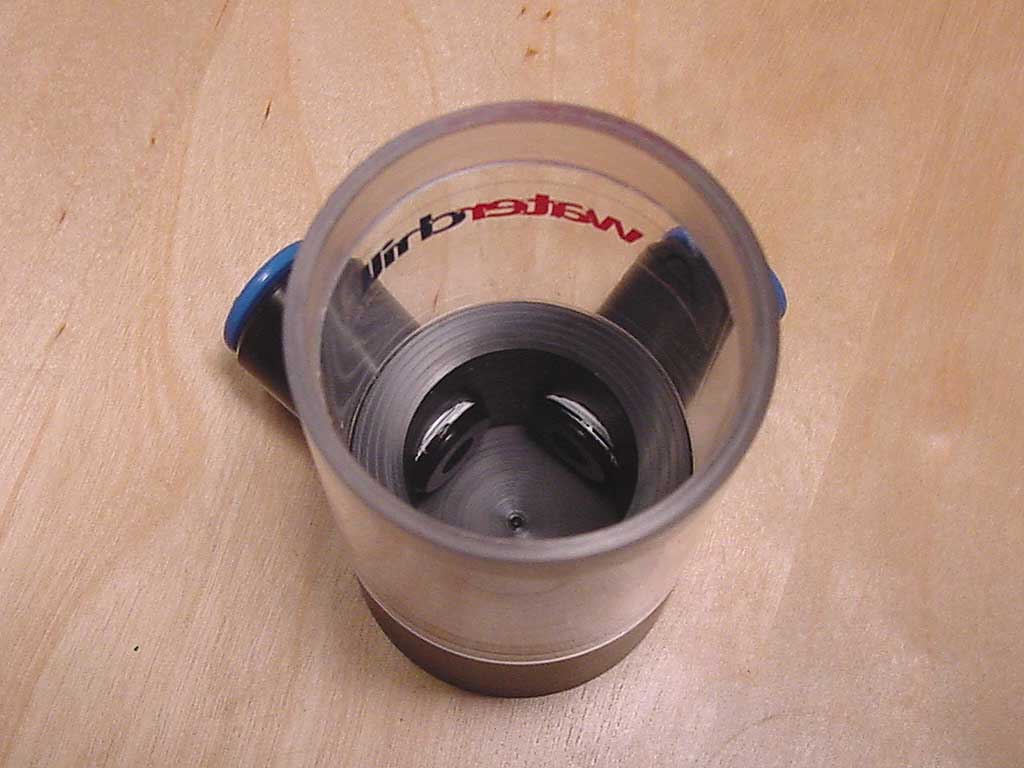
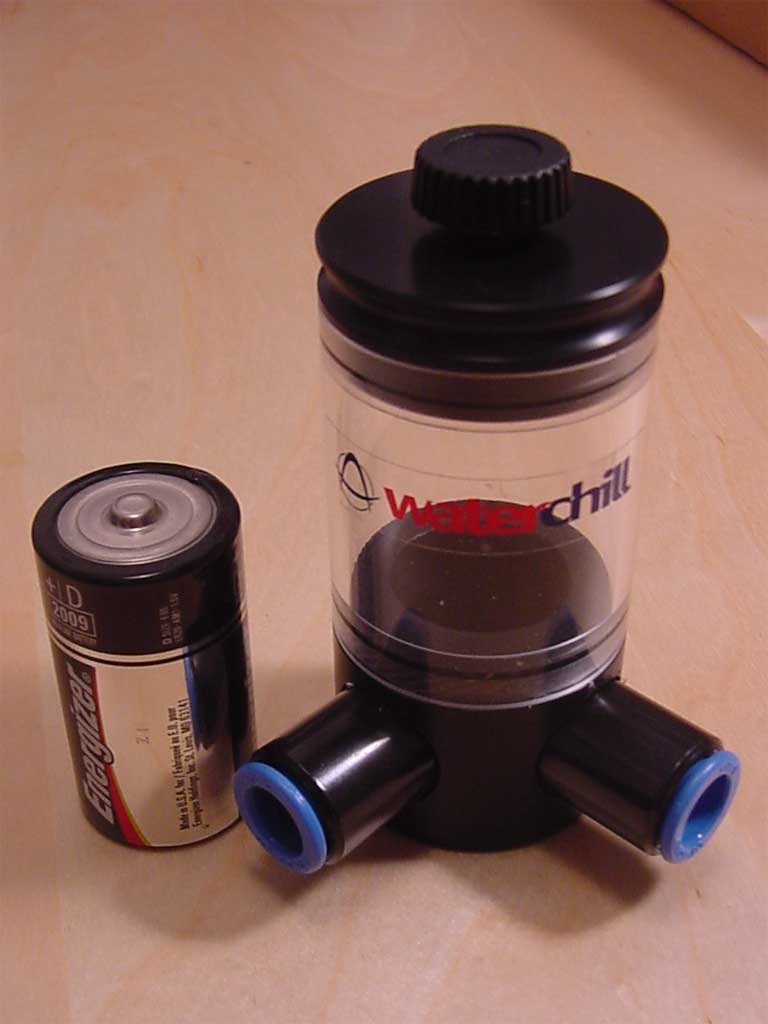
Next is the reservoir. Despite the grandiose name, this device isn’t actually meant to hold much water. In fact, it’s quite small! The main function of a res is filling and bleeding the system. In other words, it’s a place where you initially fill the system up and the place where all the air in your system eventually bubbles out of.
This res uses 90 degree fittings allowing you to stick it into a corner of your case, and by this design it is allowed to bleed more quickly than a straight-through type res. Why? Because the intake shoots water and bubbles into the side of the res, slowing it down enough for air to bubble up easily. The downside is a slight reduction in flow, but very slight indeed. The included res includes a push-on top with a screw. The screw makes the seal air tight, thus preventing the top from accidentally coming off. The quick-connect fittings are epoxied in, so I wouldn’t worry about leaks.
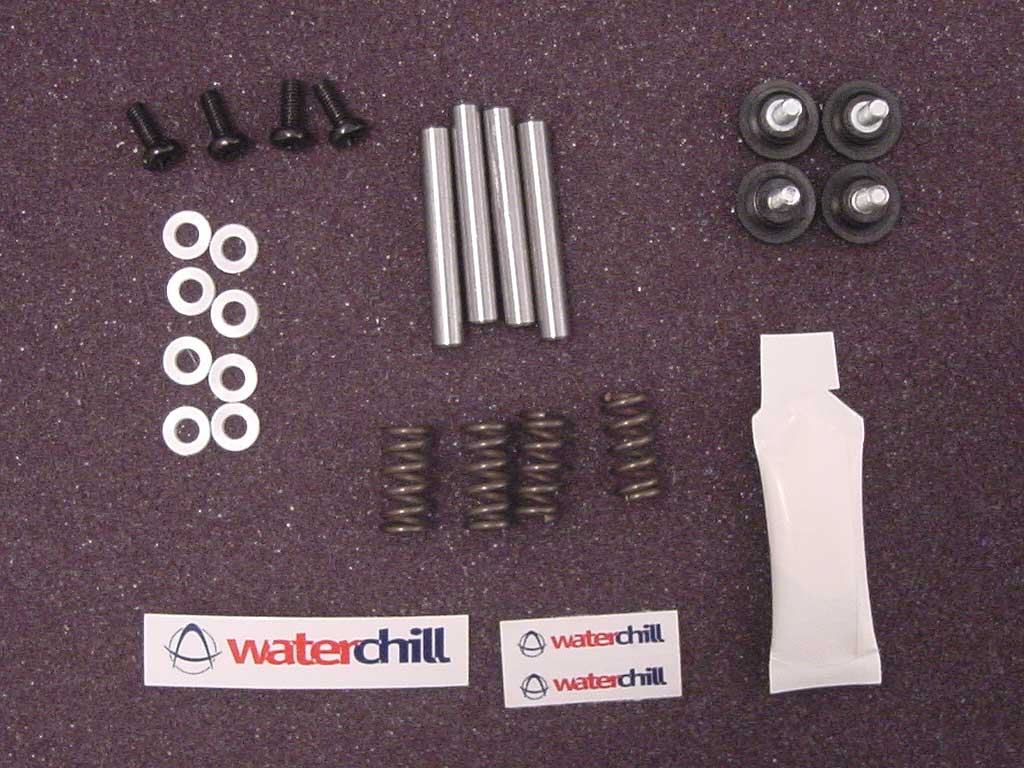
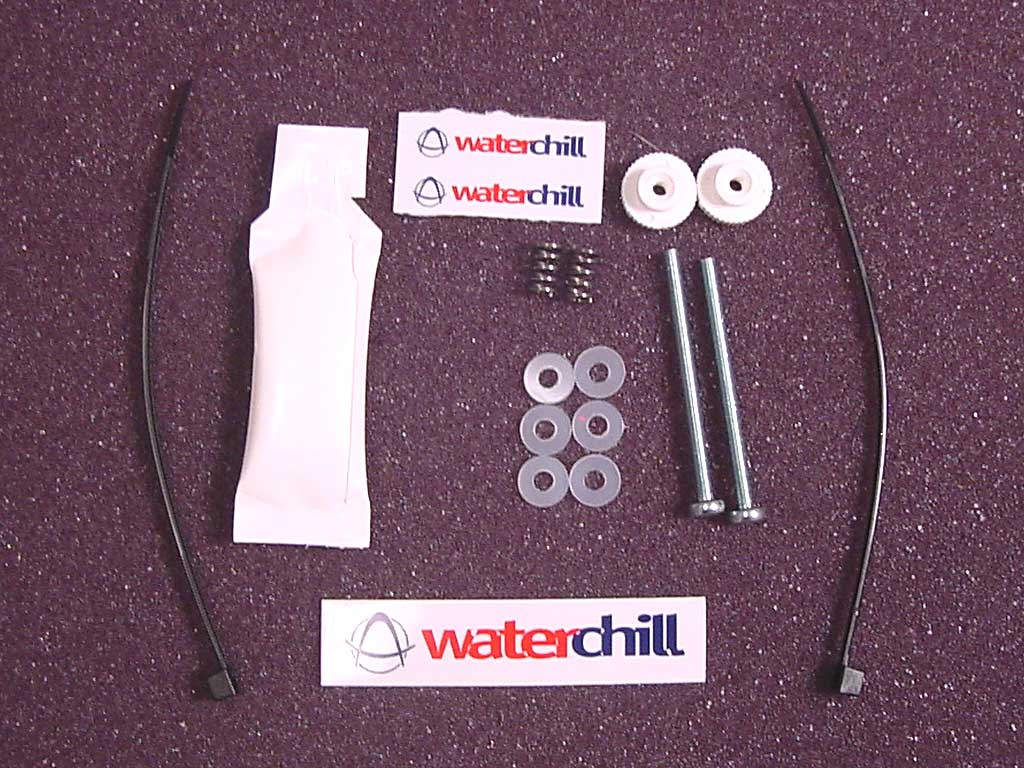
The block also comes with a great many accessories. Most of these are self explanatory, so I won’t spend much time here. We have a well written instruction manual, mounting hardware for all three blocks (including thermal paste), 25ml of anti-algae fluid, the hermaphrodite connector and PCI slot cover, screws to mount the fan to the rad, an extra AMD poly-top for the CPU block (nice! I didn’t expect that).
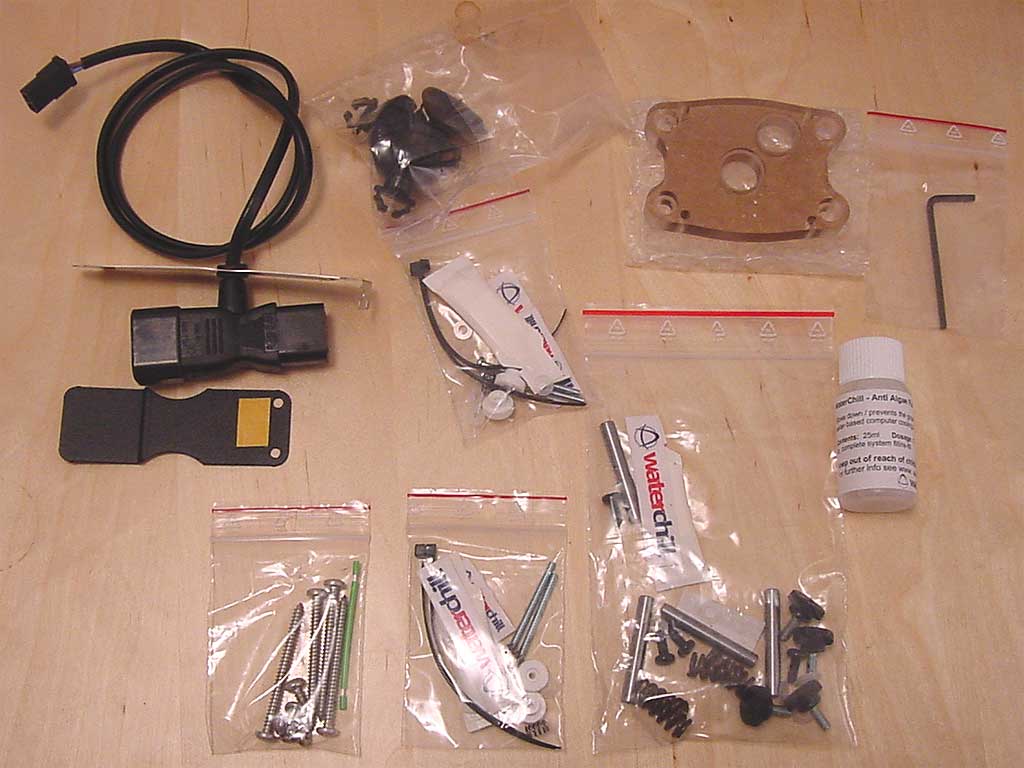
The kit also includes a proper hex-wrench to take apart any of the included blocks (nice again!), a brace to mount the res to the pump, and some suction cups to attach the pump to your case. Also included is about 8′ of 3/8″ID, 1/2″ OD hard wall tubing (not shown in picture). Hard wall tubing is needed for the quick-connect fittings, but the downside is it can be very frustrating to work with.
This is what most of you want to see, the blocks! This kit comes with all three – a CPU block, a GPU block, and a Chipset block for the Northbridge, or from here on out abbreviated to NB. In some pictures I used very high light and very low exposure to bring out the detailing in the machining process, so if some pics look dark that’s why.
Let’s start with the lightweight – the Northbridge, or chipset, block. This block is has a nice 1/2″ copper base machined out to be an open-chamber style block. What this means is that there is no ‘maze’, pins, or fins of any sort. There is a slight depression in the middle of the block to increase turbulence, but otherwise it is very much a wide open chamber.
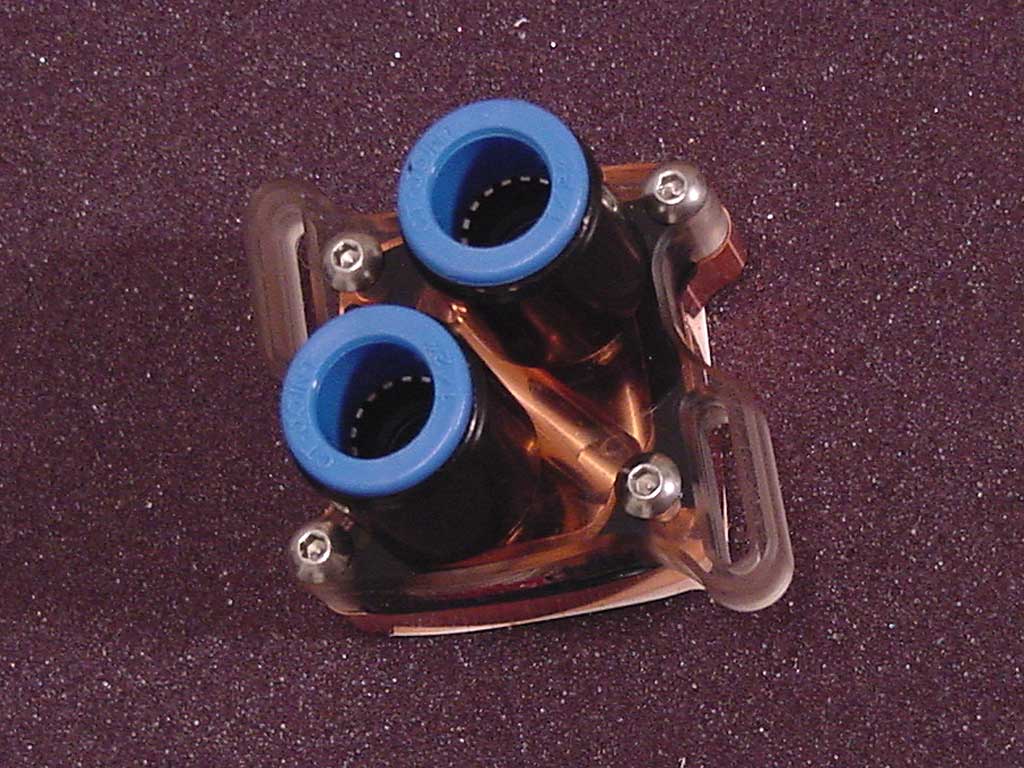
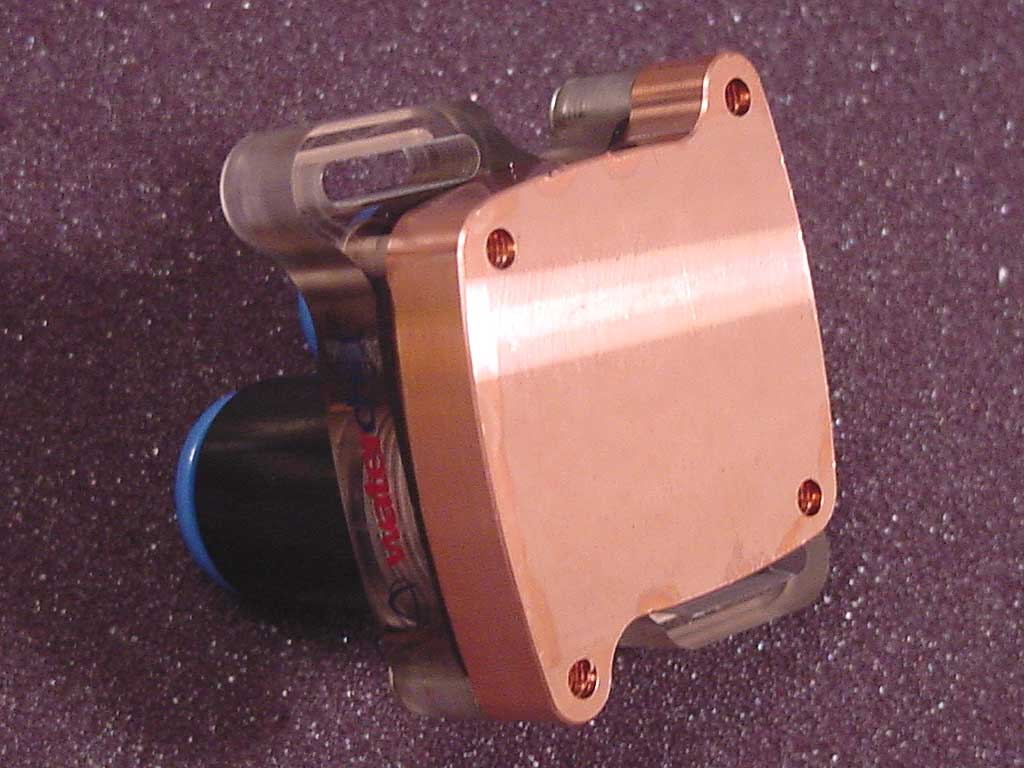
During machining they did not lap or polish the interior, and that’s a good thing! Slightly more surface area and turbulence to aid heat transfer. The base was lapped perfectly smooth and polished. The benefits of such a design are very little flow restriction. The downside is a ‘maze’, fins, or pins tend to make a block perform better. Given this kit, I think an open chamber suits it, as three blocks, 3/8″ID tubing, and a heatercore can bring many pumps to their knees.
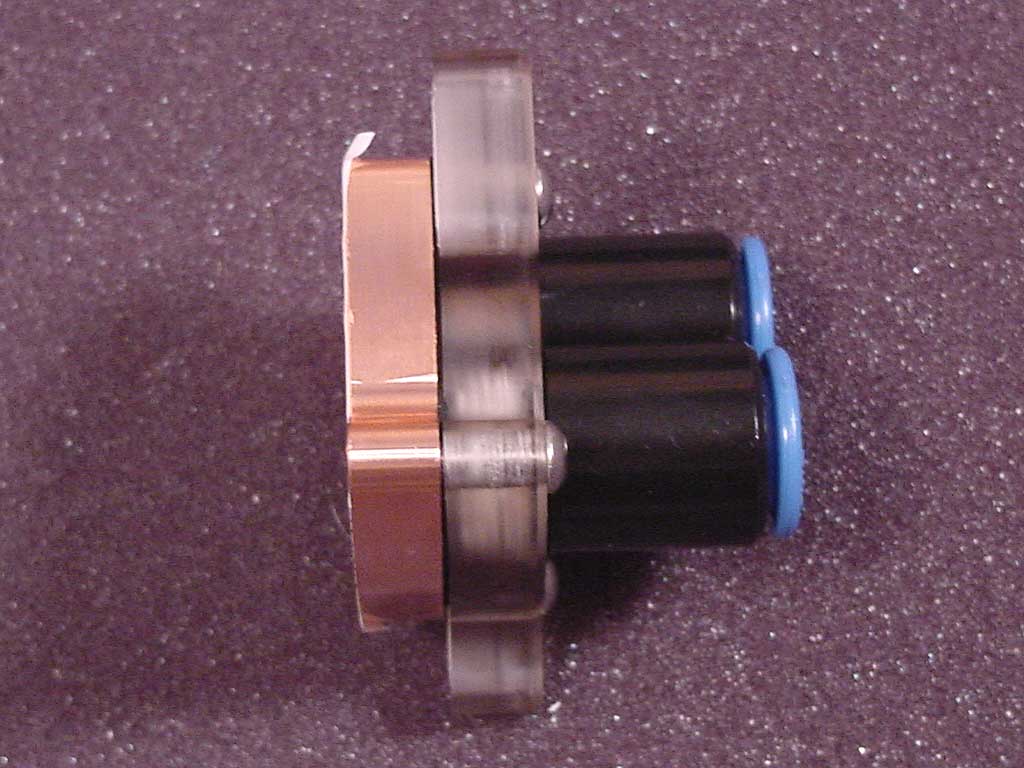
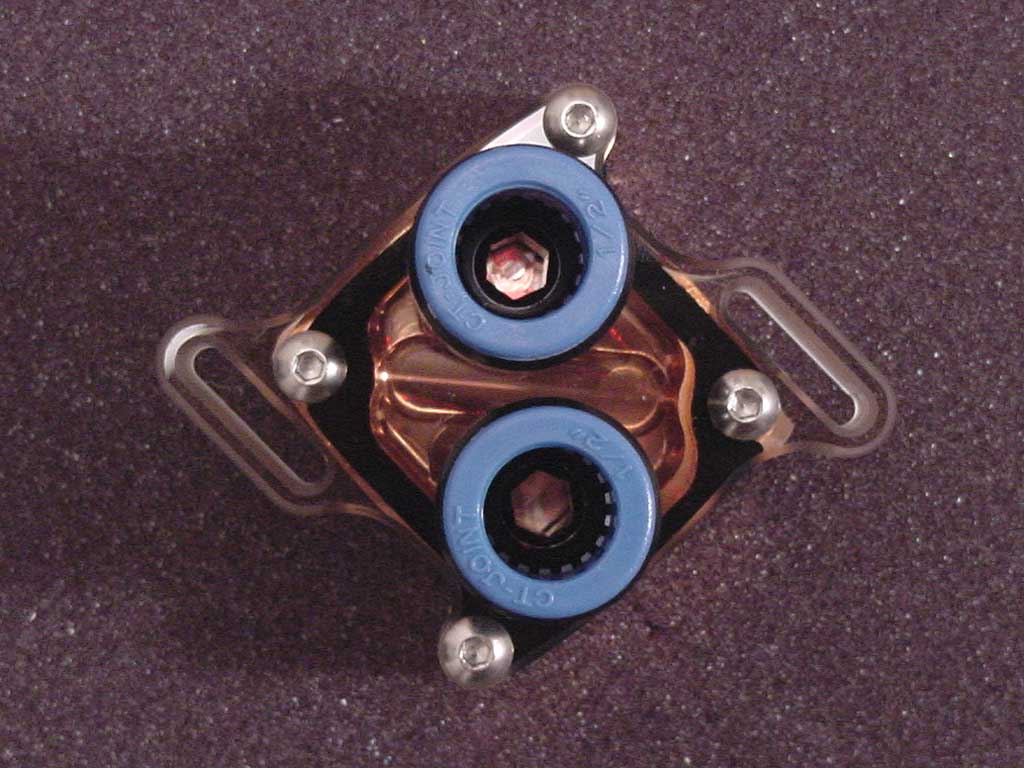
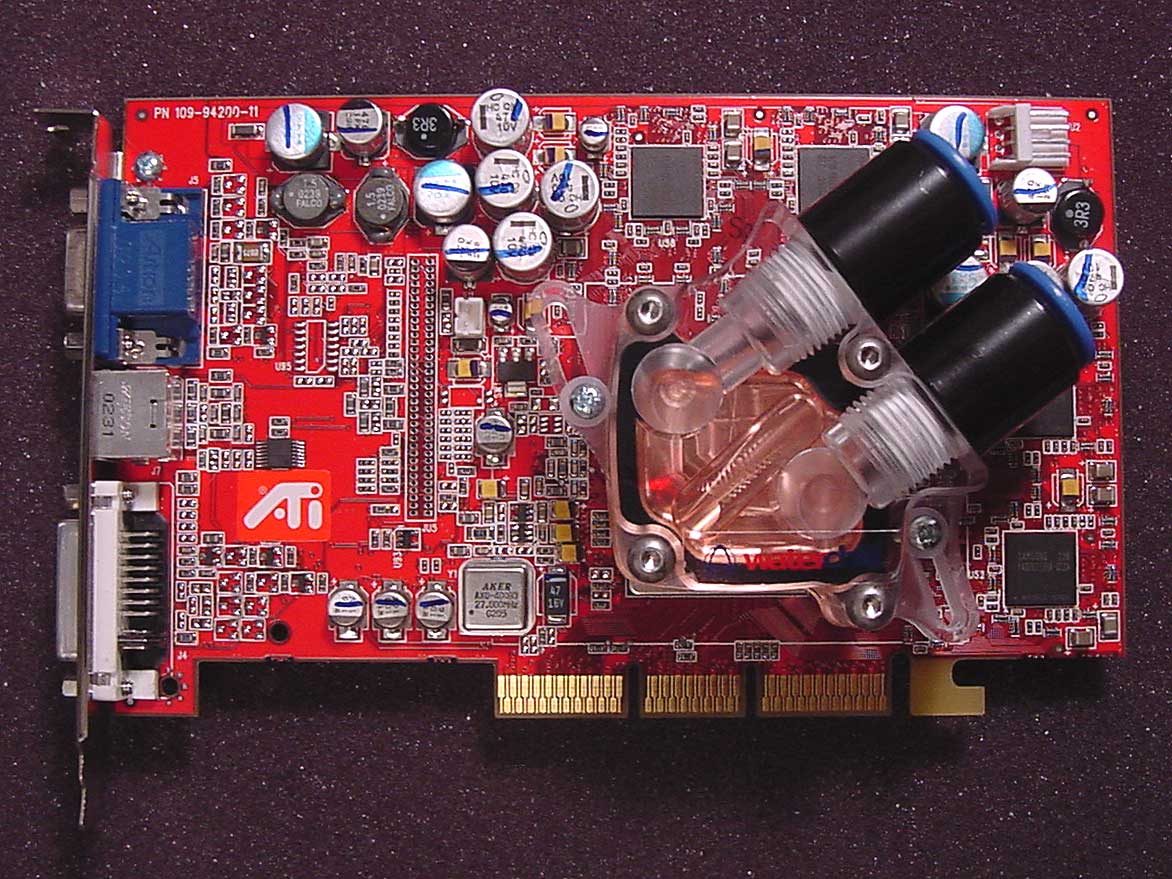
Next up we’ll look at the GPU block. This has a big, hefty poly-top on what looks to be the same base as the chipset block. They also use the same mounting hardware by the way – how efficient of you Asetek! The block is an open chamber with a depression for turbulence, and the bottom is polished smooth (sorry about the shabby pic!). I also have a pic of the protector that each block is shipped with. It’s a white plastic backing that protects the base during shipping. Looking at the design of the inlet and outlet, I was worried that it would trap air bubbles. After all, these things hang upside down in the case, and the inlet and outlet come up from underneath. In practice I found they did not trap air, but definitely check your install to be sure.
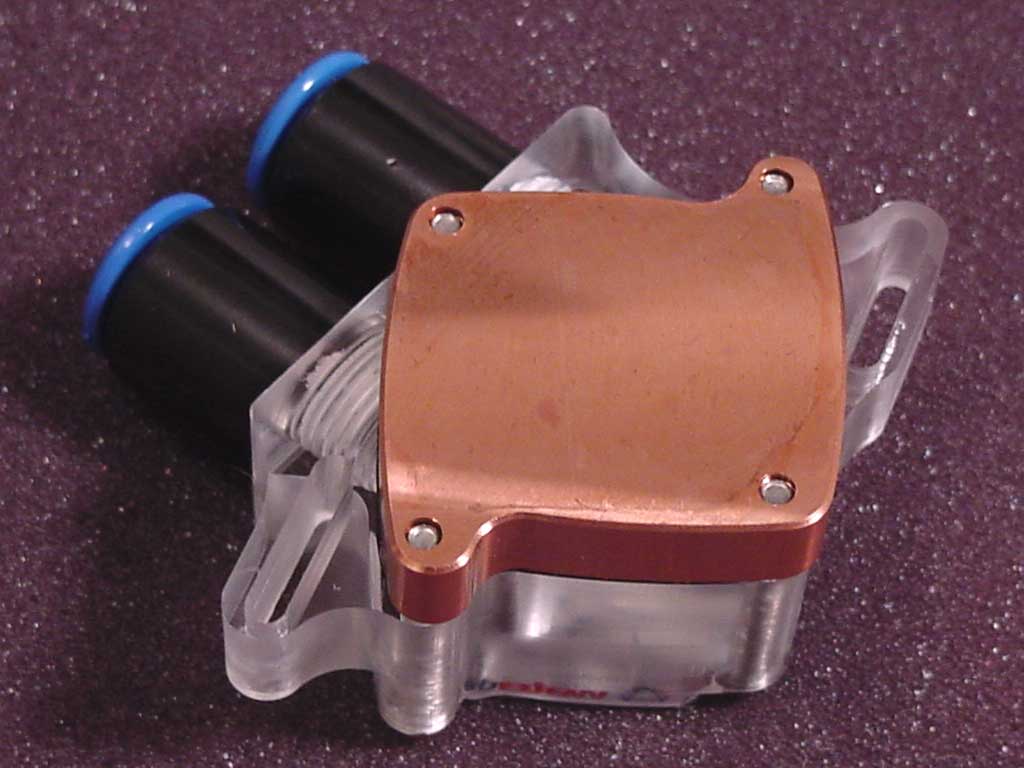
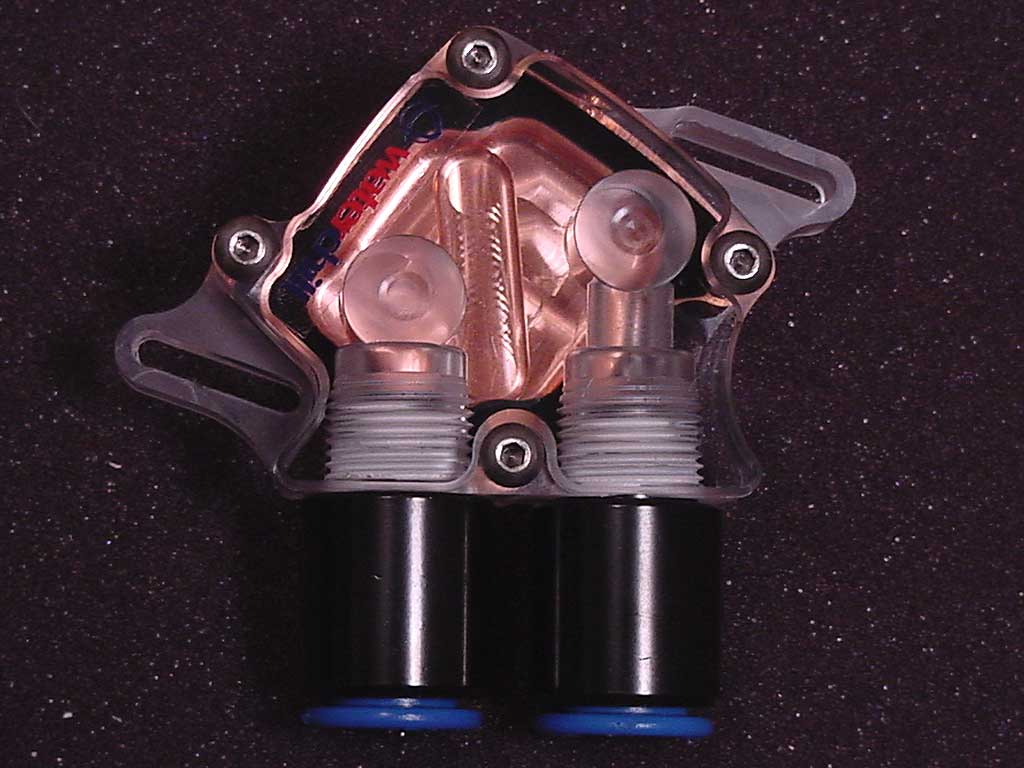
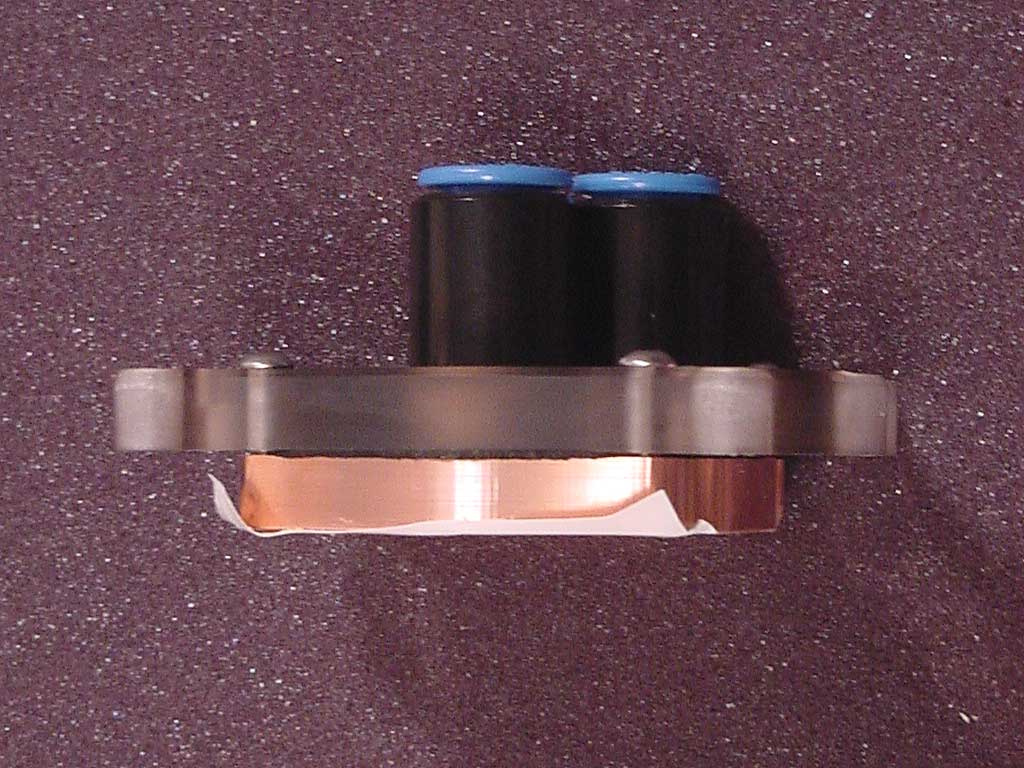
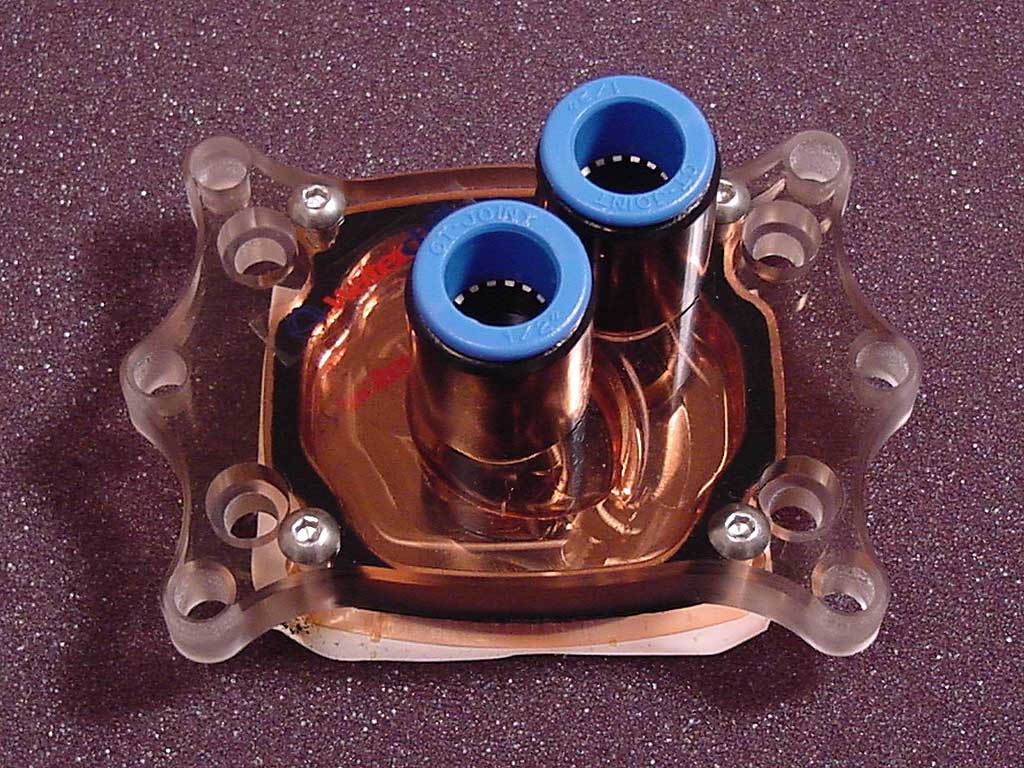
Now on to the big-boy, the CPU waterblock! This one is unique from the NB and GPU blocks in that it uses a crescent-moon style open chamber. This means that the water can’t go straight from inlet to outlet as it can in the other blocks, it has to take the long way around.
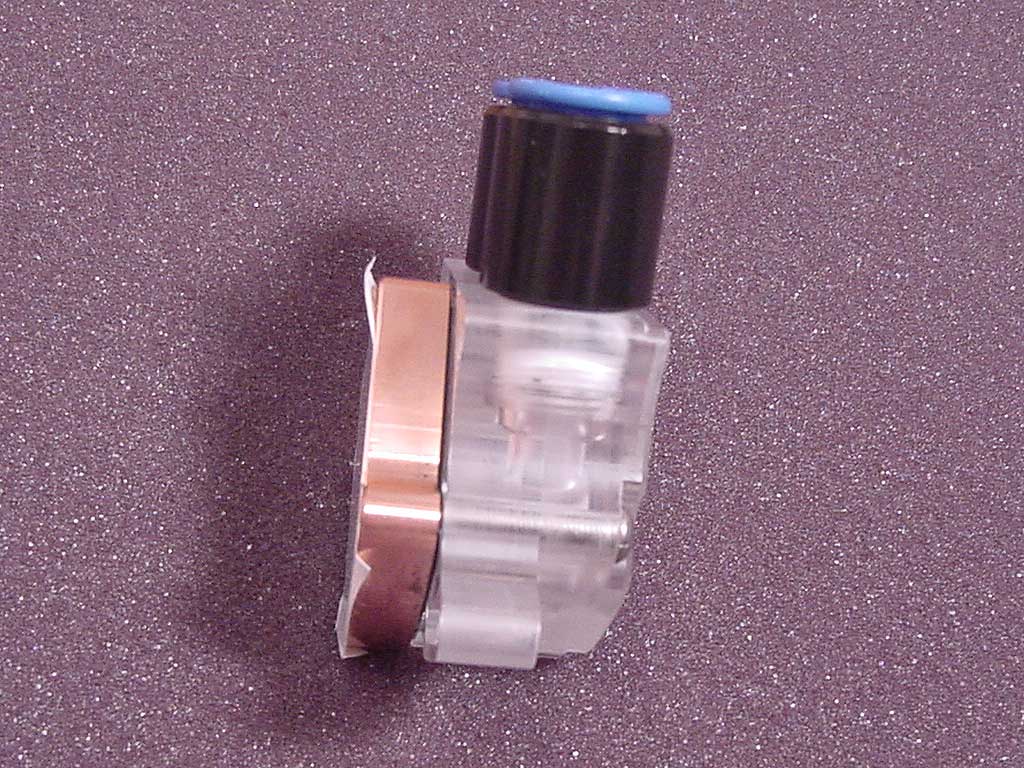
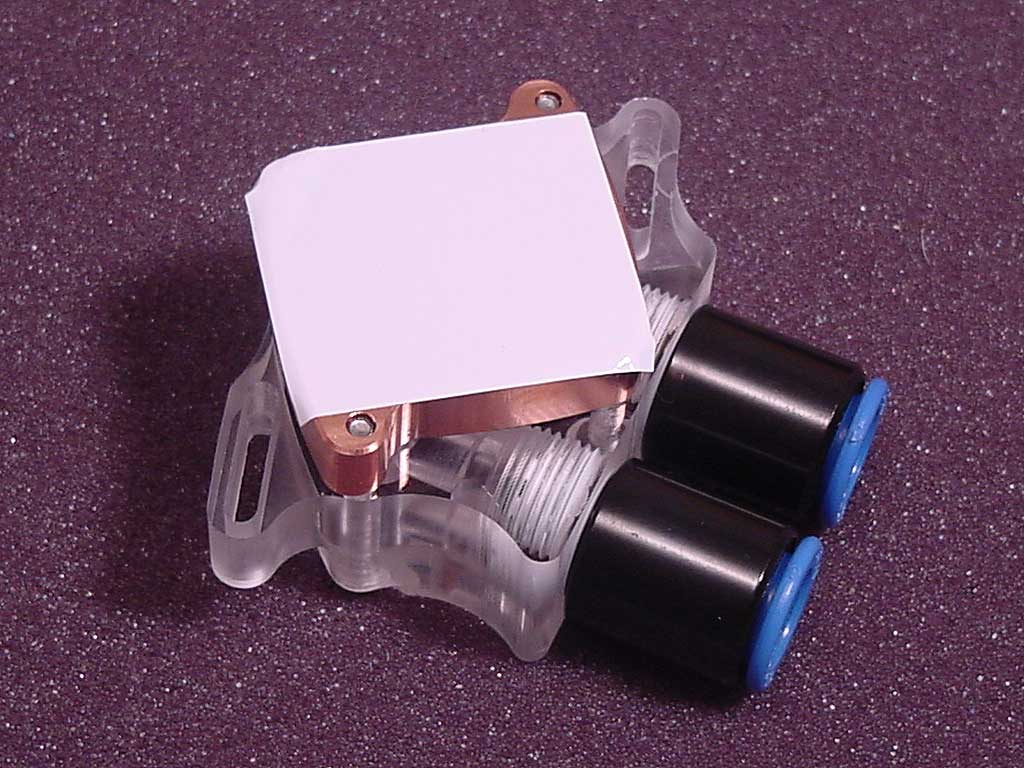
This, combined with a depression under the inlet and some rough machining, creates lots of turbulence; however, the open design keeps flow resistance to a minimum. This style of block is known to perform decently, but not at top notch levels. It can compete with many of the ‘maze’ style blocks, but doesn’t hold up to micro-channel or pin type blocks. But, as I mentioned before, three blocks, a mess of tubing, and a heatercore is enough resistance, so an open design is a must.
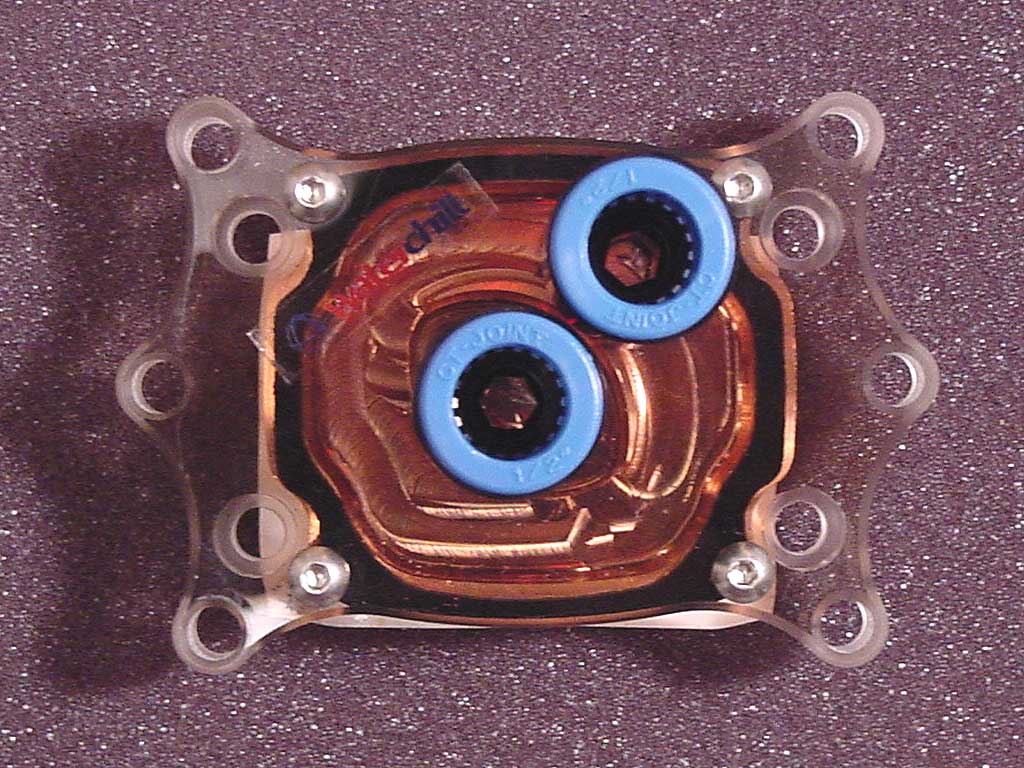
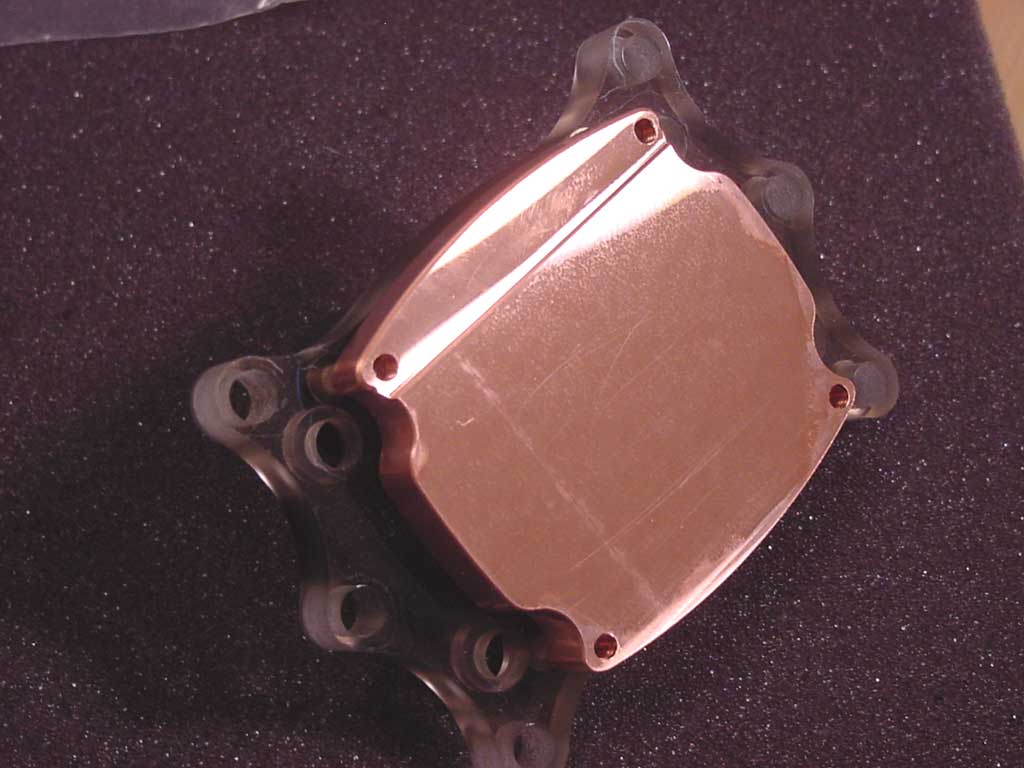
The block has a whopping 10 mounting holes to accommodate P4, Socket-A (AMD XP), and Socket 754 (AMD A64) mounting. This has it’s ups and downs as we’ll see in the installation section of the review. The ups are the same kit can be sold to all people, even future A64 users. This cuts down production costs, as does using the same base on the NB and GPU blocks, same mounting hardware for NB and GPU, etc… Nothing wrong with that – it shows good business sense. The downside is not all motherboards are created equal, and things can get in the way of all those extra protrusions.
Installation of the kit is one of its selling points – it’s supposed to be easy! Quick-connect fittings, just push in the tubing and your done! Well, it’s not that easy, nor is it especially difficult. Compared to other water installs I’ve done, this one is just about even in terms of difficulty (my previous work was a custom 4′ acrylic waterbong, much harder, and an external heatercore box, easy).
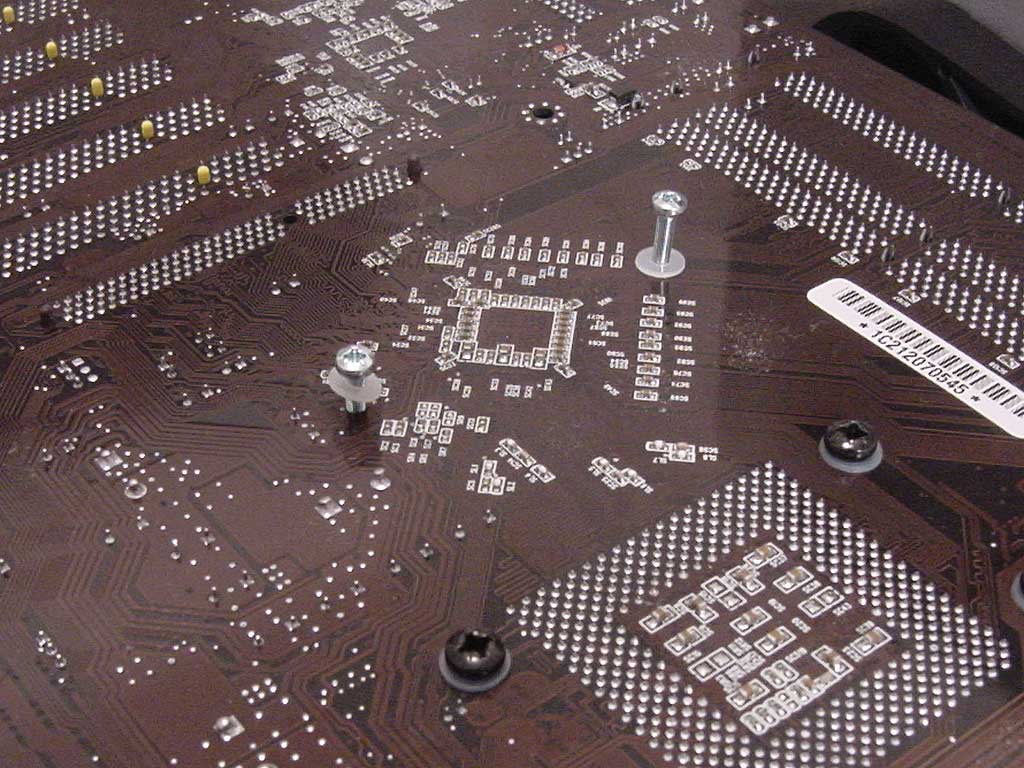
Installing the blocks involved motherboard removal. I don’t like it, but it’s to be expected when working with water. Luckily the actual install of the blocks was very intuitive and easy. Too bad dismantling the entire machine and reassembling is so time-consuming… The installation of the CPU block hardware was simple. Just put a washer on a screw, put it through the motherboard mounting holes, and screw it into one of the mounting ‘pipes’. All the needed hardware is packaged cleanly in a zip-lock bag, and the directions in the manual are clear and concise. This step took me less than five minutes!
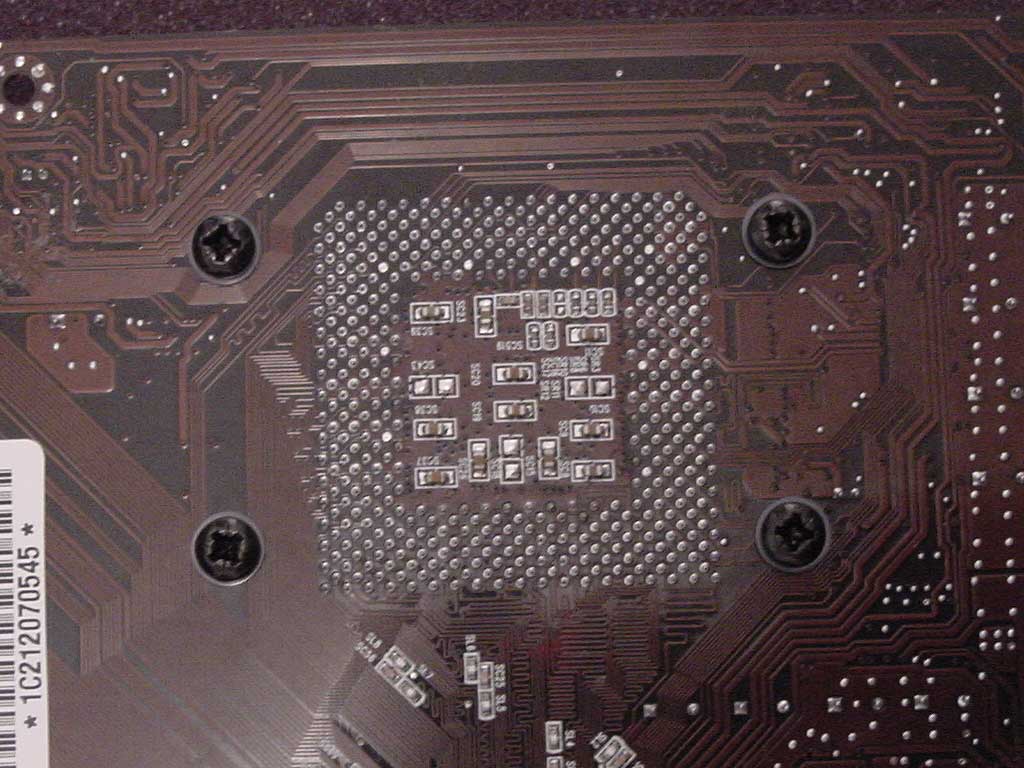
A great thing about this mounting hardware is it doesn’t interfere with onboard components at all! I’ve had to modify the hardware for all my previous blocks to work with my Chaintech 7NJL1, but this one fit perfectly. You can see in my pics how close some onboard resistors come to the mounting holes.
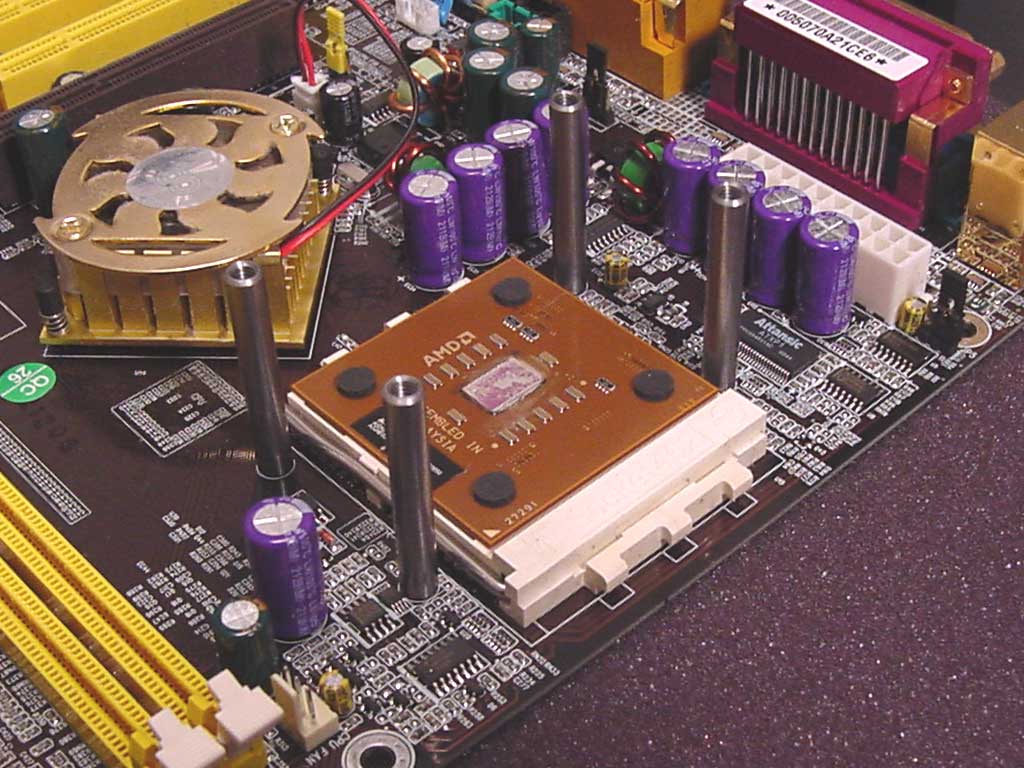
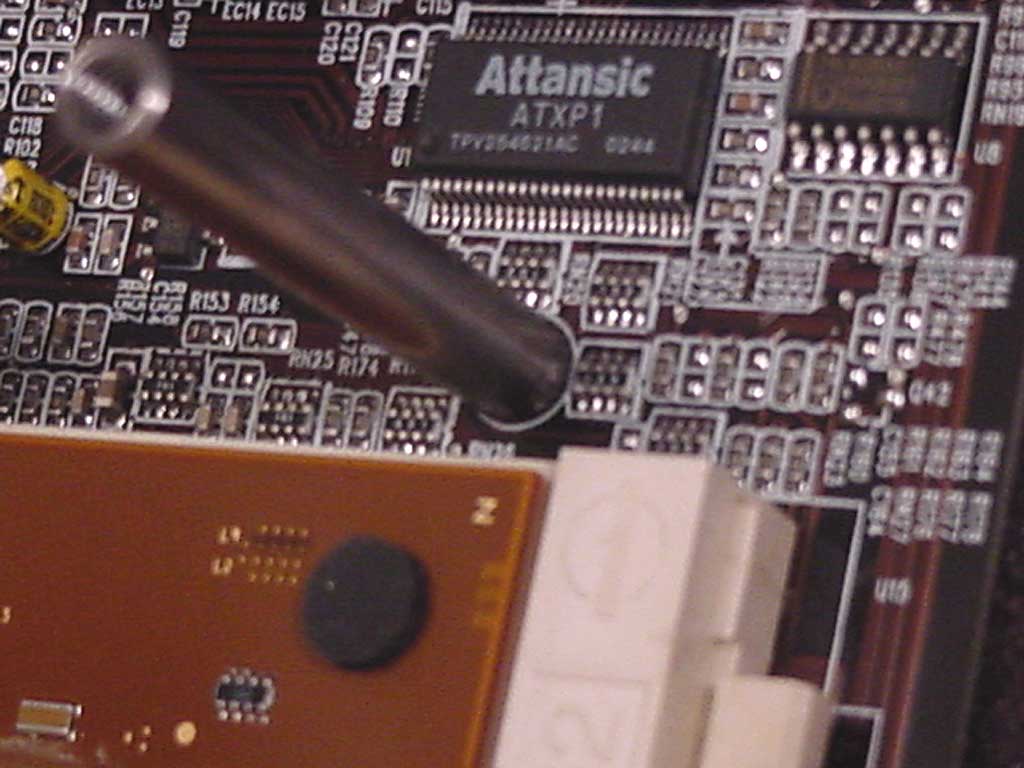
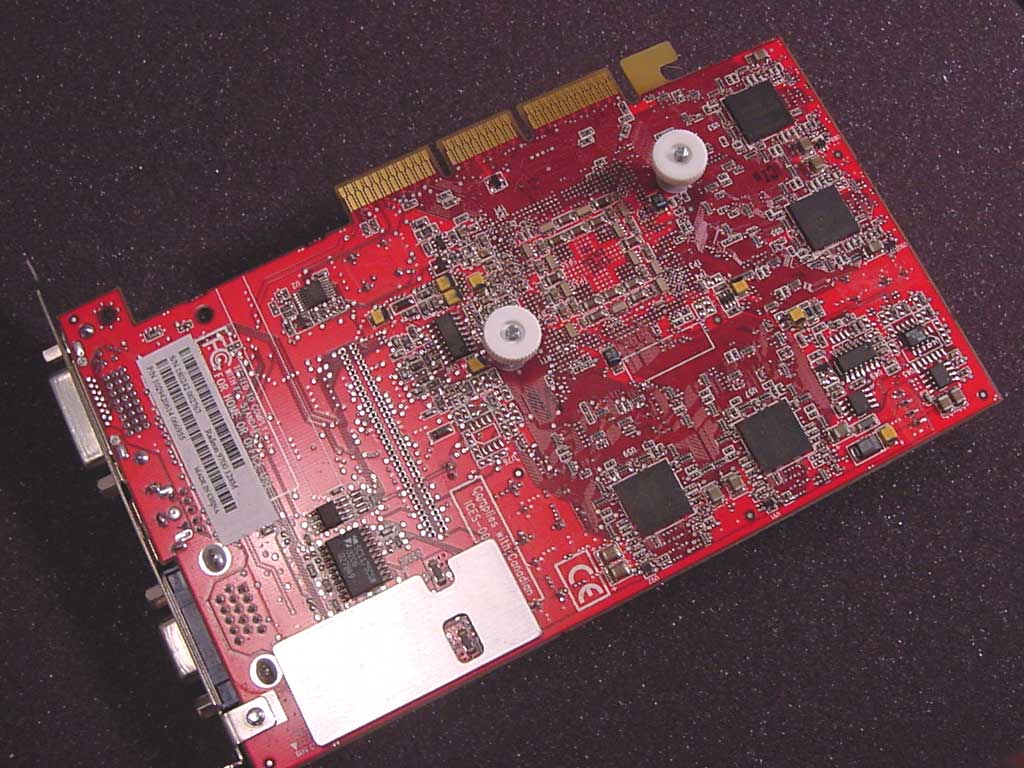
While the mobo is removed we also have to put in some hardware for the NB block. Again, it was packaged wonderfully and instructions were clear. All you have to do is put a washer on the screw, stick it through the mobo, and then on the other side just add some more washers, a spring, and a thumbscrew.
This step took ten minutes or so, and that included spreading thermal paste nicely on the northbridge. Securing the CPU block was just as easy. It slid onto the mounting ‘pipes’, then you just add on the springs, washers, and thumbscrews. A great thing about the CPU block is the screws will only go in to a certain point, therefore making over-tightening impossible! This is a concern with AMD chips as over-tightening can sometimes crush the CPU core.
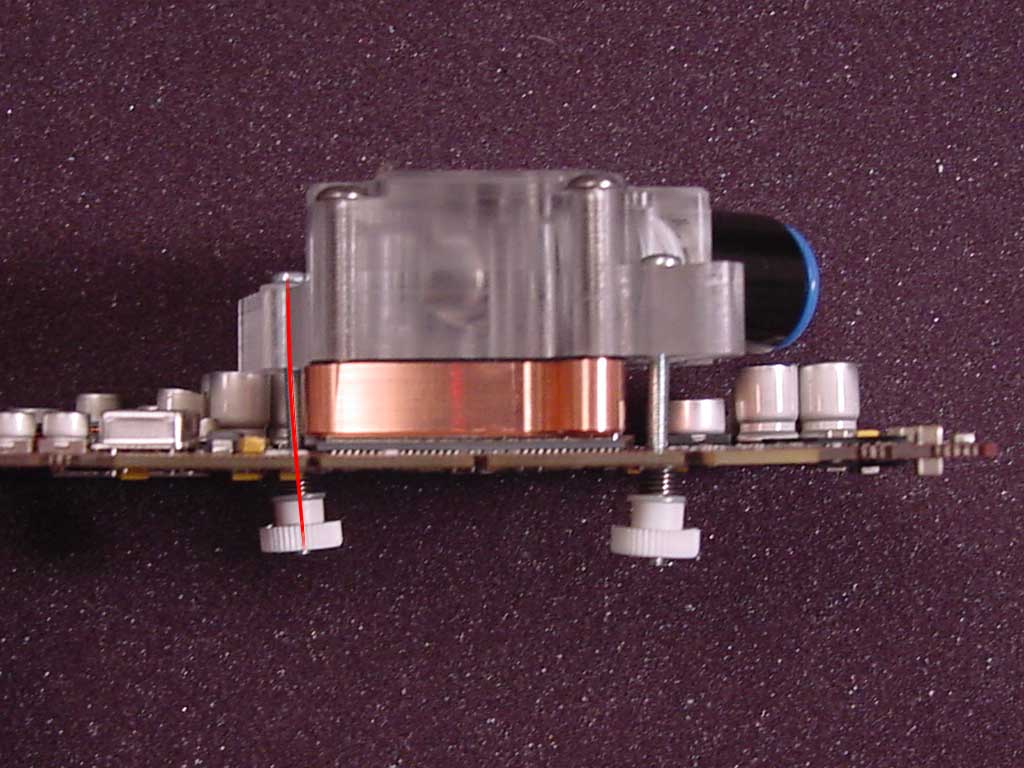
Mounting the GPU block on my 9700pro was also pretty easy. In fact, mounting hardware and procedure for this block was identical to the NB block. The install wasn’t perfect though, as the mounting holes for the card don’t seem to line up 100% with the mounting tracks on the block. I tried several different orientations to no avail. In the following pics I marked the curvature in red to show how severe it is. It doesn’t seem to affect anything but the screw, but this is worth pointing out. When brought up to Asetek they showed me pics of 9700pro installs where the screws did line up, however on mine it seems to be off about 1/16″ or so, thus causing a bit of curvature.
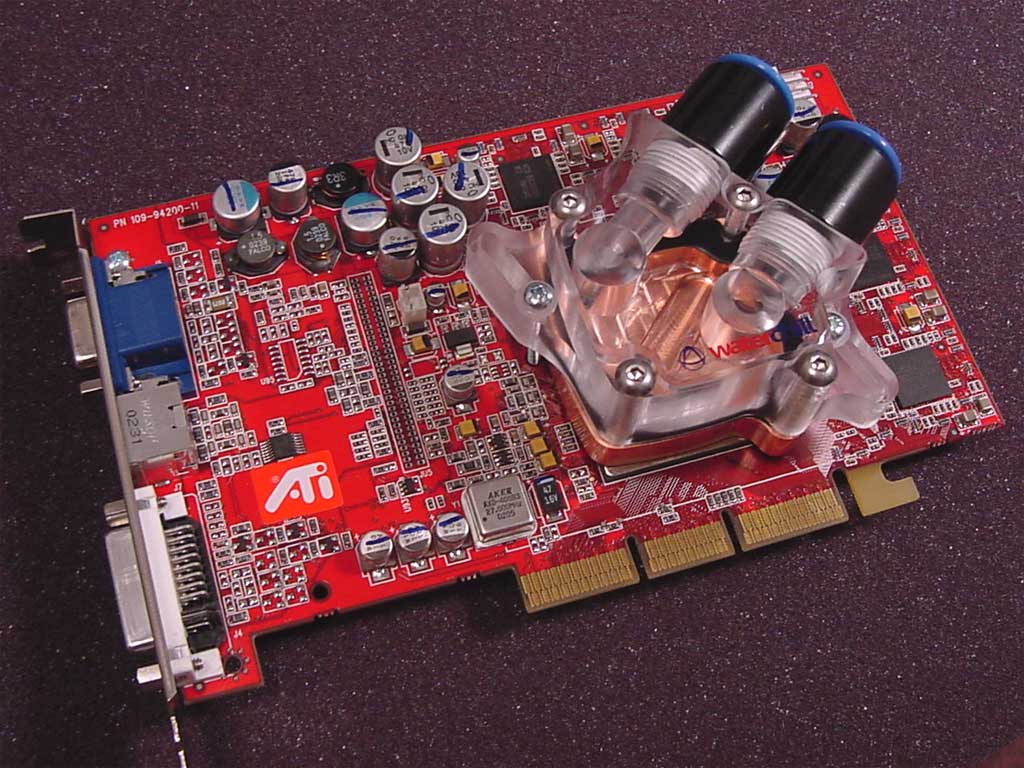
Another thing I didn’t like is that this block is not machined to fit within the ATI 9700 and 9800 series shims. Yes, one can remove the shim – but only at the cost of the warranty! With lesser cards I wouldn’t care, but this one cost me hundreds of dollars… Some GPU blocks by Swiftech and others are made to fit inside the shim, it was a shame that this one did not. Doing this would mean Asetek couldn’t use the same base for the NB and GPU, but it would have been nice. Lastly, the inlet and outlet of the waterblock pass over some of the memory on the card. There is plenty of room for BGA ramsinks underneath, but if you use very tall sinks this could be an issue.
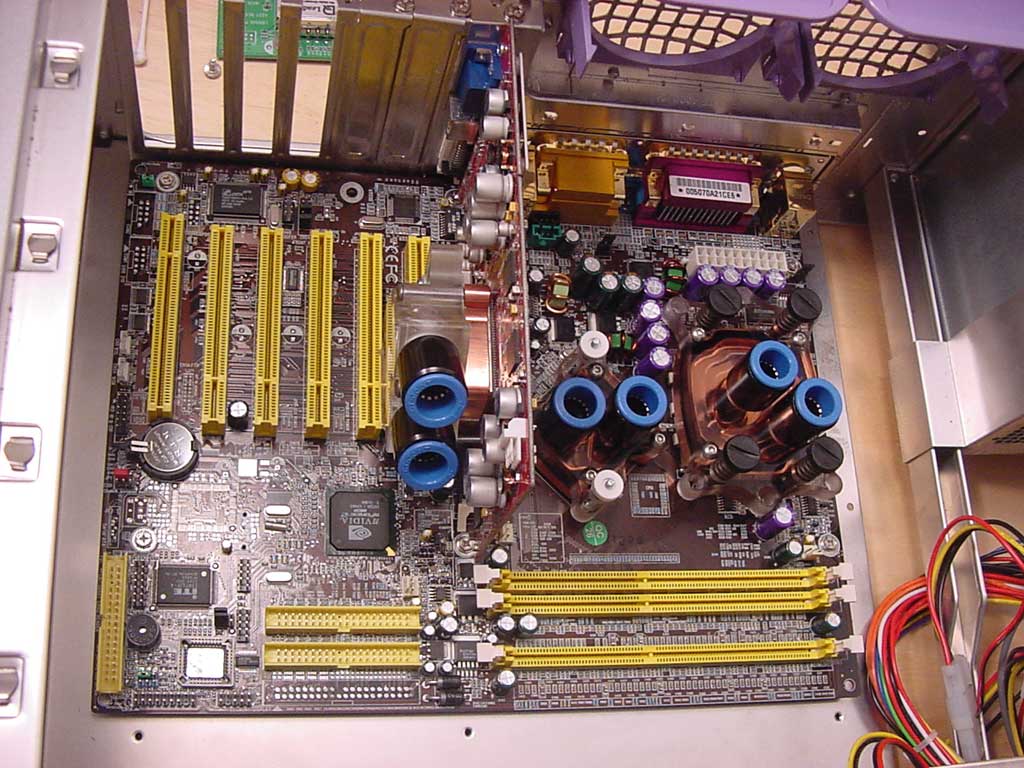
Here’s everything installed and in the case.
It’s Not Over…
Midway through my review I changed motherboards for unrelated reasons. I went from my Chaintech 7NJL1 to an Abit NF7-S v2.0. All was well until I tried to mount the CPU block…the extra mounting holes conflicted with some of the Abit’s capacitors! I had to significantly trim down the poly-top of the CPU block to make it fit.
In case you’re wondering, the poly-top was easy to cut and file down using a hacksaw and wood file. It took about 30 minutes and I didn’t even remove the top.
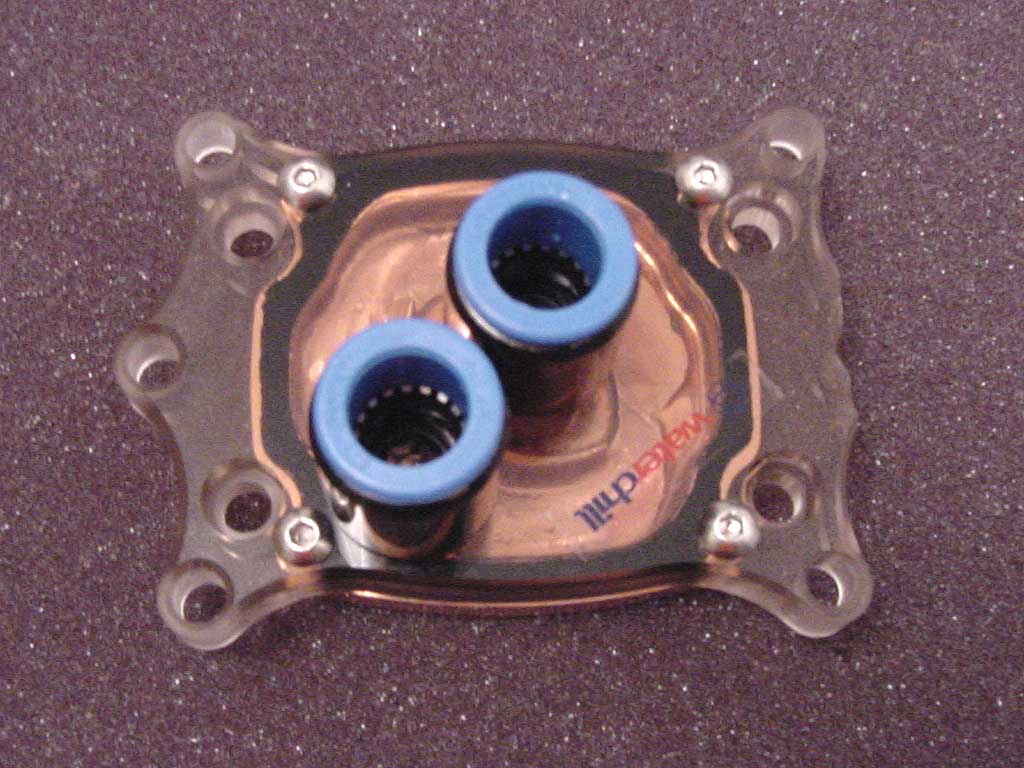
But alas, all my work was in vain! When shown to the Asetek people they pointed out that the replacement top is not just a replacement, but an AMD-only top. This means that as long as your AMD mobo follows all heatsink clearance specs – and pretty much all of them do – all you’d have to do is change tops and there would be no filing needed. I had thought it was an identical replacement top!
Now that my blocks are in, it’s time to route the tubing, mount the pump, reservoir, and radiator.
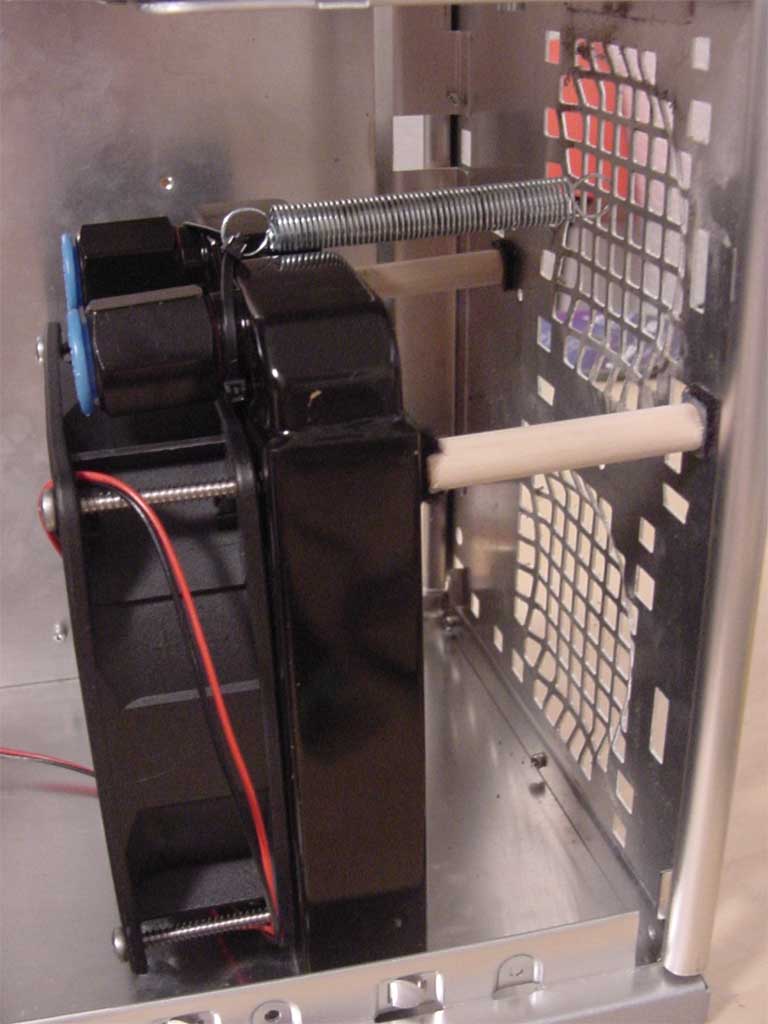
First thing here is to mount the fan to the radiator. Four long screws are included to do so, and it’s very easy. Not wanting to cut my case apart, I came up with a unique way to mount my radiator with industrial strength velcro from home depot, some lengths of dowel, and a spring. Confusing? Well, the spring pulls the rad back into the dowels, which push back against the spring. This tension keeps the
top of the radiator in place. The bottom is lined with industrial strength velcro which keeps the lower end of the rad in place ($8 @ Home Depot). So you think it looks flimsy? I had to turn my case on its side several times during the review, and it held strong – even when full of water.
I opted not to modify the two 80mm fan holes existing in the case. I did some calculations and found that the area of the two 80mm holes is 90% the area of a single 120mm hole. Factoring for the dead spot of the 120mm fan and the CFM of the fan, the two 80mm holes should provide plenty of airflow. Later in the install I will add a shroud, and the difference in airflow between open air and the shrouded 2x80mm holes is unnoticeable.
Next was the pump, res, and tubing. After place-testing everything and figuring out which places were best, I started to set things up. I put the suction cups on the pump and put it in my case, and was surprised to see how secure it was. Those are some powerful suction cups. The included bracket to mount the res on 1) didn’t work and 2) didn’t fit my case. It seems this bracket was made for the Hydor L20, as with the L30 it was a bit off and didn’t really do anything. Even if it had worked, I didn’t have the room in my case to put the two side by side. Instead, I put some velcro on the bottom of the res and put if farther away from the pump.
Now that everything is in place, time for the tubing! I must say this took me a very very long time. Since the tubing is so rigid, cutting it even a 1/2″ too long would throw things out of whack. For example, the line between the GPU block and the rad, if it was a little too long it would push the GPU block really hard and put lots of stress on the fittings. In fact, the tubing was so strong the line from the pump to the CPU would push my pump into the case door and pop off the suction cups (now that it’s been running a few days, it seems to be acting less stubborn, but it still happens).
The tubing has a very powerful memory as well, i.e. it wanted to stay coiled as it was during shipping. This made getting it to do any type of bending rather annoying. None of this would have been so bad if the tubing weren’t so difficult to cut! Cutting hard tubing with scissors is a bad idea, and with a razor it took forever as the blade frequently got stuck.
With the tubing finally out of the way, here is the final result. NOTE – I deviated from the recommended loop of pump->radiator->cpu->nb->gpu->Reservoir because there was no way this tubing could make the needed bends. I had to modify the loop to pump->cpu->nb->gpu->Radiator->Reservoir. And check out my bad-ass shroud! Fellow reviewer and mod-specialist Bozenago would be proud.
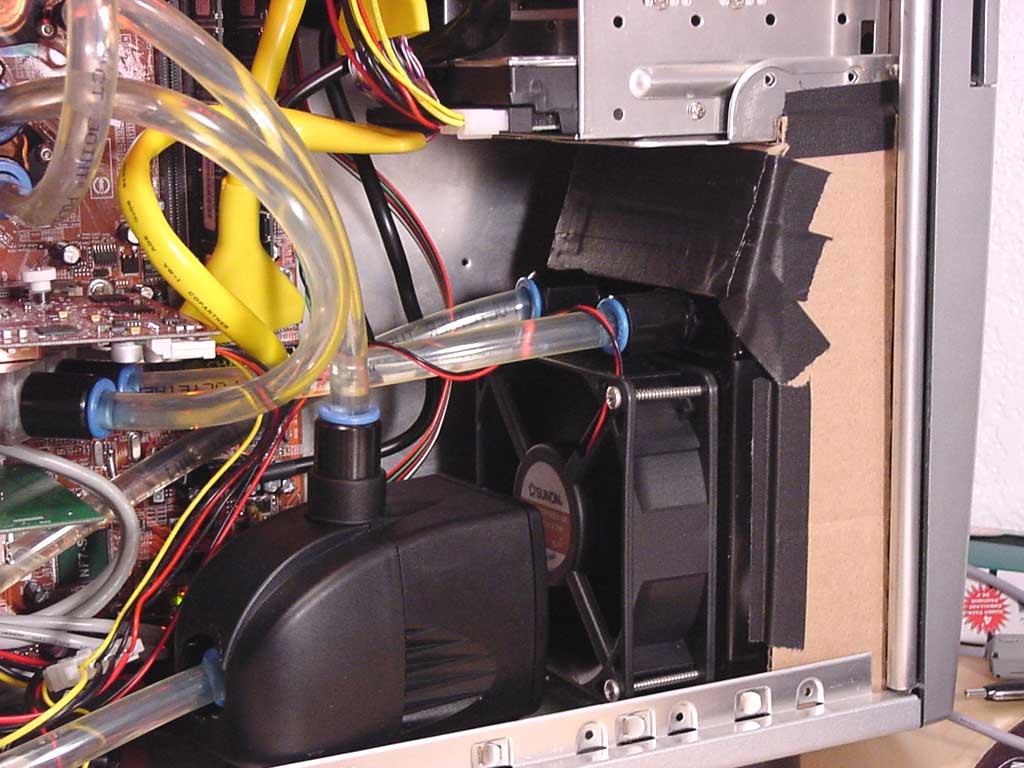
UPDATE: After reading through my review, the people at Asetek reconsidered their choice of tubing. They just sent me a sample of the new batch and I must say, it is a VERY big improvement. It has a bend radius comparable to to Clearflex-60 or Tygon tubing and is just easier to deal with overall. Great work Asetek!
The last step was to hook up the power! Nothing to difficult here, just hook the 3-pin fan connector into the relay, hook the two-pin AC power connector into the PCI slot cover/hermaphrodite connector wire, and you’re done!
One thing worth mentioning is that this needs a 4 pin floppy power connector to run. So does a 9700pro. And so does a floppy drive. So what’s the problem? Most PSU’s that I’ve seen only have two floppy connectors! Luckily a nerd like me happened to have an extra molex-Y splitter that had a floppy connector on it, but for some this could add extra hassle. If you have a 9700/9800 video card make sure to go out and get an extra Y-splitter before installing this kit.
Here’s my test setup:
- Abit NF7-S v2.0 mobo
- AMD XP-2100 AIUHB
- 2x512MB sticks of Buffalo PC3700 RAM, Dual-Channel (Winbond BH-5 chips)
- ATI Radeon 9700pro
- Western Digital Special Edition 120GB hard drive
- Leadtek TV2000XP TV card, Lite-On CD-RW, floppy
- 450W PSU
- In addition to the watercooling, I also have 2x80mm exhaust fans 7v-modded
To test, I measured idle and load temps of the CPU via the NF7-S thermosistor at stock speeds, and max overclock speeds. The max stable overclock speeds I reached with the CPU is 215FSBx10.5 for 2.26GHz, 1.85vCore, and 1.7vdd (chipset voltage). To test the GPU performance, I simply overclocked my 9700pro to the max, and gauged stability by looping 3D Mark 2003 for several hours.
CPU & Chipset Performance
The results for the CPU were quite surprising – I didn’t expect the kit to perform this well! I’ve used this chip for a while, it tops out around 2.3GHz no matter what (and I previously had this on what many would consider a higher-end watercooling setup). The difference in idle temps from 12v testing to 7v testing are most likely due to AS3 settle in and potentially lower ambient temps, but notice at stock
speeds there is hardly any difference at all! Very nice, considering the noise drop from 12v to 7v is significant. It goes from somewhat noisy to near silent. At OC levels the difference between 12v and 7v mode are more noticeable, but at only 3C at load this is not a very large difference. Personally, I’d sacrifice a few MHz to run near silent.
Video Performance
Video performance was less spectacular most likely due to the fact that I did not remove the 9700pro shim. This leaves a small gap between the GPU and waterblock, thus reducing performance. For 3D Mark 2001 I was able to get the card to 380/335, and with 3D Mark 2003 I was only able to get it to 350/335. Judging from the results of the CPU blocks, I would say that there is much more cooling potential here than I extracted from the system.
If you don’t mind removing the shim, or if you use an nVidia card, then this shouldn’t be an issue for you. With the shim removed I’ve heard reports of 400MHz+ on the GPU core with this kit, but of course all results will vary from system to system.
As a seasoned watercooling veteran, I went into this review expecting mediocre performance. I must say, while not up to par with waterbongs and giant heatercore systems, the Waterchill does hold it’s own in the watercooling arena. For a complete, all in one package, this is definitely a good bet.
Everything is finely constructed and good looking, the pump is solid, the res looks like it would need to be hit with a hammer to leak, and the heatercore-style radiator is a big plus over old pipes’n’fins style rads.
But alas, nothing is without faults. The hard tubing is a pain to work with. After working with Clearflex-60 for years, I was amazed at how rigid this tubing was. It takes some effort to get it to run properly.
The good news is if you buy the latest version of their kit you won’t have this problem. Asetek’s newer, softer tubing is the icing on the Waterchill cake. It is as workable as the expensive Tygon and Clearflex-60 tubing and far, far superior to the old hard tubing.
Other issues I have are with the GPU block. It is not machined to fit the 9700pro shim, and one of the
screws had to be slightly bent to fit properly. The bent screws did not affect mounting at all, but removing the shim is a choice you will have to make on your own.
A final note – the Anti-Algae fluid didn’t work too well for me, as a few days into testing I started to see some growth. Asetek has been very responsive to the problem however, and I’m willing to believe that this is a unique case seeing how rare my problem is when looking at other reviews. If you ordered the kit today I doubt you’d have any problems, and considering Asetek’s responsiveness I’m sure they’d fix it if you did.
Overall, this is a great kit. It has wonderful craftsmanship across the board, from the quick-connect fittings, the blocks, the pump, and the radiator, all pieces are clean, functional, and good looking. Performance was quite good, though not what you’d get from the best-of-the-best. In 7v mode the kit runs near-silent, and in 12v mode it is by no means loud – but you’ll notice it.
The negative points I brought up are by no means show-stoppers, but it’s my job as a reviewer to pick these things apart. Also, whenever something went wrong Asetek was there to make it right. Changing over to new tubing as well as sending me a sample to play with shows that they are a quality company.
The last thing to think about is the price. At around $250 and up for the complete kit as I have, it is not a budget kit. Compared to similar performing kits this one is very competitively priced, but $250 isn’t chump change.
Taking everything into consideration, I give this kit an 9.25/10, and I’d recommend it to anyone wanting a one-stop watercooling solution. Further, I think this kit should get the OC Mod Shop seal of approval. Asetek has thought about everything, even when some reviewers don’t (which is why I have a filed down block now).
Pros
- Good Performance
- Great Craftsmanship
- Very Complete Kit
- Silent 7v Operation
- Good Looking!
- New tubing is much better
Cons
- Difficult Tubing
- Potential Install Difficulty