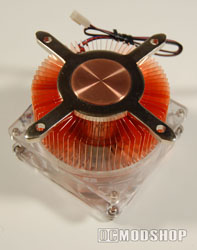
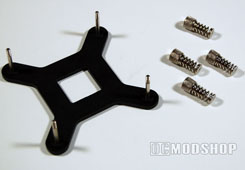
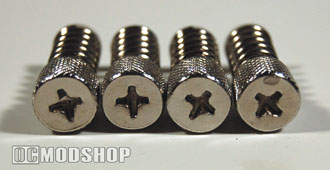
The bottom of the sink is formed from a solid slab of copper, and has a slightly tapered rim. The base comes protected with a plastic film that must be removed before installation. The base is highly reflective, indicating an extremely smooth surface, with no milling required. Only a very small amount of thermal paste will be needed to achieve solid contact between the processor and this heatsink. The circular base is surrounded by a metal (I am assuming steel) brace, which branches out to four arms acting as the mounting contact point. Spring-loaded screws are to be inserted through the holes in these arms to the motherboard’s mounting rods. The heavy copper base extends all the way up to the copper fins, to ensure maximum heat transfer from core to fin.

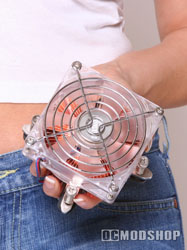
The fan looks like a standard square clear 80mm case fan, but has been modified to fit onto the circular shape of the copper fins. The fan in screwed into place using four small screws, and has a long 3-pin fan lead. There are four blue LEDs in each corner of the square fan, which should provide a decent glow in our case.
Unfortunately, this sink is only usable with a Pentium 4 LGA775. This heatsink would be a real contender in the market if it included mounting methods for Athlon 64 and Pentium 4 478 processors. Zalman heatsinks are doing rather well because they can be used on a variety of motherboards. If a user upgrades then they don’t have to throw away a perfectly good expensive heatsink.
Installation
Using a back-plate would seem like quite an ordeal for mounting a heatsink. Usually this type of heatsink method requires the motherboard to be uninstalled to attach the back-plate. All LGA775 motherboards use a back-plate, so one should already be installed. All that is required is to unscrew your current heatsink and install this new one. The CopperMan’s mounting mechanism is standard and does not require use of it’s own backplate, so we used the one already installed by the motherboard manufacturer.
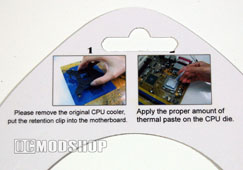
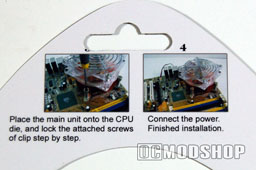
Installation is very simple if your motherboard already has another heatsink installed (which most should if you are upgrading to the CopperMan). Otherwise you will have to mount the backplate to the underside of the motherboard through the retention holes. Next, spread a thin layer of thermal paste to your Pentium 4. If you haven’t done so, remove the plastic film protecting the Copperman’s smooth base and align the holes in the retention arms with the retention rods now sticking up through the motherboard. Now place the spring-loaded retention screws over each rod and tighten, which will push the heatsink down onto the processor. Make sure you connect the fan’s lead to a fan port on the motherboard, and the assembly is complete. Evercool has an installation guide on ther website if further assistance is needed.
Fan noise
28-30 dBA is pretty standard for a 80mm case fan. Other components in your computer will probably create more noise than this fan, which can be silenced to inaudible levels with a rheostat or fanbus. At full power it is not noisy and provides enough airflow to be effective.
The blue light emmitted from the fan is striking, but the square fan is just uninventive contrasted with the beautiful circular heatsink hidden underneath. This is a great heatsink is made to look no better than an OEM sink upon installation.