
The mouse can be customized and tweaked to any level of performance, and you can even adjust the optical sensor to track better on your surface of choice. The included software CD includes a configuration utility, an online manual and a mouse test application. The manual is rather diffucult to decipher, and includes many examples of “Engrish” that have been lost in translation.
The mouse test software lets you visually see how smoothly the mouse performs compared to other mice. It can show you the mouse polling rate, your effective DPI settings, and how quickly your “keep shot” (auto-fire) settings are. I used this utility to test the difference between my wireless laser desktop mouse and the H1. It can be easily seen that the H1 has much smoother circles, whereas a traditional 800dpi mouse makes several straight lines when moving the mouse in a circle. These straight lines are the result of the mouse not polling quickly enough. Using an old mouse, a circle is composed of say 20-30 points, and the H1 delivers hundreds of positioning points in the same amount of time, resulting in a much smoother pattern.
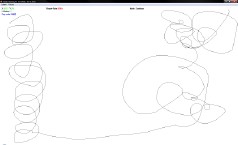
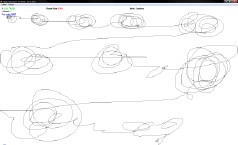
I also used this tool to show how the mouse reacts at different DPI settings. You can see several circles that become progressively larger. I moved the mouse in approximately the same motion in all settings, and the resulting circle shows how sensitive the cursor was to each. At the bottom you can see that the cusor is almost uncontrollable in a desktop setting, but believe me that this fast motion translates into a very quick and satisfying experience for the twitch-gamer.
The Gamer Toolkit allows you access the mouses’ onboard memory, much like Spock did with McCoy in Star Trek 2. All configuration settings (including keyboard macros) are stored onto the device’s onboard memory, so the mouse retains all settings even if you plug it into a completely different computer. The tool is seperated into four different tabs:
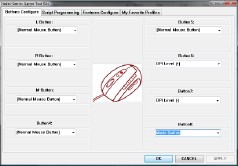
Buttons Configure
This is where you can configure each of the mouse’s 8 buttons. Most people will keep the default settings, but you may want to remap each button to a completely different function in a different mode (I have a seperate desktop and gamer profile). You can even assign a button to use one of the three programmable scripts that you define in the next tab. Each button has a dropdown list next to it, and the picture of the mouse changes to show you which mouse button you’re actually changing. This tab is straightforward and easy to understand.
Script Programming
This tab will interest gamers, but is a little difficult to understand at first. You can program up to three scripts, which are selected by clicking the A, B, or C icons above the Edit Area. You can then program in commands from the keyboard, either by pressing the keys on the keyboard individually, or by “String Input Method” where you type in a literal macro (such as “I+D+K+F+A”). When using the default method, you must keep focus on the Toolkit window (if you press the Left Window key, [LWIN] shows up in the Input field, but the window loses focus, so you must click on the window to continue the macro).
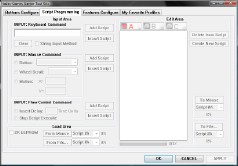
Once a keyboard or mouse sequence is constructed, it must be added to the Edit Area by clicking the “Add Script” or “Insert Script” buttons. Add Script adds the macro to the very end of the list, while Insert Script inserts the command to the selected area. You can add a combination of keyboard commands, mouse commands, or “timeouts”. Customizing a script can be a long process of trial-and-error. Either the script won’t fire, or too many commands try to execute at once, or the game doesn’t respond in time. This is a very powerful feature, but young Jedi must have patience…
Features Configure
If you’re going to totally Fubar your new mouse, thenthis tab will do it. You can override the Sensor features, which basically adjust the shutter rate and can be customized to be more sensitive to different surfaces. Just by playing with this I killed the mouse and had to reload the profile from file (after calling technical support about how to do this). The sensor is already more sensitive than other optical mice from my experience (very similar tracking to laser mice, if you can believe that). My advice: leave the sensor area alone.
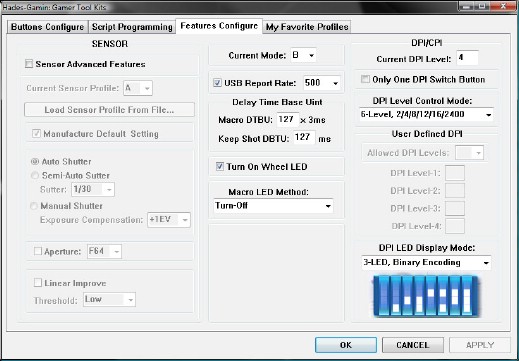
You can adjust the USB report rate for each of the 2 programmable modes from 100 (USB mouse’s default) to 1,000. One-thousand USB polls per second is pretty much overkill and requires USB 2.0’s bandwidth. A setting of 500 is more than enough, and it is good to see a true alternative to “overclocking your mouse”. You can also adjust the time for your autofire feature (called the “Keep Shot DBTU”) in this tab. You can also adjust the scroll-wheel’s LED brightness (Always On, Always Off, On when executing a macro, or flash when executing a macro).
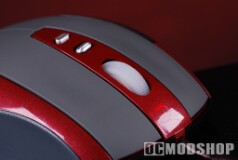

You can put the mouse into “One DPI Switch Button” mode, which allows you to toggle through all DPI settings using only one of the rocker-switch buttons, leaving the other button available for programming.
The DPI Level Control Mode is what most people will probably tweak. By default there are several modes to select, each with a different number of steps.
- 4-level (4/8/12/1600)
- 4-level (2/4/8/1200)
- 8-level (1/2/3/4/8/12/16/2400)
- 6-level (2/4/8/12/16/2400)
- User Defined DPI (any 4 steps of your choosing)
Because there are only four LEDs to indicate your current DPI setting, the LED indicator can get confusing if using a 6-level or 8-level DPI mode. You can select “Binary encoding” which may make sense to you if you know how binary numbers work (0001 = 1, 0010 = 2, 0011 = 3, 0100 = 4, etc). You can also select a 3-LED, 2-step method, a 4-LED increment, 4-LED decrement, 2-LED Gray Encoding method… you get the idea… there’s a lot of freakin’ ways to show your current DPI level.
For simplicity purposes I use a 4-level mode with 4-LED increment, so it looks like a bar graph (1 LED is lowest, 4 LEDs is the highest). It must be noted that the only way to achieve 3200dpi is to manually set it in the “User Defined DPI” setting.
My Favorite Profiles
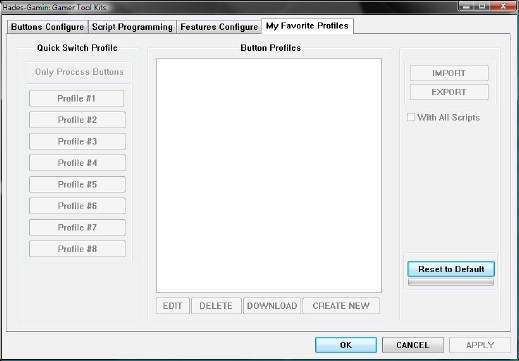
This tab will interest to gamers who have a LOT of different macros they want to use between games. This tab lets you load and save profiles customized to a particular task. Once you’ve created the settings you like in all the other tabs, you can save it to a slot, name it, and update your mouse’s configuration with one click.
There is also a “reset to default” button, which loads the manufacturer’s default settings from file. This process basically re-flashes the mouse’s memory and takes a few seconds. I’ve had to do this more than once when messing with the mouse’s settings, and am glad this feature exists.


