

Razer mice do not use “drivers” per se, as all of their configuration is contained within onboard software. You do need to download an install software that lets you change these settings, however; in this case the Imperator Configurator.
The Configurator is arranged into five different sections, and each tab has sub-windows as appropriate. The first tab is the Assign buttons tab, which lets you set several different functions to any of the seven buttons. Honestly most gamers won’t want to specify anything beyond the default, as most games already recognize the scroll wheel, Forward and Back buttons within the game. MMO and RTS gamers may want more buttons, or rely on a gaming keyboard for all of their macros.
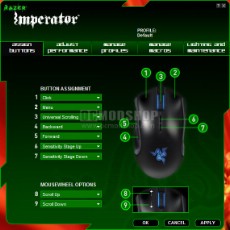
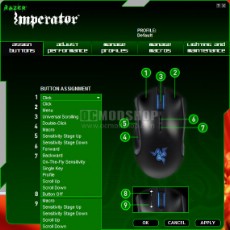
Assign a number of functions to any of the 7 buttons
The DPI up and DPI down buttons are practically critical for a gaming mouse, and most users will leave these alone. There is no “DPI cycle” command, which could free up one button. I’m a big fan of configuring 2 DPI modes for FPS games, and switching from “high” to “low” without having to go through a bunch of intermediate steps. Since there are no visual indicators on the mouse of your current DPI setting, it is likely that gamers will misjudge their setting and stumble a few times. Even if you program 2 positions, if you accidentally press the wrong DPI button then you won’t switch. Having 2 DPI buttons also meand you have to reach a little further, too.
The mouse does feature “On-The-Fly” Sensitivity adjustment, which basically allows you to use the scroll wheel to fine-tune your current sensitivity setting without having to use software or dig through menus. If you assign a button to “on-the-fly sensitivity” and press this button, then the scroll wheel will adjust sensitivity from 1 to 10 in .5 increments. This might be useful, but still requires one to hold down a button while scrolling, which requires two fingers, so if you use it frequently then it should probably be assigned to a thumb button to ensure grip on your mouse.
The Adjust Performance lets you set the number of DPI levels (Razer calls them Sensitivity Stages), and the setting for each level. You can set one to five DPI levels, and can independantly set the X and Y axis, which can be helpful in First-Person shooters when you need more horizontal movement than vertical (keeping your eye on the horizon). You can also choose to Enable Mouse acceleration, which interpolates additional data for each mouse movement. Many gamers turn this off for gaming, which is why there is actually a need for DPI resolutions as high as 5600. You can also adjust the Polling Rate of your mouse from 125Hz, 500Hz and 1000Hz.
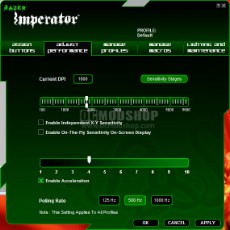
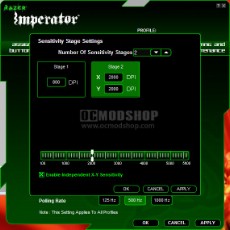
Adjust performance tab lets you specify several DPI settings, and assign seperate X and Y positions
The Manage Profiles tab lets you create, import, export or delete mouse profiles. There is also a checkbox to Enable On-Screen display, which is the only way you can tell which profile has been selected. You can also click an Auto-Switch checkbox that automatically switches the profile for you whenever your game (or application) is in focus. Honestly, you should depend on this feature with the Imperator, as it is difficult to manually switch profiles with this mouse.
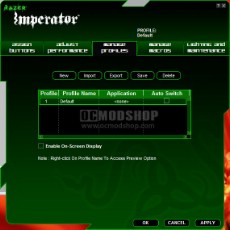
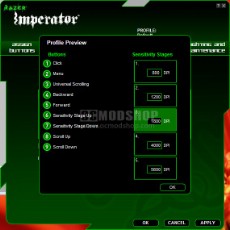
The Manage Profiles tab and sub-screens
The Manage Macros tab is one of the most powerful parts of this software, and lets you create, import, export or delete macros. By default the software records any time between commands as a delay, but you can switch this off by clicking the “Ignore Delay Between Events” checkbox. Alternately, you can specify a default delay between commands by checking the “Insert Default Delay” and inputing your own time. The software records mouse clicks and keyboard commands, and will accept 16 events (8 keydown and 8 keyup events). The software had no problem with holding down several keys while pressing others, like doing a manual Copy and Paste (which requires holding down Alt while pressing X for example).
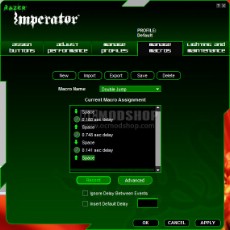
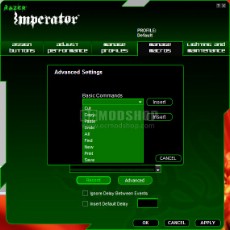
The Manage Macros tab
The Lighting and Maintenance Tab lets you toggle the blue LED lighting on the mouse’s scroll wheel and Razer logo. You cannot turn the Razer logo “full on”, however. The logo is either “breathing” (fading in and out) or completely off. This tab also displays the Driver and Firmware version of your mouse. You can also click a button to restore all default settings.
When the Razer software is installed, a launch icon is displayed in the bottom right of your task bar. The Razer Tray icon does not display any of this information with a mouse hover, either. You have to right-click and see which of your profiles have a checkbox next to them. The DPI information does not update in real time on the Configurator, either.

