

The first option is ownCloud (owncloud.org). Here’s what you’ll need for this:
- A web host that supports PHP5 and MySQL. Many website hosts support PHP5 and MySQL, so finding one shouldn’t be hard. The go-to option for many people is Dreamhost. If you have your own website, then you’re already set.
- A copy of the latest ownCloud server. You can get this at ownCloud.org.
- An address for remote access. If you have a website of your own already, then you’re pretty much set. You can buy a domain name, they’re fairly cheap now, or you can search around for free options and host the site itself on the same server.
ownCloud runs on almost any server, including Linux, so your options are wide open, and Dreamhost provides setup information as well. This is for more advanced users, though. It’s not rocket science, but if you’re a “just get it up and running” type person, stick with the web installer when it comes to ownCloud.
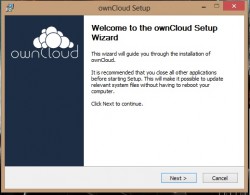
- Download the web installer for ownCloud server from their website.
- Use FTP software, such as FileZilla or CuteFTP, to upload the setup-owncloud.php file to your server. Many website interfaces also allow file uploads. Just use whatever works best for you. If you don’t have an upload option on your website’s interface, then go with FTP.
- Enter the URL of your website into a browser, like http://www.yourdomainname.com/setup-owncloud.php, and follow the setup instructions from there. There’s almost nothing to it. You’ll have the server up and running in no time.
- Open the ownCloud software on your PC and select “Configure”.
- Type in the address to your server, as before, and enter the credentials you put in whilst setting up the server. Hopefully you didn’t skip that part.
- Now you simply click “Add Folder…” and browse around your PC for folders you want to add to the server system. Once you are done with that each folder will be accessible on your cloud.
- Go get the Android or iPhone ownCloud app from their respective app stores and enter the address to access your server. You’ll have to input your credentials, and then you’ll have access to all your files from anywhere in the world.
- Congratulations! You now have your own cloud server! Add as much security as you like and breathe easy knowing you have secure access that will rarely go down and is away from the prying eyes of the NSA and hackers. Advanced users can take things much further than this, but for the average user this will serve the purpose.


