

The Logitech SetPoint software can be accessed by right-clicking the Logitech Setpoint icon on the lower-right of the taskbar. This can be difficult to identify when you have several Logitech products running, like the G510 keyboard and G930 Wireless Headset. When the software opens, you can select which mouse you want to configure, but in my opinion the software should open up to the configuration screen if only 1 mouse is registered.
SetPoint is laid out with the categories on the left side, and the configuration options for each section on the right. From top to bottom, the left navigation lists the name of the mouse, battery status, and wireless (or wired) status. You can select a dropdown of which profile you would like to configure, and the default 3 are Gaming, General, and Productivity. Below this are the Overview, Basics, Buttons, Pointer, Scrolling, Battery, Profile Manager, Macro Manager, Device Options and SetPoint options.

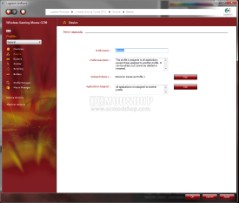
Overview and Basics screen
The Overview screen shows a summary of all the subsections listed on the nav. You can click the “Edit” button to be taken to that subsection, or just click on the left nav.
The Basics screen lets you change the Profile name, description, and position in the mouse’s onboard memory. You can also assign applications to use this profile, so that the mouse can switch automatically when a particular program or game is run. For example, if you play First Person Shooters, you can have the mouse automatically switch to FPS mode, and when in Photoshop it will automatically change to Productivity mode.
The Buttons screen lets you change any of the mouse’s 13 (that’s right…THIRTEEN) buttons. There are a wide variety of functions you can choose from without having to set a macro (Copy, Cut and Paste are options without having to set a keyboard macro for them). The functions are too numerous to list in this review, but feel secure that there are plenty of media controls, macros, and productivity options available. The buttons available are:
| 1. Left Click 2. Right Click 3. Middle Mouse 4. Bottom-right Thumb button (G4) 5. Bottom-left Thumb button (G5) 6. Top right thumb button (G6) 7. Top left thumb button (G7) |
8. bottom-most index finger button (G8) 9. center index finger button (G9) 10. top index finter button (G10) 11. dead center button (G11) 12. Left scroll button 13. Right scroll button |
When you assign a button to a Macro, then the available macros you’ve defined appear in a lower drop-down list. If you want to create a new macro, then click the Macro Manager button and you’ll be taken directly to a sub-window which lets you create a new one on-the-fly.
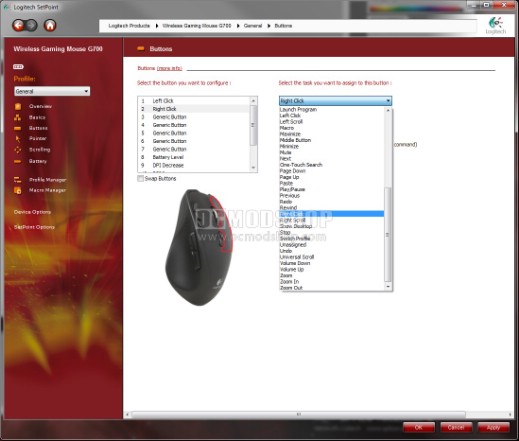
Buttons screen lets you assign anything to any button
The Pointer screen lets you set the number of DPI levels from 1 to 5, as well as independently set the X and Y resolution at each position. One of my favorite gaming mice is the SteelSeries Ikari Laser, simply because you can switch between 2 DPI levels. Many FPS gamers need to instantly switch between “run for your life” mode and “sniper” mode, which translates into high DPI for movement and low DPI to hone in on an opponent’s head. The time it takes you to hunt for the right button and then toggle through a few modes could cost you your virtual life. I have reviewed many mice and I have not until now encountered a mouse that gave you this much flexibility. You can set your mouse to as many or as little resolution jumps as you wish, and that should be a standard feature in all gaming mice.
To change the DPI levels, you simply adjust two slider bars (one for the X axis, the other for Y). When you select 5 DPI levels then 5 slider points appear on each bar; when you select 2 DPI levels then 2 slider points appear on each bar. You can set the minimum and maximum DPI levels for each profile by where you set the left and right slider points. You can choose between a low of 200 and a high of 5700.
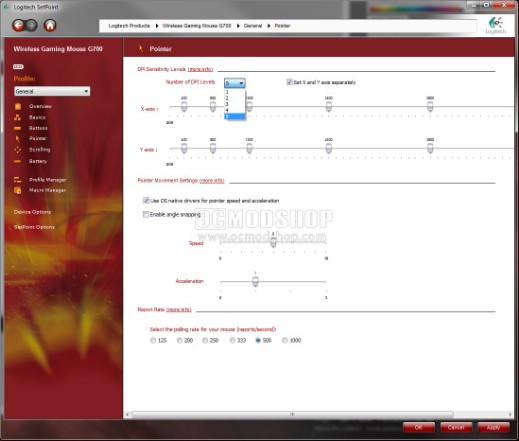
Pointer screen lets you set number of DPI levels and indepently choose X and Y levels
This screen also allows you to change the polling report rate of your mouse, from 125Hz to 1000Hz, as well as enable or disable OS native drivers for pointer acceleration. You can even toggle angle snapping. Whenever pointer acceleration is enabled, mouse movements are interpolated, and additional movements are filled in, so gamers usually have this disabled (which is why a high DPI mouse is so desireable).
The Scrolling screen allows you to set the vertical and horizontal scrolling speed of your mouse wheel, and is as straightforward as it sounds.
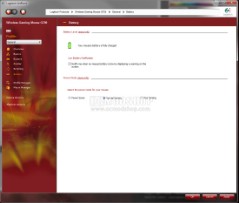
Scrolling and Battery screens
The Battery screen displays an indicator of your mouse’s rechargable AA battery. You can also toggle a checkbox which displays a notification icon when your battery is low. You can also change the power mode of your mouse between Power Saver, Normal Gaming, and Max Gaming. All wireless mouse perform several tricks in order to preserve battery life, which is why many wireless mice require a good shake to “wake them up” after being idle. When set to Max Gaming, I’ve never had to “wake up” the G700 in such a way, but battery life suffers as a result. Luckily, the power mode can be different for each profile, so the mouse is in high-power mode when fragging zombies, and allowed to go idle when browsing the web.
The Profile Manager lets you set how you want onboard profiles to be switched. You can manually switch between them using a mouse button (G11 by default), or you can have SetPoint automatically switch the profile for you when a particular application is in focus. You do have to take some time to identify the executables that SetPoint should look for, but it can save you loads of time once configured. You can also Export, Duplicate, or Delete any onboard profiles.
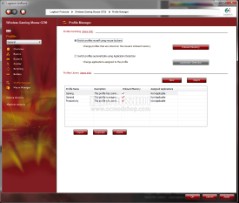
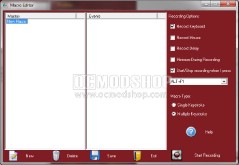
Profile Manager and Macro Manager screens
The Macro Manager is probably the most complicated part of the SetPoint software, but is still easy to use. You create a blank Macro and name it whatever you want. You can then click the “Start Recording” button and use any combination of keyboard strokes and mouse clicks, and you can even set delays between commands. This can be helpful not only for Real-Time Strategy (RTS) and MMO gamers, but First-Person-Shooters (FPS). You can easily record a double-jump by pressing Space twice with a delay in between.
Whenever you are finished recording your macro, press ALT+F1 (the end command can be changed via a dropdown). You can also click checkboxes to toggle what the Macro Editor listens to. If you uncheck “Record Mouse” then you can click all the buttons you want while recording, and only keyboard strokes will be identified. There also appears to be no practical limit to the length of the macro, as I created one with 60 events (30 keystrokes) and it would still let me continue. If you need to edit a complicated macro, you can right-click on any event and insert new commands, insert a delay (500ms by default), or delete any command in the chain. You can also set up the macro as a Single Keystroke or Multiple Keystrokes (useful when you need to hold down Control or Alt while pressing another key).
Keep note that you have to click Save and then Exit before you close the Macro Editor window, or your newly-created macros will not appear on the Macro drop-down list.
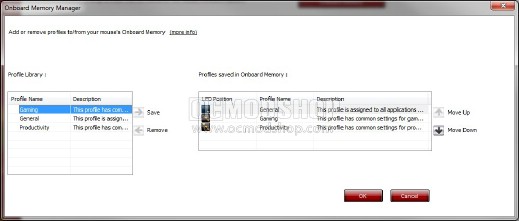
Onboard Memory Manager lets you change the position of your profiles
The Device Option screen displays the current Firmware version, and lets you check for updates. You can also restore the default General, Gaming, or Productivity profiles as well as launch Logitech Online Support.
The SetPoint Option screen basically lets you toggle the notification icon in your taskbar. You can also check for updates to the SetPoint software.
That’s an awful lot of configuration options and features for a mouse, and the software really lets you unleash the power of your mouse.


