~o~o~o~o~o~o~o~o~o~o~o~o~o~o~o~o~o~o~o~o~o~o~o~o~o~o~o~o~o~o~o~o~o~o~o~o~
zz
—–zzzz—–
—–zzzzzz—–
—–zzzzzzzz—–
—–zzzzzzzzzz—–
—–zzzzzzzzzzzz—–
—–zz———-zz—– Isle of Ember
—-zzzz——–zzzz—- [0303]
–zzzzzz——zzzzzz–
zzzzzzzz—-zzzzzzzz
zzzzzzzzzz–zzzzzzzzzz
zzzzzzzzzzzzzzzzzzzzzzzz
————–
~o~o~o~o~o~o~o~o~o~o~o~o~o~o~o~o~o~o~o~o~o~o~o~o~o~o~o~o~o~o~o~o~o~o~o~o~
+——————————————————–+——————–+
|The Ocean – Southwest Region | Mark List |
+——————————————————–+ A: Mercay Island |
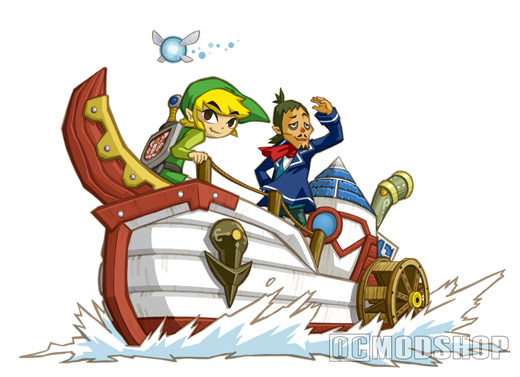
There’s a lot you can do on the Ocean (it’s not nearly | B: Isle of Ember |
as redundant here as it was in Wind Waker), but I won’t +——————–+
be getting into most of it for a while, yet. Start by doing something that
should be old hat to you by now: marking the map. Close the Navigation Screen
by hitting the Back button on the Touch Screen, then open the Map Screen in the
same way you would on land. Mark Mercay Island (the northeast-most island) as
POINT A, and the Isle of Ember (the southeast-most island) as POINT B. Reopen
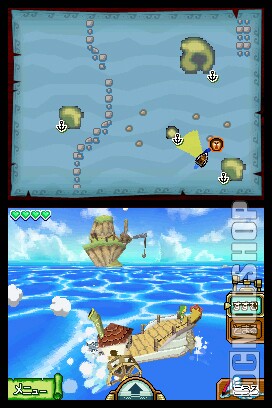
the Navigation Screen (hit the Quill Icon on the Touch Screen), and chart a
course for the Isle of Ember by dragging a line from Linebeck’s Ship to the
anchor near POINT B: ISLE OF EMBER.
The ship will automatically guide itself there; you can take a look around by
touching the edges of the touch screen. Linebeck will also teach you how to
make the ship stop and go by activating its engines. When you reach POINT B:
ISLE OF EMBER, you will automatically dock.


+——————————————————–+——————–+
|Isle of Ember – West | Mark List |
+——————————————————–+ A: Isle of Ember |
After another cutscene with Captain Linebeck, Mark your | Dock |
landing spot as POINT A. There are several houses | B: Kayo’s House |
dotted around the island, as well. The one closest to +——————–+
POINT A: ISLE OF EMBER DOCK contains nothing of any great interest. The house
southeast of POINT A, however, contains something of interest. Mark it as
POINT B, then head for that House. Go inside.
+——————————————————–+——————–+
|Isle of Ember – West: Kayo’s House | Mark List |
+——————————————————–+ B: Kayo’s House |
Read the book sitting on the table, and learn of a Torch | C: Kayo’s Duty |
which is “Kayo’s Duty.” Check the east end of the Isle +——————–+
of Ember, where there is a tiny island. Mark this as POINT C: KAYO’S DUTY.
Leave Kayo’s House, and head east into the Isle of Ember – East area.
+——————————————————–+——————–+
|Isle of Ember – East | Mark List |
+——————————————————–+ B: Kayo’s House |
Continue to the east end of the island, noting an | C: Kayo’s Duty |
electrified barrier you’ll pass on the way. Mark this | D: Electric |
as POINT D, then continue east to POINT C: KAYO’S DUTY. | Barrier |
Along the way, you’ll encounter Tektites; use Targeted | E: Astrid’s House |
Attacks to kill them easily. | F: The Final Torch |
+——————–+
When you reach POINT C: KAYO’S DUTY, Ciela will spot the corpse of a fallen
hero. Run over to the corpse to trigger a cutscene with the ghost of Kayo. He
will point out on Link’s map which house is Astrid’s. After the cutscene, make
sure you mark this house as POINT E.
Astrid herself, however, is sealed inside her house. Kayo mentions that the
torches on the island are the secret to breaking the seal. You’ve already seen
two of them; one at POINT B: KAYO’S HOUSE, and another on the tiny island just
east of POINT C: KAYO’S DUTY. The last torch is hidden on the northwest corner
of the island. If you follow the perimeter of the island on the map, going
counter-clockwise, you’ll eventually reach a gap with a large island in the
middle of it. The east coast of this gap is where the final torch is; mark it
as POINT F.
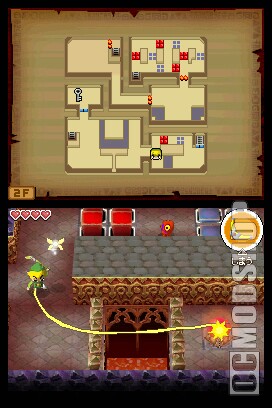
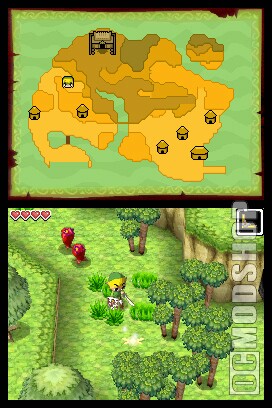
Just west of POINT C: KAYO’S DUTY, there is a small ramp which leads up to the
second tier of the island’s four tiers. Climb up this ramp, and start heading
counter-clockwise around the tier to POINT E: ASTRID’S HOUSE. Along the way,
you’ll encounter Red and Yellow Chus; the Yellow Chus are electrified. Use a
targeted attack when they stand still and stopping flashing with energy to
defeat them. Dodge them until you get the opportunity. Go inside Astrid’s
House when you reach it.
+——————————————————–+——————–+
|Isle of Ember – West: Astrid’s House | Mark List |
+——————————————————–+ B: Kayo’s House |
Run around Astrid’s Crystal Ball, and down the stairs | C: Kayo’s Duty |
into her basement. Link will promptly be locked inside | D: Electric |
with an army of Octoroks; use the Wooden Shield to block | Barrier |
their projectile attacks, and Targeted Attacks to kill | E: Astrid’s House |
them. Their large numbers and close quarters also makes | F: The Final Torch |
the Spin Attack effective. Defeat them all to reopen | G: The Temple |
the basement door, and allow Link to solve the puzzle of | of Fire |
Astrid’s Prison. +——————–+
Once all of the Octoroks are dead, head for the barrier in the northeast corner
of the basement. Ciela will sense a presence on the other side of the barrier,
and ask Link to call out to the person. Make a noise, any noise, loudly into
the DS’ microphone to get the attention of the person on the other side (if
you’re in a public place and don’t want to feel stupid, then tapping the
microphone sharply with your forefinger works well).

After a brief conversation with Astrid, she’ll ask you to free her. Agree, and
touch the map on the wall near the door. You’ll be prompted to mark the
location of the island’s three torches. As previously noted, these are
located at POINT B: KAYO’S HOUSE, POINT C: KAYO’S DUTY, and POINT F: THE FINAL
TORCH. Mark these points on the touch screen to open the door.
With Astrid freed, she’ll interrogate Link a bit. Your answers don’t
particularly matter (pick the first option in each question for best results).
After Astrid tells Link and Linebeck their fortunes, you’ll have a new quest.
Open your map, and mark the building near the center of the island with POINT
G. This is the Temple of Fire. Leave Astrid’s House and head back to POINT D:
ELECTRIC BARRIER.
+——————————————————–+——————–+
|Isle of Ember – East | Mark List |
+——————————————————–+ D: Electric |
With Astrid’s blessing, Link can now open the Electric | Barrier |
Barrier which leads to the summit of the Isle of Ember. | G: The Temple |
Run near the Barrier, and tap it to open as Ciela | of Fire |
indicates. +——————–+
Start climbing to the summit of the mountain, watching out for more Chus and
Tektites. When you’re halfway to the summit of the mountain, it will begin to
erupt, spewing balls of fire onto the third and fourth tiers of the island.
Watch out for the circles that appear on the ground, indicating where a ball
will land.
When you reach POINT G: THE TEMPLE OF FIRE, you will find its entrance sealed
shut. Stand in front of the two giant candles which flank the entrance to the
dungeon, face them, and blow into the microphone to snuff them. Do this to
both candles to open the door to the dungeon. Go on inside (if you like,
continue all the way to the summit, where you’ll find a chest which contains a
red rupee on the west side of the volcano’s crater).