~o~o~o~o~o~o~o~o~o~o~o~o~o~o~o~o~o~o~o~o~o~o~o~o~o~o~o~o~o~o~o~o~o~o~o~o~
zz
—–zzzz—–
—–zzzzzz—–
—–zzzzzzzz—–
—–zzzzzzzzzz—–
—–zzzzzzzzzzzz—–
—–zz———-zz—– The Temple of Fire
—-zzzz——–zzzz—- [0304]
–zzzzzz——zzzzzz–
zzzzzzzz—-zzzzzzzz
zzzzzzzzzz–zzzzzzzzzz
zzzzzzzzzzzzzzzzzzzzzzzz
————–
~o~o~o~o~o~o~o~o~o~o~o~o~o~o~o~o~o~o~o~o~o~o~o~o~o~o~o~o~o~o~o~o~o~o~o~o~
+——————————————————–+——————–+
|The Temple of Fire – First Floor | Mark List |
+——————————————————–+ A: Central |
|New Item: Boomerang | Staircase |
+——————————————————–+ B: East Door |
Almost as soon as you enter, Ciela will officially mark | C: Diagram Room |
herself as Navi’s successors by stating the blatantly +——————–+
obvious: don’t touch the walls of fire located in this
dungeon.
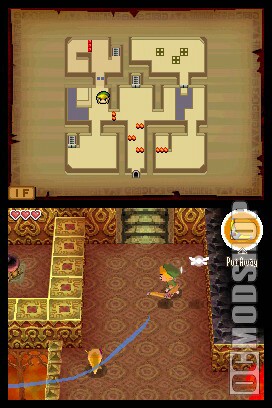
Head north into the dungeon, weaving through the fire barriers. The hallway
quickly widens out into a large room; watch out for a long, spinning flame
barrier that patrols this room. Mark the barrier on the north end of the room
as POINT A: CENTRAL STAIRCASE, then go east into another wide room. Hug the
south wall to avoid the spinning fire.
In the next room, head to the north wall until you see a locked door. Mark
this point as POINT B: EAST DOOR. You’re now going to learn how to jump (if
you haven’t already discovered on your own). Simply run bravely towards the
edge, to the opposite ledge in front of the locked door. Link will
automatically jump when he reaches the gap. Repeat to reach the far east side
of the room, and examine the drawing on the wall.
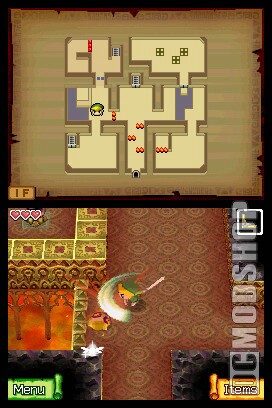
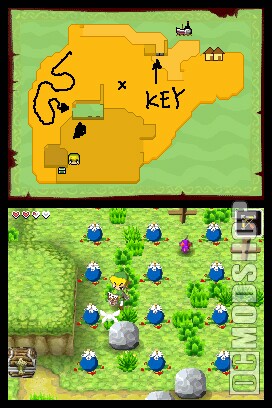
This drawing will show a detailed map of a safe path through the room in the
northeast corner of the room. Mark this room as POINT C: DIAGRAM ROOM, and copy
the route shown on the diagram as best you can to your own Map.
Head into the southeast room of the dungeon. As soon as Link enters, he will
be locked inside, and several Bad Bats will appear. Kill them with targeted
attacks to unseal the exit to the room. A wall of fire will also disappear,
letting Link claim a chest. Open it to get a SMALL KEY.
Backtrack to POINT B: EAST DOOR, and open it with your new Small Key. Go
through the newly-opened passage to POINT C: DIAGRAM ROOM. Follow your
carefully copied line safely through the room. If you deviate from the path
described on the plaque just outside the room, then Link will plummet to an
early grave.
On the other end of the path of the Diagram Room, you’ll find four Trap
Switches grouped closely together. Stand in the center of these four Trap
Switches, and use a Spin Attack to activate them all simultaneously. The door
back at POINT A: CENTRAL STAIRCASE will open. Head back there, and go through
the newly opened door, and up a staircase.

+——————————————————–+——————–+
|The Temple of Fire – Second Floor | Mark List |
+——————————————————–+ A: Toggle Switch 1 |
As you enter the second floor, head counter-clockwise | B: Boomerang Room |
around the large stone block which dominates this large | C: Boomerang |
room. Watch out for Chus on the way. When you reach | Puzzle 2 |
the northwest corner of the block, you’ll find a +——————–+
special Trap Switch. This is a Toggle Switch; hitting it will make all Blue
Traps in the area deactivate, or activate if they are deactivated, and vice-
versa for Red Traps. Mark this Toggle Switch as POINT A: TOGGLE SWITCH 1, then
activate it by attacking.
Continue running counter-clockwise around the stone block; when you reach the
northeast corner, go down the newly-opened path to the east. Head to the east
wall, then south to a new room. The door will immediately slam shut when you
enter, trapping Link inside with a small pack of Gels. Gels can latch onto
Link, damaging him over time until he shakes them off. Rub the Stylus rapidly
across Link to free him. Kill the Gels with Targeted and Spin Attacks, and the
doors will unseal themselves. A chest will also appear; open it to get the
Boomerang. Mark this room as POINT B: BOOMERANG ROOM.
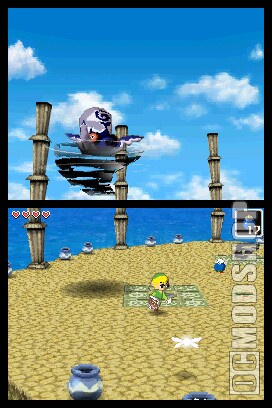
Head to the lava pit on the east end of the room, and follow Ciela’s
instructions to use it. First, click on the Boomerang’s icon in the top-right
corner of the touchscreen, then draw a path on the touchscreen that crosses
over both of the Trap Switches in the pools of lava. The screen will
automatically pan out as you draw so that you can see both of them. Draw a
line to both trap switches, then remove the Stylus from the Touch Screen to
unleash the weapon. It will automatically fly around, activating the switches.
Make a purposefully ridiculous and exaggerated path if you’re feeling silly.
West of the chest where you picked up the Boomerang, there is a long tunnel
which leads to a room in the northwest corner of the floor. Mark this room as
POINT C: BOOMERANG PUZZLE 2. This room contains a nearly identical, but
mirrored, version of the puzzle you faced in the Boomerang Room. The only
wrinkle are the two torches which will spit flames at Link. Dodge one of the
flames, then immediately whip out the Boomerang, and toss it at the two Trap
Switches on the west side of the room. Do it quickly; if a flame hits Link
while you are drawing the path, it will be cancelled.
Once both of the Trap Switches at POINT C: BOOMERANG PUZZLE 2 are solved, the
flames will snuff, and a stairwell on the east side of the room will open. Go
down these stairs.
+——————————————————–+——————–+
|The Temple of Fire – First Floor | Mark List |
+——————————————————–+ D: Toggle Switch 2 |
Try out your new Boomerang on the Chus in this area, if | E: Boomerang |
you like. Just draw a path that intersects them to hit | Puzzle 3 |
them. Once the Chu is out of the way, mark this spot as | F: Southwest |
POINT D: TOGGLE SWITCH 2. Head for the northwest corner | Staircase |
of the room, where there are Red Traps visible in the +——————–+
floor. Stand on the right side of these Traps, and draw a path to the Toggle
Switch which sits at the end of the tunnel on the other side of the Red Traps.
With the Red and Blue Traps switched, Link can now escape the room.
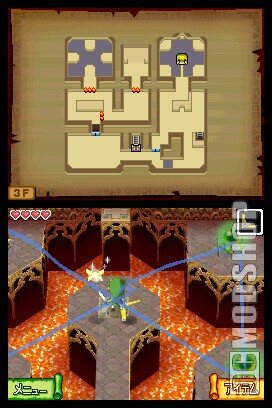
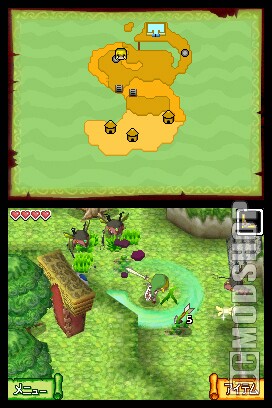
Head south to the next room, which you should mark as POINT E: BOOMERANG PUZZLE
3. You should know the drill by now; equip the Boomerang, and draw a line
leading to the Trap Switch on the other end of the tunnel. The wall of fire
behind Link will deactivate, letting you return to the early portions of the
dungeon, including the entrance/exit.
Head south to the next room, where Link will promptly be locked inside, and
pitted against two Red Bubbles. You will only be able to hurt these guys if
you first stun them with the Boomerang. The only wrinkle is actually hitting
them; they move quickly. The best strategy is to not even attempt to target
them. Instead, stand near the middle of the room, equip the Boomerang, and
quickly scribble a flightpath which travels in narrow circles around Link.
Keep going until you can no longer add to the flightpath, then release. The
Boomerang will very likely collide with both of the Bubbles, extinguishing
their flame and causing them to bounce harmlessly around the room. Use
Targeted Attacks to kill them before their flames recover.
Defeat both of the Bubbles to unseal the room, and open the southwest
staircase. Mark this location as POINT F: SOUTHWEST STAIRCASE, then go up the
staircase.
+——————————————————–+——————–+
|The Temple of Fire – Second Floor | Mark List |
+——————————————————–+ D: Switch Room |
As soon as you arrive back at the Second Floor, mark | E: Boomerang |
this large room as POINT D: SWITCH ROOM. Watching out | Puzzle 4 |
for whirling rods of flaming death, as well as new, +——————–+
deadly, Fire Keese, head for the southwest end of the room, then hugging the
south wall, head east until you spot a switch set into the wall. Grab ahold of
this switch, and pull backwards to activate it.

The second switch in the room is clearly visible on the other side of a narrow
wall. Head there by returning to the staircase, killing any Fire Keese you
meet on the way using the Random Path Boomerang Method you used on the Red
Bubbles previously. When you reach the staircase, head east, jumping over a
gap in the floor onto a narrow platform. Dodge more flaming rods, jumping east
again to the relative safety of the room’s east side. Defeat more Fire Keese
here. If you’ve killed all of the Fire Keese, the dungeon’s final chest will
appear. Open it to get a Red Rupee, then head to the south end of the room.
The second switch is located here; activate it to open a sealed door near the
staircase.
Backtrack to this sealed door, and stand right in the doorway of the room. A
Rat in this room holds a Small Key you’ll need to reach the dungeon’s final
area, but you’ll need to use some clever Boomerang Pathing to get it. Wait for
the Rat to appear, spot you, then disappear into it’s hole. Immediately whip
out your Boomerang, and start making a flightpath which consists of tiny
circles in front of the hole the Rat disappeared into. Continue until you run
out of flightpath juice, then release. The Boomerang will hover in front of
the hole, killing the Rat as soon as it appears. Take the Small Key it drops,
then return to the passage on the southeast end of POINT D: SWITCH ROOM.
Mark this newest room as POINT E: BOOMERANG PUZZLE 4. On the south end of the
room, there is a narrow gap with a Toggle Switch on the other side of it.
Activate the Toggle Switch with the Boomerang, switching the Red and Blue traps
on the north side of the room. Kill the Octorok located in the gap between the
Red and Blue Traps (use the Boomerang to stun it), then take up the Octorok’s
former position. Send the Boomerang back around the corner, and back onto the
Toggle Switch, toggling the traps once more.


You can now access to the stairwell on the southeast side of POINT E: BOOMERANG
PUZZLE 4. Use your recently-acquired Small Key to open the door, then go up
the stairs on the other side.
+——————————————————–+——————–+
|The Temple of Fire – Third Floor | Mark List |
+——————————————————–+ A: East Room |
As soon as you enter the third floor, mark your current | B: Boomerang |
location as POINT A: EAST ROOM. Watch out for Gels in | Puzzle 5 |
this area, and head for the room’s south end. In a | C: Boss Door |
small nook here, there is a diagram on the wall, near a +——————–+
spinning fire rod. Examine the diagram, and copy the numbers on it onto the
room in the northeast corner of the floor, then head back to POINT A: EAST
ROOM.
Go to the north end of POINT A: EAST ROOM. There are two candles located here,
just like outside the Temple; face these candles, and blow into the microphone
to snuff them.
Link can now access the northeast room of this floor. Mark it as POINT B:
BOOMERANG PUZZLE 5. Run north into a platform that sits in the middle of the
room, then whip out your Boomerang. Follow the numbers you got earlier from
the Diagram, in the south end of POINT A: EAST ROOM. Make sure you draw
slowly, to ensure that you don’t use up all your Flightpath Juice before you
can reach the fourth switch.
Once you activate all of the Trap Switches, a SMALL KEY appears on the north
end of the room. Snag it by tapping it while you have the Boomerang equipped.
Backtrack to POINT A: EAST ROOM, and use the Small key to open the locked door
in the room’s southwest corner.
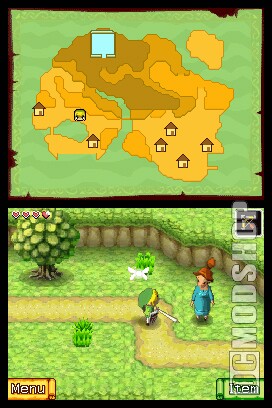
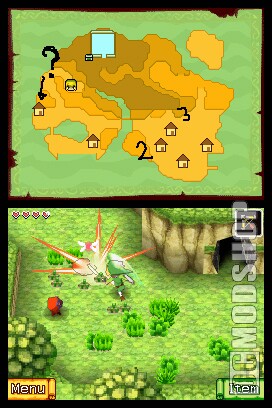
On the other side of the door, you’ll find a tunnel stretching west. Go down
it, and Ciela will spot a strange looking door. Zelda veterans will
immediately recognize this as a Boss Door. Mark it as POINT C: BOSS DOOR, then
keep going west to the end of the hall.
As you enter the next room, the door will slam shut, locking you inside.
You’ll now have to contend with two Yellow Chus, two Fire Keese, and a torch
that spews fire. Run around in circles, dodging their attacks, eliminating the
Yellow Chus when their bodies stop crackling with electricity. Once they’re
out of the way, kill the Fire Keese using the Random Pathing Boomerang Method.
Once you’ve defeated all of the enemies, the doors will unseal themselves.
Head for the room to the north, marking it as POINT D: WEST ROOM. This is a
large room, made into a looping square-shaped hallway patrolled by Red Bubbles.
Use the Boomerang and draw a path traveling clockwise around the hallway,
hopefully stunning the Red Bubbles on the way. If you nail one, quickly run to
it and slash it before it recovers. Defeat both of the Red Bubbles to remove
the Fire Traps around the room.
Go to the room north of POINT D: WEST ROOM. Stand on the switch on the south
end of the room, igniting one of the torches in the room. Whip out the
Boomerang, and draw a path which begins at the first, lit torch, and continues
to the other, unlit torches. This will light the torches, removing a fire trap
near the north of the floor. Back to POINT D: WEST ROOM.
Go to the southeast corner of POINT D: WEST ROOM, and stand on the left side of
the gap in the floor here. Pull out the Boomerang, and draw a flightpath into
the room to the east. There’s a Trap Switch here; guide the Boomerang onto
this switch, then let it fly. A trap door will shut, letting you cross into
the north-center of the dungeon.

Dodging a tripod of flame rods, head to the north end of the dungeon. A chest
here contains the BOSS KEY. Take it, and carry it to POINT C: BOSS DOOR.
You’ll need to follow the clockwise path of the tripod flame trap to avoid
dropping the key. When you get back to the Boss Door, throw the key into the
door to unlock it, and go up the stairs on the other side.
+——————————————————–+——————–+
|The Temple of Fire – Fourth Floor | Mark List |
+——————————————————–+——————–+
Smash the pots in the room to get precious Recovery Hearts, and read the stone
tablets to open a warp point back to the Temple’s entrance, as well as a clue
of the Temple’s purpose. Go up the stairs on the north side of the room when
you’re done.
+——————————————————–+——————–+
|BOSS: Blaaz, Master of Fire | Mark List |
+——————————————————–+——————–+
Run forward into this large, circular arena to begin the game’s first boss
fight. Blaaz will appear in a column of flame, and then split himself into
three. If you look at the map, you’ll notice that Blaaz’s three separate parts
have a different number of spikes on them. The object is to use the Boomerang
to grab each of these parts in number order (from one spike, to two spikes, to
three spikes). This will combine all of them into Blaaz’s complete form,
letting you damage him. When Blaaz is in one form, a second attack from the
Boomerang will stun him, making combos much easier to perform.

While split into three, Blaaz will slowly hover the room, eventually coming to
a stop and slowly summoning tiny balls of flame. After a long charging period,
Blaaz’s three parts will hurl the flames at Link. The charging period is
probably the best time to combine Blaaz’s different sections; they will be
stationary, making it very easy to draw the line from Spike 1, to Spike 2, to
Spike 3.
While in his Complete Form, Blaaz will teleport around, occasionally summoning
balls of fire from the sky. These are exactly like the balls that you dodged
while climbing to the summit of the Isle of Ember. He will also attack
physically if you get too close; again, use the Boomerang to stun Blaaz before
approaching him. Continue combining Blaaz’s three parts, and damaging him in
his Complete form, until he succumbs.
Defeating Blaaz will introduce Link to Leaf, a Fairy similar to Ciela. A chest
will also appear; open it to get a Heart Container, increasing your maximum
capacity. Enter the blue portal that has also appeared behind the chest to
leave the dungeon.
+——————————————————–+——————–+
|Isle of Ember – East | Mark List |
+——————————————————–+ A: Isle of Ember |
As soon as you emerge from the Temple of Fire, return to | Dock |
Astrid’s House. After a cutscene, Link and Ciela will | E: Astrid’s House |
be directed to return to the Temple of the Ocean King +——————–+
on Mercay Island. He’ll also receive a Power Gem –
these will be important later.
Return to POINT A: ISLE OF EMBER DOCK, and set sail for Mercay Island. Once
there, head straight back into the Temple of the Ocean King.