

First thing to note: if you don’t have the latest firmware of your NAS, then upgrade to it. During my research I’ve found that people run into more issues when using older firmware.
Upgrading the primary array on a Synology Diskstation is pretty straightforward, but will take a rather long time. Some NAS units (like QNAP) have a data migration tool which walks you through the data migration process, one drive at a time. Synology does not have a tool like this, but the process is the same. You must replace one drive at a time, rebuild the array, then replace the second drive, and so on until all of the drives are replaced. The system them automatically expands the volume to use the unused space.
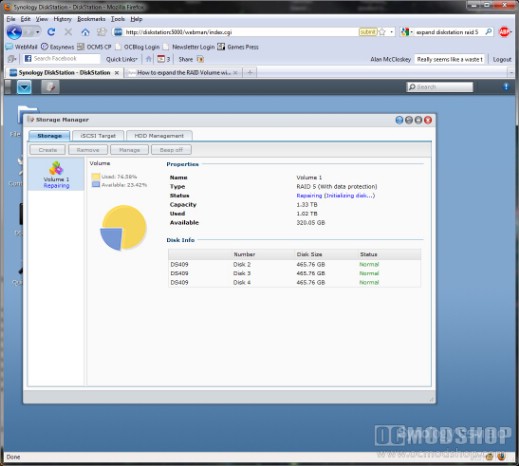
Upgrading the main volume
You’ll have to take apart the DS409 and have it sitting open for a while until the process is complete. Thankfully, you will have 100% uptime during the rebuild process (minus the shutdown time to physically switch drives), which would not be true if you were to build a new array from scratch.
The Synology DS409 does not have “hot swappable” bays, and instead requires that the system be shut down during each drive change. In a normal RAID system you can click a button to “remove” the drive from the array and then physically replace it, all while the system is online. This does not appear to be the case with Synology, so the safe way for the system to detect the new drive is to shut down and restart.
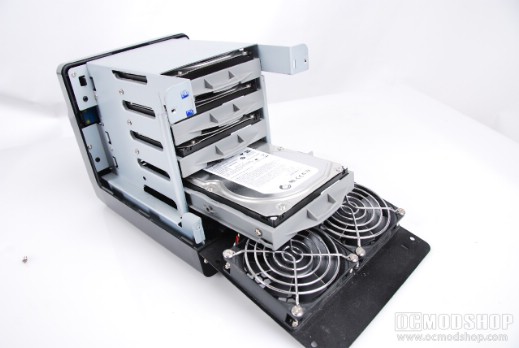
The Synology Diskstation DS409 comes apart rather easily. Just twist the four thumbscrews at the back of the unit, and the back flips down. You can then remove the top and sides of the unit, which reveals the semi-hot-swappable drive bays.
I say “semi” hot-swappable, because you must first remove two screws on either side of each drive before you can pull out its plastic tray. You must then remove screws from the bottom of the drive to unmount it, and then attach the new drives to the tray with the same screws. Then insert the tray back into the slot and turn the NAS back on.
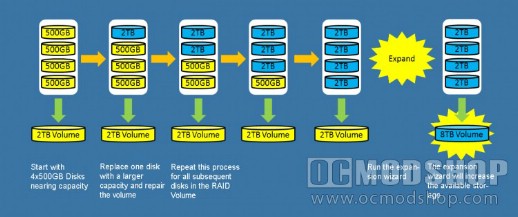
The upgrade flowchart… too bad each step takes over 3 hours.
The NAS will behave a little differently when it is powered back on. The power button will flash and boot up will take a little longer, about 2 to 3 minutes. You will then hear a constant beep warning stating that the array is degraded. Once you start repairing then this beep will stop.
On the next page we rebuild the array with software.



1 comment
It looks like you've got some of the fastest, most expensive Seagate drives you can get… and you're putting them in a slow NAS? Those drives in a RAID 0 or RAID 5 confiig could easily do 400 MB/s (or faster), and your NAS probably only delivers 40-50MB per second.
Comments are closed.