The motherboard comes with basically the same thing as all other AOpen motherboards. You get a I/O back plate for all the ports because it’s not the “standard” layout, 2 IDE cables and a floppy cable which are not pictured. You get two CDs, one which has drivers and things of that nature and the other has Norton Antivirus 2002 which is the best Antivirus software on the market in my opinion.
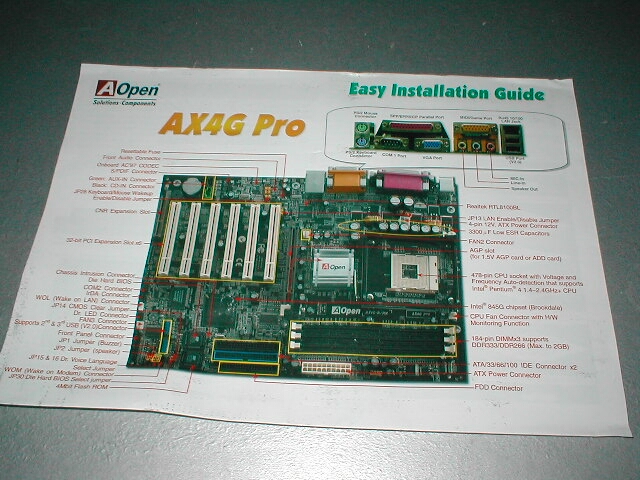
You also get the motherboard manual and an easy installation guide, I really like AOpen’s easy installation guide because it makes it a lot easier to find the normal things that you would be looking for during installation rather than having to scour through a whole manual to find one thing.


The box of the AOpen AX4G Pro is very similar to all of the other AOpen boxes having the window on the top so that you can see inside. The bottom of the box is also similar to the rest letting you know what your getting and all of the cool features that the motherboard offers you.


AOpen continues to use their “Black Beauty” PCB which I really like because green and brown PCBs are too generic and boring. Just taking a look at the top of the motherboard it looks to be laid out pretty well, we will look more into that as we progress. The bottom of the motherboard is quite cool too and has the backing of the heatsink clip.


Like I said the I/O panel is not your “standard” layout as far as motherboards go. Because this motherboard has onboard video one of the serial ports is the VGA port which isn’t a big deal because only legacy hardware uses serial ports and if you need more than one it’s probably time to upgrade anyways. It also has onboard sound and an onboard NIC which are down towards the bottom of the motherboard. I really like that this board has a lot of things onboard even if you don’t use them its nice to have them there as an option.


The jumpers on the motherboard are in a good place all in the bottom right corner where they usually are. There are the standard jumpers for all of the case LEDs, speaker, power, and reset switch. Down with all the jumpers is a fan header for the intake fan of your case and a WOL connection for your NIC.
There is also a set of jumpers for the Dr. LED which is an optional upgrade, jumpers for the IrDA and also some jumpers for a COM2 which if you need another serial port can be added. You can see right next to the COM2 jumpers there are traces for a memory stick and smart card but are not a feature of this motherboard.
In this picture there two sets of blue jumpers for the second and third set of USB ports. You can also see the dual BIOS setup on this motherboard which is again another option upgrade which should have been included because its a really good thing to have but if it doesn’t come stock it doesn’t help much.


On the other side we see the onboard PC speaker which I always like because then you don’t need to have another one inside of your case taking up room however little room that might be. There is also he CMOS battery which is somewhat odd because the battery is usually right next to the jumper that clears it. Right above both of those things are the CDROM cable connections if you are going to use the onboard audio. Right above that is the SPDIF jumpers which again is another option that should be included.
The heatsink on this northbridge is a passive one and is held on by 2 little wire clips. I am used to the passive cooling on AMD setups so to me this was a little strange but that’s probably just me. The AGP slot and another fan header are also in the picture along with a mosfet which has a little heatsink on it because they can get hot. I went ahead and took off this little heatsink to find the 845G chipset which basically looks like a socket 370 Pentium III that is soldered to the motherboard.


The motherboard has 3 DDR slots which can hold up to 2GB of PC1600 – PC2700 memory. I don’t like where the DDR slots are placed in relation to the AGP slot because you will not be able to add or remove memory when you have an AGP card installed which can be a real pain because when trying to add memory or troubleshoot you don’t want to have to take the video card out. You can see the ATX power supply is right next to the DDR slots and the IDE connectors are in a good location right in the middle of the motherboard right under the DDR slots, a.


The socket of the motherboard is right at the top of the motherboard and has the standard Pentium 4 heatsink clip layout. The socket of this Pentium 4 is really small compared to AMD’s socket A, something that I do like is the arm on the socket that opens it up is longer than the socket so it is easy to get a hold of which is usually a little harder on AMD motherboards. There is also another fan header that is right next to the socket for the heatsinks fan.