
Sprint straight ahead and climb over the fence. Jump over the next fence you come on. Drop down to the ground now and go into the vent on the right. Navigate through this vent and then go into the next one. As you navigate through this vent, keep an eye out for a path that leads to the right, downwards. Keep going in this direction and it will lead you right to a Riddler Trophy. Next, get back into the vent and head towards the right to drop down back to the ground. Sprint deeper into this room and crawl into the next vent. Crawl out of the vent and stay put on this platform.
+—-S a n a t o r i u m—-+
Drop down to the ground, go into Detective Mode and keep an eye on the guard on the other side of the wall. Spray some of the explosive gel onto this wall and detonate it to immediately take him out. Take cover behind the pillar and wait for some of the henchmen to come and check on him. Wait for them to bunch up and sprint right out, swinging for the fences.
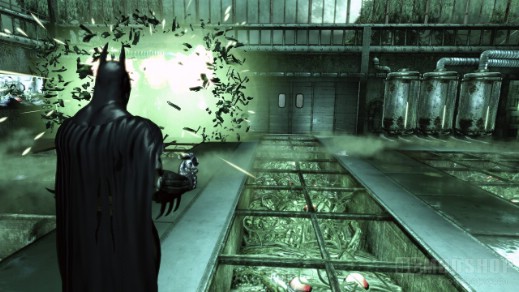
If you start to get into trouble just look up at any part of the room and grapple onto the gargoyle. As usual, grapple around very quickly to lose them. Now, you can use a glide kick + ground takedown to quickly dispose of any the remaining henchmen. Now time to head over to the cubicle on the right portion of the room, to find the doctors. Stay against the wall the doctors were on, and turn left (basically go as far away from the vents you came in from as possible), and look for a little office. You will find an Interview Tape.
Talk to them, and then turn around and sprint straight ahead to jump over the ledge when you arrive to it. If you turn left now, and turn left again to the little area in the corner here, you will come across a detonable wall, and inside you will find a Riddler Trophy.
| Riddler Challenge | |
 |
“TICK! TOCK! News flash! Someone is not getting out of here alive.”Drop down to the bottom floor of the Sanatorium and make your way to the doors. Don’t go in though, instead, turn around and face the south. Go into the first opening to Batman’s right (in the west). You should see a little chamber here, and it’s filled with skeletons and skulls. Take a scan of the chamber to solve the riddle. Make sure to position yourself so you can get as much of the chamber in your shot as possible. |
Now, head through the doors to the next checkpoint.
+—-U p p e r C o r r i d o r—-+
Turn left up the stairs and sprint down the hallway. Once you come to the fork, turn right and follow the stairs down to the Surgery Room. Go up to the man on the dentist chair and talk to him. Get ready for a battle here. A group of enemies are going to drop down, but don’t worry they are all melee. Go at them the normal way, but do watch out for the guys that goto the walls and get these bricks to throw at you.
| Riddler Challenge | |
|
“Shhhhsshh! Rumors persist that Tommy Elliot operates in Arkham. Can it be true?”After dispatching this wave of guards, look up to where they jumped |
Once you grab this riddle, head back outside and run up the stairs. A box will blow up in the hallway and a bunch of Joker Teeth are going to appear, so collect the XP.
Continue down the hallway and ignore the path to the left to keep going. Get into detective mode and watch for the two melee guards coming up. One of them have a pipe, but no big deal. Open the door to get into the Patient Observation room. Immediately dispatch of the guards here.
+—-P a t i e n t O b s e r v a t i o n—-+
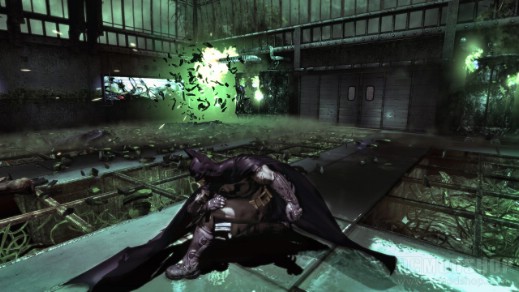
Look up now and grapple up to the vents. Look up again and see if you can grapple one more time. If yes, do so. If no, look around for the small vent door and help yourself through.
You’ll now be in a room full of that poison gas. From where you are, move to the right, and get into Detective Mode. You should see an Extractor Control Panel next to the fan in the west, below. Throw your Baterang at it to lower the gas for one level. Now go over and jump on to the platform where the panel is. Now sprint straight ahead and climb up the platforms in front. Once you reach the final platform, and you can’t go anywhere anymore. Turn around and face the platform you just jumped from. You should be able to see the second Extraction Control Panel. Throw your Baterang on it. All right, no we’re just about finished. For this last bit, look towards the henchman who is hanging in the room. Aim your Baterang at the line he’s hanging from and throw.
Time to position yourself so you can see into the room the henchman just crashed into. The final Extraction Control Panel is there. All right, jump down now and go into the office the police officer (Aaron Cash) and the doctor were in. You’ll find another Interview Tape on the table. Leave this room now.
| Riddler Challenge | |
|
“Was this fire fly too hot off the press?”Still on the bottom floor of the gas room, head into the room that the henchman crashed into. You should see a surgical chair here.Look to the corner in the right once you come in, and you should see a couple of newspapers. Go into first person mode and one of them reads “Firefly Escapes.” Scan this newspaper to solve. |
All right, now circle around and look for the door behind the office Aaron Cash and the doctor were held. Sprint down this hallway and out this door to head back to the Upper Corridor.
+—-U p p e r C o r r i d o r—-+
Sprint down the hallway and you’ll find another exploding present with Joker Teeth inside. Sprint down the hallway now and turn right when you can. Sprint down the hallway and you should soon come to a set of stairs. You’ll recognize that to the right is the Sanatorium again. Instead of going there, head down the stairs to the left. Sprint down the hallways and keep following the path. Get into detective mode and keep an eye out for the three henchmen outside of the X-Ray room.
+—-X – R a y R o o m—-+
As soon as you come in, go into Detective Mode and walk to the detonable wall ahead. Plant some Explosive Gel here. Circle to the left now, still in detective mode. Turn right when you pass the initial hallway and you should see another detonable wall. Plant the Gel on this one as well, and detonate the walls. Leave the X-Ray Room and head back to the Upper Corridor. Sprint down the hallway. Watch out when you come to the present this time, though. A guy armed with knives is going to pop out as well. Use your Cape Stun on him before striking . Follow the hallways back to the Sanatorium.
+—-S a n t i t o r i u m—-+
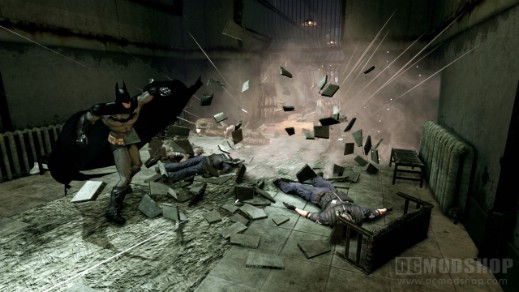
After the cut scene, you’ll find yourself at the top of the gargoyle statue. This part won’t be too difficult. Go into Detective Mode to get a good view. Watch for the guards to separate off, and focus your Glide Kicks on the lone guys. Once you knock one out, immediately get back up to the vantage point. If you’re lucky, a guy is going to come check on his fallen comrade, leaving himself wide open for another Glide Kick. Either way, just repeat the strategy of attacking the lone guards.
| Riddler Challenge | |
 |
“A question can only be answered from a new perspective. Don’t you agree?”Grapple back up to the upper floor of the Sanatorium, and make your way to the western side of it. Go into Detective Mode and look for a detonable part of the floor (not in a cubicle). Set the Explosive Gel on there and stand clear of the floor when you detonate it, so that you won’t fall through. Ok, now stand next to the square hole in the ground, and position Batman so he’s looking at the north. Look down at the square in Detective Mode and you should see the top hook of a question mark. The circle is on the bottom floor, below. Take a few steps back from the square hole and manuever the camera to line up the queston mark. Scan to solve. |
Once everybody is disposed of and you’ve got the riddle, head into the elevator with the title “Morgue” on top to get to the next area.
+—-S e c u r e A c c e s s—-+
Watch the brief sequence here and turn to the left. Go into Detective Mode and spray some Explosive Gel onto the wall here. Blow it up and head on through. Run down the hallway for a bit and keep descending. The next little bit is going to be very linear, so there are no directional challenges. Soon, you will come across a brief scene with Commissioner Gordon. Once it’s finished, look to the right of where he was to find a little vent. Time to crawl on through. Head over to the body on the ground and watch the brief sequence. Once it’s over, sprint straight down the hallway. After a little while, you hit a door. Head on through to go into the Morgue.
+—-M o r g u e—-+
Walk around the room here and leave the room. You should notice that you end up another place altogether. Don’t worry, it’s all part of the mind ****. Just walk to the centre of the room now and open up the body bags. Get ready for some fun. Once you’ve opened everything up, make your way towards the door and you’ll notice everything is just getting very weird. It’s starting to rain, the building is in shambles. Just keep going directly ahead and you should soon come to a cinematic.
All right, for this battle we’ll have to fight him with our brains. You have to avoid Scarecrow’s gaze at all costs. It’s like a searchlight/laser beam. Begin by running right up the stairs. Wait at the brick wall corner for Scarecrow’s gaze to pass. Sprint straight across the next long walkway. Crouch behind the small wall when you reach the fan and the gap. Jump across the gap when the coast is clear and climb up the ledge. Climb up the next ledge and shimmy over. Climb up when you are able. Before jumping across the next gap, take cover behind the wall.
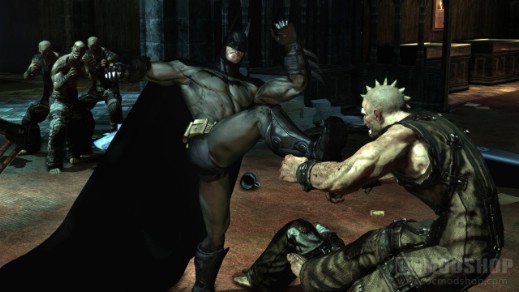
You’ll soon come to a wall with three… “freezer” doors that open and close. Take cover here for a bit and wait for the Scarecrow’s gaze to pass. As you wait here, take note of the wall to your right. It is detonable. Plant the Explosive Gel on it and stand behind the wall as you detonate. Scarecrow is going to come check on the explosion. When it’s looking to YOUR left, sprint right and jump across the gap. Don’t stop and make a full sprint through the obstacles. When you reach the stairs, wait here for Scarecrow’s gaze to pass and sprint to the light. Hit the Run Button to use to end this sequence.
| Riddler Challenge | |
|
“What silent killer of the oceans can be found in a tiny jar?”Before leaving the Morgue room, go to the very centre to find a few surgical beds. You should also see a jar nearby. Go into first person mode and scan the label that reads “The Great White Shark” to solve. |
All right, time to leave this room through the doors now. Follow the arrows on the ground down the hallway here. Batman will briefly halt to look at the body. Go into detective mode and look at the door. You should see three guards on the other side. These guys all have knives, so be sure to set up your attacks with Cape Stun. Follow the arrows again and you’ll come to a few Joker Teeth. Follow the arrow up the stairs and turn right into the room. Head through door in here to get into the Experimental Chamber.
+—E x p e r i m e n t a l C h a m b e r—-+
Head straight down this hallway towards the next room. When you come in, look at the table to your left and you should find the Riddler Map on here. The Riddler Map will show each of the Riddler secrets on your own map (Select).
| Riddler Challenge | |
|
“Is this bear the Bane of his life?”On the same table as the Secrets Map is a Teddy Bear. Scan this bear to solve the riddle. |
Go up to the window and you should see Harley Quinn with Gordon. Turn to the right now and open up the vent door. Navigate your way through the vent to head down to the floor below. There’s another vent in here, so get your ass in. Once you arrive out of the vent again, you will be in a fortress of sorts. Do note that in order to complete this part successfully, you must take down each guard without being detected. Won’t be too difficult though.
Get into Detective Mode and immediately crouch walk to the guard to your right and deliver the Silent Takedown on him. Ok, so you should see that there’s another guard to the right of him as well. Crouch walk over and Silent Takedown him as well. There are two more guards to the left. One might be on the lower portion of the room. Start with the one who’s on your level. Crouch walk to him and take him out. For the last guy below, wait for him to walk up so he’s on the same level as you are before disposing of him.
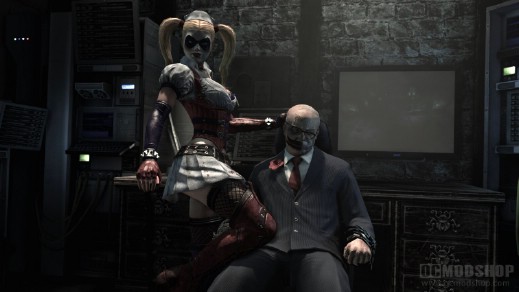
Go to the area below Harley Quinn now. Look for the stairs leading up to where she’s standing. Once you reach the Security Gate, grapple up and you are now standing above Harley and Gordon. Be sure to grab the Riddler Trophy to your left. Now, stand on the glass in Detective Mode and hit the Takedown action to initiate a cut scene.
– B a n e – (Boiler Room)
This battle is actually pretty simple. For the most part, focus on avoiding Bane’s attacks. You do this by double tapping the Run Button + Left/Right on your left stick. His attacks consist of a tackle, throwing boulders at you, and melee strikes. The time to strike is when he uses his tackle manuever. Try to position yourself so you’re nice and far away from him. As he charges, throw your Baterang from the hip (L1). As SOON as you throw it, dodge to either the left of the right to get out of the way. Bane will now charge into the wall. Watch him after he does this. If he grabs onto his eyes, sprint up to him and swing for the fences. As SOON as his hands leave his eyes, get the hell out of the way. Note that the fourth and last strike of your combo is Batman jumping onto Bane’s back and taking a swipe at the tentacles in his neck. When Batman swipes all of them, this battle will be over.
Repeat the above method until Joker summons the goons on you. When this happens, it’s still important to keep your eye on Bane. Throw some combos on the goons, but if Bane throws a boulder at you, get the hell out of the way. Try to use Bane’s attacks to KO some of the henchmen by getting out of the way at the last second. Once the battle ends you will find yourself back on Arkham Island, outside.
Arkham Island
You’ll find yourself in Arkham West. Our target is in in the central portion of the map, by Intensive Treatment. Let’s make our way across the field here, keeping to the left, towards Arkham North. Head through the Arkham North doors and up the hill. Turn to the left now and through the small door here. Now time to head towards the Arkham East. You’ll run into three henchmen along the way, but they are nice and easy to handle. There is that one guy with the knives, so you’ll have to Cape Stun him first.
Stand in front of the Arkham East door but don’t head through. Instead, turn to the right and sprint towards this fence. Sprint straight ahead and head turns the cave opening. Once inside, grapple up and scan the Chronicle of Arkham. Now turn to the right and head towards this opening. Grapple up here and head through the door. Turn left and sprint straight down the long corridor. Once you reach the room with the moonlight, turn to the right and blow up the wall to find a Riddler Trophy. Now climb up the only ledge in this room and head back outside to activate another cinematic.


9 comments
how do you get to the bat cave please? my husband is lost and driving me crazy :0
i have a game on my pc, but i want to jump from the high places with his wings.
when he use his wing he jump to a far places.
i want to know what is the botton i use for this jump. i feel stuck here
thank u
how can i get the trophy behind bars?
After spending approx 3hrs crawling over every flippin inch of the Mansion last night I have just read the ever so easy answer of how to get into Dr Jones office. Thank you soooooomuch you've saved my sanity (how ironic!)
– yeaaa these were GREAT instructions! Thankss Chaos Demonn!
Nice walk-through. Very nice. But seriously… Chaos Demon? I'm sure your mom didn't name you that? Watched a lot of "Hackers" when you were a kid, eh? Trying have one of those 1337 names? Just put your real name on the damned thing and stop the nonsense.
Sincerely,
CrYsTaL MeTh
Just leave him alone, hes helping, who cares what his name is
I ask that all OCMS staff use their real names for professional reasons. Even I don't know Chaos Demon's real name, and he didn't want to provide it for personal reasons. He's a guest contributor, and I'm happy to publish more from him.
How do I go across large gaps?
Comments are closed.