
• Sign in / Join

Login

Forgot your password?
Do not have an account ?Register here
X

Register

Have an account?Login here
X
  • Home
  • Blog
  • Image Gallery
  • News Archive
    • Hardware News
    • Gaming News
    • Affiliate News
Trending now

Why We Defend Our VR Hardware To…

Star Wars Zero Company: A New Era…

Star Wars Zero Company, VR Hardware Tribalism,…

11 Hidden Windows 11 Settings You Didn’t…

Mangmi Air X: Can It Handle PSP…

Xbox Anniversary, AYN RTX, and AI is…

I Found Leaked Footage Of The New…

The AI Slop Myth | Why You…

R36S Review: The best $40 you’ll ever…

Steam Frame adapter, E-Day, and Xbox Protests…

OCmodshop.com

  • Hardware
    • Audio
    • Cases
    • Coolers
    • Gadgets
    • Home Theater
    • Input Devices
    • Laptops
    • Memory (RAM)
    • Motherboards
    • Networking
    • Power Supplies
    • Processors (CPU)
    • Storage
    • Video Cards
  • Gaming
    • Gaming Accessories
    • Game Walkthroughs
    • PC Games
    • Xbox
    • Playstation
    • Nintendo
  • Articles
    • How-To Guides
    • Case Mod Projects
    • Software
    • Event Coverage
    • Movies
    • Interviews
  • Podcast
FacebookTwitterYoutubeSpotifyTwitchSteam
Game Walkthroughs

Complete Halo 3 Walkthrough

by Brad RussellSeptember 28, 2007June 27, 20140293
Share0

I made this a separate section because I believe you must pursue these things in a second or separate playthrough of your first one. I have left a few  terminals in the main walkthrough.

Skulls

When you find a skull, just hold RT until you pick it up, then drop it and  you get credit for finding it. And you must start from the beginning of the level in order to find any skull, so you can’t start from a major checkpoint.

You can get these on any difficulty setting except easy. You can find the skull and then save and exit if you like to unlock it.
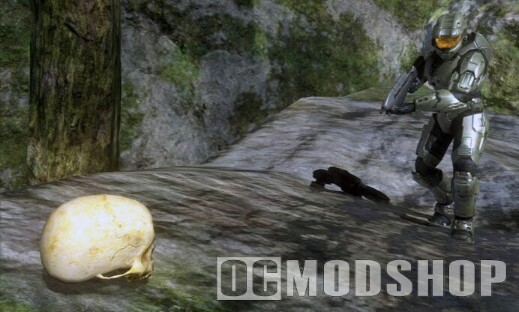
The skulls add points to your meta-game, where you play the main game for  points. So turn them on to up that score.

And note that grenade jumping is when you toss a Plasma Grenade to your feet (not sticking yourself) and then you jump as it explodes to get more air.

Silver Skull Locations

Name Reward Level Location
Blind Your HUD and gun will go away Sierra 117 After the first Phantom drops off enemies in the pool of water,  go straight ahead to the cliff and go to the far right. Look down and drop  to the rock sticking out and pick up the skull.
Grunt Birthday Party Confetti thrown for Grunt headshots, and it does just a wee bit damage. Crow’s Nest In the Drone Sewer before you drop down to the Arbiter, stop before you fall down the pipe (this is before the Arbiter is in view). Under your feet is a small space that you can see below the floor. Hug the side and try to fall so that you land back into that space.
Cowbell Stronger Explosions The Ark One of the harder ones to get. You must first get a Grav Lift in  the building near the Scarab battle. Take this lift with you into the building up the ramp as if you are continuing the mission.  After you fight some enemies in a room with the exploding things, the skull  is in the corridor leading downward. At the curve, set the Grav Lift down and try to make it to the areas above. The skull is on the highest platform, so if you fail then you need to reload your last checkpoint and keep trying.
I Would Have Been Your Daddy New dialogue in the game. The Covenant Location: After Truth is dead, kill all the Flood in the area. That means move through the level to the exit, killling all the parasites, but don’t exit the area. You must jump through the rings along the level in a certain order. The order is: 4654534. 1 is the ring near start of the bridge, 7 is near Truth. The skull appears near the bridge that leads to Truth.


Gold Skull Locations

Name Reward Level Location
Iron Death means you restart the level. Sierra 117 In the dam area (ha, more dam jokes could be said). It’s on the  structure behind the building where you find Johnson. Go right, jump up to a ledge, follow it all the way left, and the skull is in the corner.
Black Eye You must melee friends or foes to recharge you shields. Crow’s Nest Turn around at the start of the level and go up the stairs. Jump up to the ledge on the left and then up to the pipe. Follow the pipe to the skull.
Tough Luck Enemies dodge stuff and fight to the death. Tsavo Highway After the first shield blocking a tunnel, at the end is some piping on the left. Under these pipes are some beams, but you need to jump on the first one. Follow it to the end and go left to find the skull on a cliff ledge.
Catch Enemies use more grenades. The Storm In the area with the Wraiths, don’t kill any. Look to the structure next to the AA Wraith and get to the top of it. Use grenade jumping, or use  a Warthog. You can kill everything except the Wraiths and even the Wraith gunners.
Fog No radar. Floodgate Returning from the destroyed AA gun, the start of the level, look up the right when you hit a ramp and a checkpoint. Kill the Flood on the  roof and it will give up the skull. Hope the skull doesn’t get stuck, because mine did the first time.
Famine Less ammo in enemy guns you pick up. The Ark When you get the second drop-off, instead of going left to the wall first, go right. Kill the Ghosts and scale the jumpable rocks to reach the  structure above you. The fourth beam has the skull up there, so either grenade jump or co-op jump, or toss up a grenade, or use deployable cover, or some  other way.
Thunderstorm All enemies are stronger (improved ranks). The Covenant When you get the Hornet, fly to the tower that the Arbiter disabled and find the skull at the top.
Tilt Enemy armor is stronger. Cortana In the large room with a lot of Flood and where the Cortana moment includes “I like to play games too.” Go to the left for some ledges along the wall. Jump up these and then jump to the ones on the right when you can. When you get to the top, the skull is up here.
Mythic rder to kill enemies. Halo Follow the right rock wall to the skull. Like, it will lead you  there if you hug it to an off-shooting path.

Terminals
These are very mysterious things. These is nothing you have to do special, just find them and read them (though I think all you have to do is get the  alert then be redirected).

There are seven in the game, and only in three levels. When you access one it will take you to a screen of text, then an alert will pop up, and then you get taken to another text screen.

The Ark Terminals —————–

1. Soon after starting, the first building will be a door on the left that  leads to a corridor with the terminal.

2. In the building where you let the vehicles across the bridge, directly behind the control panel.

3. After defeating the Scarab and getting into the final building there will be a room with sleeping Grunts. Go through the corridor and you run into a  fork in the road where you can go either direction. Under the stairs is the room with the terminal.
The Covenant Terminals ———————-

4. Near the first elevator in the first tower, jump across the gap to find  the terminal in a dark room.

5. In the second tower that the Arbiter cleared. It’s just near the door.

6. Same as #4, but in the third tower.
Halo Terminal ————-

7. In the beginning of the level, after the first cave, hug the right wall and onto a building. Go left and you got it.

Post Views: 402
1 2 3 4 5 6 7 8 9 10 11 12 13 14
Pages ( 13 of 14 ): « Previous1 ... 1112 13 14Next »
HaloMaster ChiefShare0
previous post
Dragonball Z: Budokai Tenkaichi 3 Hands-on Preview
next post
To All Those Using Limewire
Brad Russell

Related posts

Latest Halo 3 Info, Screenshots & Posters!

Alan McCloskeyMay 14, 2007June 17, 2011

“Halo 4: Forward Unto Dawn” Live-Action Series Premieres

NewsOctober 5, 2012June 29, 2014

Halo 4 Crimson Map Screenshots

OCmodshopDecember 6, 2012June 28, 2014

Latest podcast

Recent Posts

  • Why We Defend Our VR Hardware To The Death
  • Star Wars Zero Company: A New Era In Real-Time Strategy Games
  • Star Wars Zero Company, VR Hardware Tribalism, and Tech News | Episode 16
  • 11 Hidden Windows 11 Settings You Didn’t Know Existed
  • Mangmi Air X: Can It Handle PSP Emulation?
  • Xbox Anniversary, AYN RTX, and AI is taking over | OCmodcast ep 15
  • I Found Leaked Footage Of The New Steam VR
  • The AI Slop Myth | Why You Can’t Escape Integration
OCmodshop.com
FacebookTwitterYoutubeSpotifyTwitchSteam
@2026 - ocmodshop.com. All Right Reserved.
  • About Us
  • Terms of Use / Privacy Policy
  • Copyrights
  • Our Rating System
  • Publish an Article on OCmodshop
  • Contest Rules
OCmodshop.com
FacebookTwitterYoutubeSpotifyTwitchSteam
  • Hardware
    • Audio
    • Cases
    • Coolers
    • Gadgets
    • Home Theater
    • Input Devices
    • Laptops
    • Memory (RAM)
    • Motherboards
    • Networking
    • Power Supplies
    • Processors (CPU)
    • Storage
    • Video Cards
  • Gaming
    • Gaming Accessories
    • Game Walkthroughs
    • PC Games
    • Xbox
    • Playstation
    • Nintendo
  • Articles
    • How-To Guides
    • Case Mod Projects
    • Software
    • Event Coverage
    • Movies
    • Interviews
  • Podcast
Manage Consent
To provide the best experiences, we use technologies like cookies to store and/or access device information. Consenting to these technologies will allow us to process data such as browsing behavior or unique IDs on this site. Not consenting or withdrawing consent, may adversely affect certain features and functions.
Functional Always active
The technical storage or access is strictly necessary for the legitimate purpose of enabling the use of a specific service explicitly requested by the subscriber or user, or for the sole purpose of carrying out the transmission of a communication over an electronic communications network.
Preferences
The technical storage or access is necessary for the legitimate purpose of storing preferences that are not requested by the subscriber or user.
Statistics
The technical storage or access that is used exclusively for statistical purposes. The technical storage or access that is used exclusively for anonymous statistical purposes. Without a subpoena, voluntary compliance on the part of your Internet Service Provider, or additional records from a third party, information stored or retrieved for this purpose alone cannot usually be used to identify you.
Marketing
The technical storage or access is required to create user profiles to send advertising, or to track the user on a website or across several websites for similar marketing purposes.
  • Manage options
  • Manage services
  • Manage {vendor_count} vendors
  • Read more about these purposes
View preferences
  • {title}
  • {title}
  • {title}