

I’ve noticed *alot* of help topics about the same things on the boards. So, let’s get to those first eh? There may be spoilers in this section, just so you know. I will cover everything in the guide in full, but here’s some ideas on what to do and what may be wrong for a few of the tougher spots.
————————————————————-
Where are all the Darkling Outfits? See full guide when it’s up for more detail on these if you need it.
Broken sword: Broken Sword one is in Chinatown. As soon as you get out of the subway. Walk straight up the stairs and continue straight. It’s right there.
 Fireman: Grinder’s Lane in the 261 room where you kill the snitch Petey Pajama on the side mission.
Saw: Help the girl at the subway station (first one) get her keys. She complains about being locked out of her apartment by her boyfriend. You go to her apartment and it’s there (directions are given in this side mission). See full guide when it’s up for more detail if you need it.
Sledgehammer: The last guy on Vinny’s list. By Shrote’s apartment entrance. The open window with the guy who’s monitoring him. It’s in there on the wall to the right.
Jackhammer: Going to City hall, in the abandoned subway car before you get to the Turkish baths.
Golf Club: Any phone, dial 5664
2K: dial GAME (4263) at any phone.
Jungle Outfit: You need to restart Chapter One via checkpoint menu at the main title screen. Don’t worry, while you lose checkpoint save you won’t lose chapter save and details on your hearts eaten, etc when you restart where you last were. This can ONLY be done during the section of the game, it’s blocked if you try to go back at any time after.
After you get past the first helicopter part (after you first meet butcher) go through the pool hall. After you exit the pool hall you should be in a place were there is a bum who asks for money and you can also ask him about dutch oven harry. Now there is a door on the LEFT wall, above it is a vent that you can send the creeping dark through. Go in there and you will see a hole in the vent. You can’t miss the hole. Anyways go down into the room were there is a collectible and the jungle outfit (known as the machete outfit).
 ————————————————————–
Where are all the collectables, including the one’s in Hell? A disclaimer. Between my two buddies and myself, we found ALL these without using the strategy guide or any websites. If you have anything to add to it, I will most definately credit you, just email me. I am still missing all of the #40s as of this update. You can cover yourself and have most all of them by calling all the phone numbers too, but some still slip through the cracks. Good luck searching, to everyone!
Construction Site:
Collectible # 1 – At the beginning of the game, after you shot open the door with your very first pair of guns.
Collectible # 89 – Located on the second floor of the construction site.
Cemetery:
Collectible # 2 – Inside the garage, located outside of the cemetery.
Collectible # 29 – Inside the locked room, towards beginning of the level.
Canal Street Station:
Collectible # 3 – Inside the station, by the waiting platforms.
Collectible # 19 – Behind info kiosk near the Lower East Side exit.
Collectible # 34 – Behind info kiosk near the Trinity Cemetary exit.
Collectible # 88 – Located directly on the train tracks at far end.
Chinatown:
Collectible # 4 – Inside Joey Skeletons apartment.
Collectible # 5 – To the right of the intersection, behind the dumpster near where one of the mobsters hangs out. You’ll see him walking around the area.
Collectible # 53 – To the left of the first intersection, past the two mobsters on the corner, and through the side entrance.
Collectible # 90 – In Mulberry Alley, next to the summon portal on the ground.
Collectible # 91 – Next to the phone booth, where you first meet the guy getting interrogated about Jackie by the two thugs.
 Lower East Side:
Collectible # 6 – Inside the Butcher’s fridge/storage room.
Collectible # 7 – Inside the phone booth by the road, towards the exit of the alley.
Collectible # 20 – Inside Sarah’s apartment.
Collectible # 35 – Inside the Whitefish, underneath a container. (careful on this one, it’s one time only)
Collectible # 54 – In the alley outside of Whitefish, on top of a container.
Collectible # 55 – Inside the second ventilation opening in the alley.
Collectible # 56 – Take a left towards Sarah’s apartment, in the alley which is the furthest away from your position.
Dutch Oven Harry’s Place: (ALL one time only)
Collectible # 8 – Outside of the pool hall.
Collectible # 57 – Inside the kitchen on the third floor.
Collectible # 9 – Under the table where Roach was sitting.
Collectible # 58 – Behind the barricade on the stairs.
Collectible # 59 – Next to the railroad track when Harry takes a fall, underneath the air conditioner unit.
Collectible # 97 – By the Golfshirt Outfit secret area, in the ventilation shaft above the basement.
Fulton Street Station:
Collectible # 10 – By the wall on the other side of the platform, by the tracks.
Collectible # 95 – In the last toilet booth in the men’s bathroom.
Collectible # 96 – Near the closed off railway line.
Grinder’s Alley:
Collectible # 11 – Inside the room with the whiteboard.
Collectible # 36 – Inside the vent to freezer room.
Collectible # 60 – On the house bridge, above the stairs to the subway.
Collectible # 61 – Behind the gates that lead to Orphanage.
Collectible # 62 – On a little roof above the entrance to the freezer.
 St. Mary’s Orphanage:
Collectible # 12 – Outside on the streets, wedged in between two buildings.
Collectible # 98 – Outside the door leading out from the second floor.
Collectible # 99 – On the second floor, by the first ruined area, around the wall to the right, inside the bathroom.
Collectible # 100 – Inside the classroom.
Trenches:
Collectible # 13 – Down the hatch, into the secret area. To the left of the Pestilence Statue/Being.
Collectible # 14 – Above the middle of the trench in the beginning. You have to exit trench first then backtrack around the sides up top.
Collectible # 38 – On tunnel ledge outside of middle bunker.
Collectible # 63 – By the wall that you break during the tank ride.
Village:
Collectible # 15 – Use the Creeping Dark power to crawl through a hole in front of the harmonica guy, and at the end of the sewer.
Collectible # 16 – In the broken building next to the Church, close to the horse.
Collectible # 28 – On the way to sewers.
Collectible # 64 – On the second floor of the church tower.
Collectible # 65 – By the little area with a ladder, where you get up from the water.
Collectible # 66 – On shelf in small room close to entrance of the sewers leading to the trenches.
Sewers:
Collectible # 17 – To the right of the pump-door, and jump down.
Collectible # 67 – Inside the drain-pipe, take a left instead of going straight forward.
Cannon: (ONE time only)
Collectible # 18 – Beneath the front of the train.
Collectible # 26 – On the left side of the cannon, on top of the train.
 Collectible # 27 – By the huge gates.
Collectible # 68 – Beneath the catwalk in the small room on the 1st floor.
Gun Hill: (creeping dark can reach many of these, even after the story mission part is done)
Collectible # 21 – In the bookcase, in Eddie Shrote’s living room. Can still be collected after story using Creeping Dark to enter via skylight.
Collectible # 69 – On top of the little roof by the phone, just when you enter Gun Hill.
Collectible # 70 – On top of the exit to the roof, when you’re fighting the helicopter.
Collectible # 71 On roof outside of Eddie Shrote’s apartment, when the helicopter is attacking you and you have to run away.
City Hall Station:
Collectible # 22 – Located by the road-worker outfit, inside the old train you first spot.
Collectible # 23 – In toilet stall before ambush.
Collectible # 30 – On scaffold in ambush room.
Collectible # 72 – Near the sewer lines, sitting on top of a small metal grate.
Collectible # 73 – Ledge on wall in the corridor leading to ladder up to Turkish Baths.
Collectible # 81 – Left of the stairs, towards Ernie Deval’s (crazy hobo with molotovs) location.
 Turkish Baths:
Collectible # 24 – Inside the first pool/bath.
Collectible # 25 – Located inside the sauna.
Collectible # 74 – After opening the steel gate, walk to your left and pick it up.
Collectible # 75 – On top of the scaffolding, near the paint buckets.
Collectible # 82 – Head to your right, instead of towards the briefcase room.
Castle:
Collectible # 31 – On the catwalk, above the shell cart.
Collectible # 32 – Below the scaffolding bridge leading to the castle.
Collectible # 33 – Inside the castle, to the left, opposite of the stairs to Dark Jackie area (when you first enter).
Collectible # 76 – Underneath cannon tracks.
Collectible # 77 – On face of cliff towards castle.
Collectible # 78 – Towards the end of the sewer pipe
 Tankride
Collectible # 83 – After shooting the beast with tank, in a side room from the main path.
Darkness area:
Collectible # 84 – Behind the broken down gate.
Pier 19:
Collectible # 37 – At the lowest level of the ship, with all the containers, in the one furthest away.
Collectible # 85 – After knocking the mobster down into the water.
Collectible # 6 – Use Creeping Dark to get on top of a container, and grab the collectible.
Collectible #37 – In a garage nearby? (work in progress)
Collectible # 92 – Furthest point from the dead end alley, at the beginning of the mission.
Collectible # 93 – Beneath container where the workers argue. Use the Demon Arm to move containers, may have to kill the armed workers first. (GO HERE BEFORE PLOT EVENTS OR IT’S GONE FOREVER)
Collectible # 94 – Front of ship, underneath the stairs.
The Hills (again):
Collectible # 79 – Inside the fireplace of a house ruin.
Collectible # 80 – Inside the trenches that are near the large cross.
Collectible # 87 – On the ledge, opposite where you enter Hills.
————————————————————–
That’s not quite right! And it’s ALL your fault!!! I NEEEEED to find all these and I can’t. Do you know of another list, or secondary methods you haven’t tried yet?
Well…no, it’s not really, and that’s not even a question, BUT, here’s a second list, thanks to Namingstandard of the gamefaqs.com boards and a few credited to my buddy Xand for searching em out with me over Live chat this past weekend. I will mark those that I’m still not certain of. This list is chronological and by area.
 Graves End Construction Site:
#01 – at the beginning of the game, on the floor right in front of the door with the lock that you have to shoot off #89 – located on the second floor of the construction site, jump off the lift as it rises and then jump across the gap to find the note at the end of the path
Trinity Cemetery:
#02 – after you get past the car blocking the gate, send creeping dark inside the half-open garage that’s located directly outside of the cemetery and you’ll the find the note on the floor
#29 – once the Darkness has manifested, head back towards beginning of the level and use creeping dark to crawl through the vent on the locked door, the note is inside the room
Canal Street Station:
#03 – inside the station, on the waiting platform at the end closer to the Lower East Side/Trinity Cemetary stairs
#19 – behind info kiosk near the Lower East Side exit
#34 – behind info kiosk near the Trinity Cemetary exit
#39 – SIDEQUEST HADEL1 (chapter 1)
#40 – SIDEQUEST CUTRONE (chapter 3)
#45 – SIDEQUEST HADEL2 (chapter 3)
#46 – SIDEQUEST CUPS (chapter 3)
#47 – SIDEQUEST WILLIS (chapter 3)
#51 – SIDEQUEST SCARDINA (chapter 5)
#52 – SIDEQUEST BLACKMOORE (chapter 5)
#88 – directly on the tracks of the working train line, near the end closer to the Lower East Side/Trinity Cemetary stairs
 Chinatown:
#04 – inside Joey Skelton’s apartment, get this during the CUTRONE sidequest (chapter 3)
#05 – behind a dumpster that’s near some shipping crates at the corner of Orchid and Harcourt
#44 – SIDEQUEST CHEN (chapter 1)
#53 – the note is in a small side entrance in the middle of George street
#90 – in the Mulberry alley nearer to Lester, next to the summon portal on the ground by Cutrone’s building entrance
#91 – behind a closed newstand, at the corner of Victoria and Lester
Lower East Side:
#06 – inside Butcher’s fridge/storage room
#07 – inside the phone located on the intersection between Bass and Clark
#20 – inside Aunt Sarah’s apartment bedroom, on a shelf
#35 – inside the Whitefish Pool lot, on top of a shipping crate
#54 – in Whitefish alley, on top of shipping crate
#55 – inside the second ventilation opening in the alley between Bass and Thompson
#56 – in an alley on the corner of Thompson and Raspberry, near Aunt Sarah’s apartment
Hunterspoint Alley:
#08 – outside of the pool hall as you exit
#09 – under the table where Roach was sitting
#57 – inside the kitchen on the third floor of Harry’s hideout
#58 – inside the hideout, behind the barricade on the stairs that’s right outside of the apartment with #57
#59 – after you chase Harry out off the roof, drop down next to the railroad track where his body is, the note is underneath the air conditioner unit
#97 – by the Darkling Jungle outfit secret area, use creeping dark to get through the ventilation shaft above the locked door, below the train tracks outside pool hall
Fulton Street Station:
#10 – by the wall on the other side of the platform across the tracks of the nonworking train line
#41 – SIDEQUEST PULANSKI (chapter 1)
#42 – SIDEQUEST WARBURTON (chapter 1)
#43 – SIDEQUEST MORTARELLO (chapter 3)
#48 – SIDEQUEST DEVAL (chapter 3)
#49 – SIDEQUEST HAZELGROVE (chapter 4&5)
#50 – SIDEQUEST TERRONE (chapter 5)
#95 – in the last toilet stall in the men’s bathroom
#96 – after getting the key to unlock the gate that leads to the City Hall Station and reaching the exit, turn back around and to where the Canal-Fulton train runs, make sure the train has just past and search for the note at the very tip of the tracks, turn up the screen brightness if it helps (chapter 3)
Grinder’s Alley:
#11 – inside the office room with a whiteboard
#36 – as you enter the the small room where Paulie’s money is being kept, look for a vent in the upper left corner and send creeping dark there to get the note
#60 – as you exit the station, turn around and look up, there are a few breakable windows in the building above the station, use creeping dark to go through the rightmost one to find the note on the floor inside
#61 – after you gain access to the orphanage, head back to where the gates were closed before, the note is hiding behind a dumpster all the way in the back, at the dead end alley
#62 – before enter the freezer sections, while still standing outside, send creeping dark up on top of the tin roof to find the note
Saint Mary’s Orphanage:
#12 – as you leave the station, head straight to the end of the street, turn around and you should see the note underneath an elevated concrete ramp
#98 – stand outside the orphanage and send creeping dark up to the second floor, the note is in front of a locked door on the balcony
#99 – on the second floor, by the first ruined area, around the wall to the right, inside a small closed room
#100 – take the first left as you enter the orphanage, the note is on the floor in the classroom
Trenches:
#13 – once you exit the trenches, go straight and you’ll see the remains of a building, on the ground is a breakable hatch and the letter should be down there
#14 – go back to the trenches but stay above them and go past the area of the crashed airplane to the next set of structures, the area that has a soldier hidden above the trench, the letter is the on the ground near there
#38 – after you exit the bunkers by using the kamikaze darkling, turn around to face the opening, the letter is on the other side of the bunker, on the cliff side, send creeping dark up on top of the bunker and to the other side and then go left to find it
#63 – right by Pestilence, the bird creature strung up on the hill
 Village:
#15 – in the tunnel you use to get into the village, the letter is in plain set between the stairs and next to the soldier playing the harmonica
#16 – in the broken house right next to the bridge to Famine, the decrepit horse, and next to the entrance to the church, can’t miss it
#28 – after getting the darkness guns and meeting up with Anthony, go down the hatch he opens for you, the letter is right past the hole you have to crouch under, turn around after you pass it to find it
#64 – in the pipe that leads back into the village river (chapter 4)
#65 – after that, drop into the water and, if you were facing the bridge, turn left to find the way back up, near that ladder is the letter
#66 – right after you get out of the tunnel, turn right and the letter is in the little shed at the end of the alley
The Hills:
**keep in mind that once you get to the Hill area itself, if you stray off the path, you will be teleported somewhere near the hill where Death, the pole where several people are reverse crucified, is on, use Death as a point of reference, wherever it’s facing is the right way
#87 – once you enter, it’s on the platform across from you, on the left, either jump there or use creeping dark
#79 – stay on the path and as you approach the hill, keep an eye on the right, eventually the remains of a house will come into view through the fog, the letter is in the fireplace of this building
#80 – head back to the path and make sure Death is facing you, head up the hill halfway and on the left should be a trench, go through it and the letter is near its end
Sewers: #17 – go up the stairs next to the sewer door you have to drain, once on top, go into the right corner and send creeping dark over the fence, the letter is straight below
#67 – after draining the water, the letter is on the left detour of the sewers
Cannon:
#18 – in the room right before you head outside to where the cannon is, the letter is laying in a corner behind the stairs
#27 – before going into the cannon itself, head towards the big gate, the letter is in the right corner
#68 – inside the cannon, on the first floor inside the second room, the letter is underneath the walkway
#26 – once you’re on top of the cannon, where the hatch to the control booth is, face away from the hatch and use creeping dark to climb up the cannon’s right side ( from what you can see), the letter is there not on the cannon itself but on top of some step like grooves, perhaps the joint of the cannon
 Gun Hill:
#21 – in a bookcase in Eddie Shrote’s living room
#69 – right after exiting the door that leads from Fulton Street Station, you’ll see a small tin roof to your right, the note is on top of that
#70 – after the helicopter blows out a piece of Shrote’s apartment, you’ll drop down after using the ladder, the note is in a corner across from you on this particular roof top (not the next one!)
#71 – this note is right behind the stairwell that you exit out from, on the roof that the helicopter takes off from and attacks and where you later jump off of onto a crumbling scaffold
City Hall:
#22 – by the Darkling Roadworker outfit, inside the old train at the end of the path, just when you enter City Hall Station
#23 – in toilet stall before SWAT team ambush
#30 – on the higher scaffold in the ambush room
#72 – after getting through the knife attackers, as you enter the sewer line rife with traps, the letter is on a pipe grate between the cinder block and flame traps
#73 – on top of a light bulb in the area where you drop down into the corridor leading to the Turkish Baths ladder
#81 – left of the stairs behind Ernie Deval, where you obtain the black hole power
Turkish Baths:
#24 – in the room with the briefcase, the note is behind the fence
#25 – inside the sauna
#74 – in the general area where you have to use the kamikaze darkling to blow open a path, the note is near the iron gate that’s by the blown opening (or Black Hole open)
#75 – on top of the scaffolding, near the paint buckets in the large room with two floors and a skylight, the same area where the SWAT later rappel in from
#82 – as you approach the briefcase room, take a right to find a note lying on the floor
Castle Entrance:
#31 – in the armory bunker, the note is on the catwalk above the shell cart
#32 – near the castle and across the plank bridge, the note is behind one of the light pillars on the right
#33 – inside the castle, to the left, opposite of the stairs to the darkness, the note is in a dirt pile
#76 – underneath the cart platform by the cannon
#77 – in front of the cannon and right before crossing the wooden plank bridge to the castle, it’s next to the left light pillar
#78 – after leaving the cannon area to head to the village and after passing through the narrow cliff path, there should be a note lying at the end of dead end sewer pipe with a grate you can see through
Tankride
#83 – right after defeating the monster with the turret, in the room to the left
Castle Hall:
#84 – behind the broken down gate across from you as you descend the stairs
Pier 19:
#86 – use creeping dark to get on top of a container at the back of the lowest level of the ship
#92 – in a dead-end alley right from the beginning of the area, after you kill the goons in the parking lot
#94 – front of ship, underneath the stairs
These are the ones we’re all still working on, and now you can too!
?? #37 – Found in Chapters 1-4, any time at the Pier BEFORE the plot takes you here. Look for a bright sign that says something like Hardware. Use a Creeping Dark and get past a shutter here to find it.
(Not confirmed by me just yet, but sounds about right) ?? #85 – I *think* it’s as you exit the ship after you kill the Capt… (something to do with a man sitting at the water’s edge that you can kick in? Not confirmed just yet…)
?? #93 – beneath container where the workers argue (I have CONFIRMED this one, must go there BEFORE Chapter 5 and use the Demon Arm on the crates in the way)
 SIDEQUESTS
George Hadel (chapter 1)
on the stairs to the Chinatown exit, asks you to deal with compton scarr, not too far away
Pete Chen (chapter 1)
after leaving Jenny’s, head straight to see two mobsters harassing Chen, kill them then choose to explain yourself
Ingrid Pulanski (chapter 1)
in Fulton Street Station, find her by the working train line tracks, her bracelet is just beneath the platform, around the middle section, jump down and look towards the platform for anything shining by the tracks
Warburton (chapter 1)
opposite Pulanski in Fulton Street Station, talk to her for the coin fetching game, spam the A button as she’s throwing the coins and then pick up any you’ve missed for an easy reward
Moratarello (chapter 3)
near the St. Mary’s Orphanage exit of Fulton Street Station, Vinny sends you on a few assassination missions, most are simple affairs but the last one you’ll find in Gun Hill, near the entrance to Shrote’s building, there’s an open second-story window that you’ll have to use creeping dark to reach
Mitch Deval (chapter 3)
talk to him before leaving for City Hall Station and agree to help him, after killing his brother and finishing the briefcase arc, help him again for the note reward
Hadel Redux (chapter 3)
Scarr’s beaten Hadel up and has taken his harmonic, kill Scarr and his cronies on the Lower East Side and return the treasured musical instrument for the sake of a phone number
Dana Cutrone (chapter 3)
find her in the Canal Street Station sitting by the nonworking train line, you’re told to go to Chinatown, find her building between Mulberry and Lester, there is a door that you can go into from either street, then find her apartment and talk to Joey Skelton
Terence Willis (chapter 3)
at one of the ends of the Canal Street Station platform, asks you to kill a gang that hangs out in the Whitefish Pool lot
Lucas Hellinger (chapter 3)
right behind Willis, his cups game is only winnable after you finish helping with Willis’s gang hit
Jimmy the Grape (chapter 3) **NO NOTE REWARD standing in the middle of Canal Street Station, Jimmy tells you to make a hit on snitch in Grinder’s Alley, make two lefts as you leave the station and find the apartment 216 and let your guns do the rest Hazelgrove (chapter 4&5)
in Chapter 4, as you head out to the Trenches to the tankride section, talk to Charlie Hazelgrove in the underground path, he’ll give you a bracelet to take to his wife, Rosie Hazelgrove can be found later in Chapter 5 in Fulton Street Station, near where Vinny Moratello usually was
Terrone (chapter 5)
“Little Petey”, near the Grinder’s Alley exit in Fulton Street Station, asks you to give a letter to Mickey Famiano in Canal Street Station, simple hide & seek mission
Blackmoore (chapter 5)
right before the exit to Chinatown, Alfred Blackmoore is an overset man past the turnstiles that ask you to evict Dana Cutrone from Chapter 3, go to her apartment and do your business
Enzo Scardina (chapter 5)
near the Trinity Cemetary exit, the same guy you spoke to from in the beginning of the game, asks you to switch briefcases with Frankie ‘Noses’ Tieri, who can be found in front of an info booth on the Fulton Street Station platform
Rottenberg (chapter 5) **NO NOTE REWARD
go back to Trinity Cemetary and you’ll find the homeless man from Chapter 1, he wants you to get his bottle of insulin, use creeping dark and go back to the bathroom/his home and retrieve it, he gives you some trinket as thanks
————————————————————–
You SUCK! And your &%$^@#$ guide sucks too! What’s wrong with you? These lists suck too!!!!
Not really a question either. But no, I’d say I did pretty okay on this guide. And yes, as I have STATED PREVIOUSLY, this list and guide is far from perfect. This is a new game as of my writing, and I’m doing my best, in my own free time. Write a better guide, or at the very least TELL me what you think is wrong so that I can work on it in this and other future guides. How many FAQ/Guides have you written? Anyway, relax, it’s a video game. And I’m not the only source of info in town, there are still message boards for your well thought out rantings and poor grammar skills.
 ————————————————————–
When/where can I destroy a Helicopter?!
You will see a couple of sections with choppers in the start. You can’t fight them with regular guns, you need the black hole power.
Not until the Turkish Baths section, use a Black Hole (right bumper).
————————————————————–
How do I shoot down those bloody Jerry planes?! (No offence meant towards any Germans out there, I’m merely talking about the Nazi Demons you face in this game, they aren’t even human characters)
You’ll see them your first time in Hell, but, you can’t shoot them down like this. You’ll know when you can, as you’ll be manning large gun set on the back of a tank. There are probably around 15 planes total, maybe 12 or so. All you need are six, so don’t beat yourself up if you miss the first one or two, but go for the big groups and do your best to get all those. If you pass the checkpoint, there will be ONE more plane left to shoot.
————————————————————-
How do I complete the final hit for Vinny!?
When you first go to kill Shrote, you’ll head into an elevator area. Back out of the little indention that leads to him and turn right. See the wall that says Mace!, vaugely? It helps if you left the lights on. The first window, on the left, lowest floor should be wide open and whitish with a faint glowing. If it’s not, go back to the subway and speak with Vinny again. He’ll give you the mission, yet again. Wait for the objective marker to reappear, turn around and rush back to the area I’ve described. The window should now be wide open. Also, in here, is a Berserker outfit. You must use the creeping arm with right bumper to slither up in there.
————————————————————–
How do I move the bell after speaking to Anthony and heading to The Hills?
Simply use the Demon Arm. Remember, it doesn’t just whip, hold down the right bumper to grab objects. This counts for cars, and even people as well!
————————————————————-
How do I get out of the room with Deval’s brother? (Obtained Black Hole)
You should have just recieved the black hole power, yes? Use it on the barred door behind where he was, to suck an opening out for yourself. If you can’t get up to where he was, use the black hole power lower in the room to make the boxes in the corner move out. Then manually push them by walking into them, for a boost to your jump.
————————————————————–
How do I kill all or most of the workers in the tunnel at the start sequence? I want the achievement!
Roadkill is a tough one. Go to your options and set your auto aim slider all the way over to help. Keep in mind you never have to reload (somehow!) and you have unlimited shots to boot , and you might start to have a chance. I know it’s tedious, but you may have to restart several times and memorize the locations of the men until you find a video of this section or something. Some people say you only need four kills, but that didn’t work for me, I give five and still nothing. So try for six. I think there are a total of nine men, but there may be only be like seven. Good luck!
————————————————————–
How do I mail letters from Hell?
Simple! When you return to the real world, you’ll find normal, blue mailboxes all over the city. Any one of them will allow you to use the A button when you’re close enough and have letters to send.
————————————————————-
Where is the bracelet, how do I get all four coins on the tracks?
I put these together as they’re nearby one another and on tracks, having you “race” the trains. Ok, for the bracelet, watch the woman, see where she leans? Try hoping down real fast, and looking at the ground near there, sort of to the right of her, while pressing A repeatedly. Keep doing this, you will eventually get it. It IS there once you speak to her to start the mission.
For the coins, speak to the lady, go on and jump down, and watch where she throws them. Quickly rush where you saw them go, pressing A rapidly. After around two or so tries, you should have the hang of this. Keep talking to her to restart if you need to. Be quick, you have around six seconds to safely live and get them all. Repetetion is key really.
————————————————————– 
Where is the key to get to City Hall Station? For that matter, where is the gate?
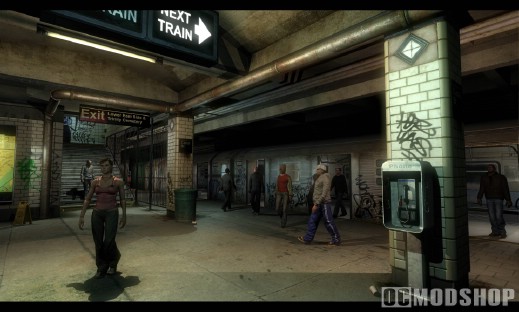
First off, go to the gate. It’s in Fulton Station. Follow the tracks until getting to a gated door with a man next to it (Deval). He gives you a sidequest about his brother. Anywho, turn directly around and look for the bathroom on THIS side of the tracks. Inside, you’ll see a door that’s locked and says out of order. Kick it in with A button, search the toliet for the key to the gate.
————————————————————–
How do I get Heart of Gold, Ghandi, Romantic, Darkness Master, etc?
Check my achievements section at the bottom for details. For the record, some of these can be found within your own game menu, via achievemnts. NOT the guide button used via your controller, the actual in game section under achievements.
————————————————————-
How do I get out of Hell in repeating sections? (just got Darkness Guns)
Try turning off your powers and backtracking. Also, read your mission menu using the select button for hints. It usually says where to go, and that usually says to go back. For better detail, see the main guide when it’s up.
————————————————————-
Whoa, I just got mugged!
Again, not really a question. Yes though, people sometimes try to stick you up. Other times you might play the entire game and not see this. All you have to do, is what you do best…heh heh heh…
————————————————————-
What are all of the in game phone numbers?
Number that is always busy
5559051 (busy)
Pre order 2k Darkling Number Dial this number to unlock the special 2k Darkling
5554263 phone retailer answermachine,phone retailer
Random answering machine numbers (none collectable)
5556402 phone sarah machine
5558672 phone sbz machine
5555664 phone retailer answermachine,phone retailer
5557373 phone butcher machine
5557735 phone paulie machine
5552284 phone jenny machine
Keeper of Secrets Numbers
Dial any 16 of these numbers to unlock “Keeper of Secrets” acheivment
5556118 phone secret 0
5551847 phone secret 1
5556667 phone secret 2
5554569 phone secret 3
5559985 phone secret 4
5551037 phone secret 5
5551206 phone secret 6
5559528 phone secret 7
5553285 phone secret 8
5555723 phone secret 9
5558024 phone secret 10
5556322 phone secret 11
5559132 phone secret 12
5556893 phone secret 13
5552402 phone secret 14
5556557 phone secret 15
5552309 phone secret 16
5554372 phone secret 17
5559723 phone secret 18
5555289 phone secret 19
5556205 phone secret 20
5557658 phone secret 21
5551233 phone secret 22
5553947 phone secret 23
5559562 phone secret 24
5557934 phone secret 25
5557892 phone secret 26
5558930 phone secret 27
5553243 phone secret 28
5553840 phone secret 29
5552349 phone secret 30
5556325 phone secret 31
5554565 phone secret 32
5559898 phone secret 33
5557613 phone secret 34
5556969 phone secret 35
Collectables Numbers
(In order of part(ny1)? place and number)
NY1
5552941 collectible ny1 canal 1
5555465 collectible ny1 cemetery 1
5558989 collectible ny1 chinatown 1
5557526 collectible ny1 chinatown 2
5553318 collectible ny1 chinatown 3
5555709 collectible ny1 chinatown 4
5553440 collectible ny1 chinatown 5
5559345 collectible ny1 consite 1
5551093 collectible ny1 consite 2
5554525 collectible ny1 fulton 1
5555211 collectible ny1 fulton 2
5559903 collectible ny1 fulton 3
5559868 collectible ny1 grinder 1
5557642 collectible ny1 grinder 2
5554649 collectible ny1 grinder 3
5558416 collectible ny1 grinder 4
5553429 collectible ny1 hunterspoint 1
5553520 collectible ny1 hunterspoint 2
5552734 collectible ny1 hunterspoint 3
5553492 collectible ny1 hunterspoint 4
5554682 collectible ny1 hunterspoint 5
5555438 collectible ny1 hunterspoint 6
5557710 collectible ny1 lowereast 1
5551266 collectible ny1 lowereast 2
5555311 collectible ny1 lowereast 3
5559588 collectible ny1 lowereast 4
5556441 collectible ny1 lowereast 5
5551234 collectible ny1 orphanage 1
5557643 collectible ny1 orphanage 2
5558881 collectible ny1 orphanage 3
5555569 collectible ny1 orphanage 4
 NY1 Side (given to you by passers by)
5556454 collectible side ny1 pulanski
5551229 collectible side ny1 cutrone
5555549 collectible side ny1 hadel
5558856 collectible side ny1 chen
5558766 collectible side ny1 warburton
NY2
5552763 collectible ny2 canal 1
5555619 collectible ny2 canal 2
5553849 collectible ny2 cityhall 1
5555466 collectible ny2 cityhall 2
5553794 collectible ny2 cityhall 3
5556799 collectible ny2 cityhall 4
5553791 collectible ny2 turkish 1
5553452 collectible ny2 turkish 2
5552575 collectible ny2 turkish 3
5554676 collectible ny2 turkish 4
5555477 collectible ny2 gunhill 1
5559913 collectible ny2 gunhill 2
5555197 collectible ny2 gunhill 3
5554691 collectible ny2 gunhill 4
5558164 collectible ny2 lowereast 1
NY2 Side
5556713 collectible side ny2 cups
5553249 collectible side ny2 willis
5555327 collectible side ny2 mortarello
5555595 collectible side ny2 deval
5554336 collectible side ny2 hadel
NY3
5556418 collectible ny3 canal 1
5557614 collectible ny3 grinder 1
5553496 collectible ny3 pier 1
5552764 collectible ny3 pier 2
5551917 collectible ny3 pier 3
5554603 collectible ny3 pier 4
5558896 collectible ny3 pier 5
5556503 collectible ny3 mansion 2
5551952 collectible ny3 lowereast 1
NY3 Side
5554463 collectible side ny3 scardina
5555439 collectible side ny3 blackmoore
5557641 collectible side ny3 terrone
OW2 (other world? Hell?)
5557761 collectible ow2 hq 1
5551228 collectible ow2 hq 2
5556892 collectible ow2 hq 3
5553495 collectible ow2 hq 4
OW2 Side
5557467 collectible side ow2 guns
————————————————————-
I’ve dialed all the numbers, why don’t I have ALL the collectables and the achievements for them?!
Unfortunately, you only get *nearly* 75% from all those above. You need to find all the Hell letters for more and mail them in the real world, and other such things to be included in the full guide later on. See above for details on collectable locations. This is STILL very much a work in progress, and may take a great deal of time to work on.
————————————————————–
How do I beat the Cups game? Is it rigged?!
Yep, it’s rigged. Look around to the right corner, find a young black male in camo pants nearby. He sets you up on a mission to go kill some scum over at the lower east side map. Do it, return, speak to him twice, he’ll teach you how to mark the game in your favor. From here, approach the cups man again, but this time choose the third option, distract him, first. Now, when the ball is UNDER the chalk cup, choose it, and voila!
————————————————————-
I want to “bring people together”…how do I score this achievement with ease?
Don’t fret, wait right up until the end of the game. There is a lighthouse…that’s all I think I should say.
————————————————————-
How do I kill the big beastie after the tank ride? I’m stuck in it and he keeps hitting me!
Ok, aim for the mouth, and keep shooting. He’ll open his circular jaw soon. That’s when the damage is done. He’ll hit you a few times anyway, just keep readjusting your aim and turning to shoot his mouth, to slow him enough for you to heal fully. After shooting his mouth several times as it opens, he’ll drop you and be dead.
————————————————————-
How do I beat my other self?
Hang back, shooting any darklings that appear. Two shots each will do it, hopefully. I use the hand guns for speed. Stay away from the Darkness, let it use black holes and what not, but stay far so that you won’t die. DO NOT SHOOT HIM. Stay back until more Darklings come, kill them, then rush yourself and you will join safely again.
————————————————————-
How do I kill seven people in fifteen seconds? I don’t even remember a spot in the game where this is possible without dying!
Don’t worry, there are a couple of parts in the later chapters , but yeah, if you really want the achievement maybe you should load up the final chapter in Easy mode. On Hard or even Normal, you will die alot attempting it, as it usually requires using the Black Hole at the Light House Mansion alot. It helps to have a maxed out Darkness level, a good dark spot, obviously, and just wait until the front of the Mansion where people respawn infinetly. You will get it eventually. Try using a Black Hole on men up close, and shooting those that are far away, all at once.
————————————————————–
I may add more as I see fit, but for now, hopefully, this will keep everyone happy!

