
PRIMARY OBJECTIVES:
[ ] KILL BJ SYKES AND JAMIE
[ ] DEFUSE FIRST BOMB
[ ] KILL CARSON MOSS
[ ] DEFUSE SECOND BOMB
[ ] KILL EMILE DUFRAISNE[ ] DEUFSE THIRD BOMB
OPPOSING OBJECTIVES:
NONE
OPPORTUNITY OBJECTIVES:
[ ] NEUTRALIZE SYKES’S MEN
[ ] NEUTRALIZE MOSS’S MEN
[ ] NEUTRALIZE EMILE’S MEN
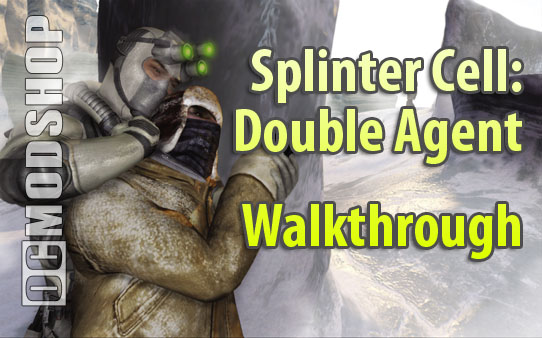
This is it! Sam’s cover has been blown and now it’s time to draw first blood! Williams gives Sam the Fifth Freedom, so if you want to kill all the JBA soldiers, DO IT.
AREA: ROOFTOP #1
There are two guards that are across from Sam. Quickly bust out the Pistol and use the OCP on the light source above them. As they move in to investigate, kill them all.
GO around the corner to see a red laser beam. Simply sneak underneath it and head to the other side of the roof. In the next area is a lone soldier (or two of them if you didn’t eliminate the other ones).
Kill him and then go around to the other end of the roof. You’ll see another red laser. Simply jump over it and enter the door inside the building to warmer temperatures.
AREA: PIGEON COOPEnter the door and go around the corner to the door. You’ll enter a pigeon coop with two bright lights (you’ll hear Sam say “AWW, IT STINKS!”). A lone soldier patrols here so use the OCP on one of the lights and then snuff him out.
Now there are two ways to get to the next area with BJ and JAMIE:
#1 – THE LONG WAYIn the room you are in, you’ll see a flowing curtain. Go through it and up the walkway. Make a left turn and walk under the red laser and exit to the next area.
The next area is a warehouse. DO NOT bother killing the guards in here. Follow this path: as you exit the door, go down the stairs and look to the right. You’ll see some metal shelves and a LADDER. Climb over the shelf and then climb the ladder to the top. You will see another soldier patrolling above but he won’t see you.
The exit for this warehouse is literally next door to the door you came from. Simply jump down to the next exit and head outside to the snowy rooftops. When you exit to the rooftop, you just have to get past three more soldiers and a blood-hungry turret to get to Jamie and BJ. Don’t feel like going through all this drama? Then read the one below!
#2 – THE SHORTER & MUCH EASIER WAYIn the pigeon coop room, there is a locked door to the right side of the room. Use the BREAK LOCK option and enter. You’ll see a Wall Mine in the corner, so move back and then shoot it.
Go around the corner and you’ll enter a room with a CRAWLSPACE in the corner. Use the CRAWLSPACE and then emerge out to the snowy rooftop. Did you see just how EASY that was? Thank god! Oh, if you take this path, you will miss the objective of neutralizing all of Skye’s men.
AREA: BILLBOARD AREA
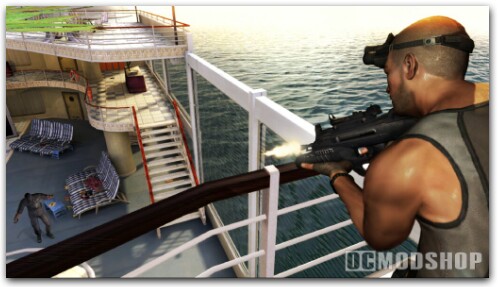
OBJECTIVE #1: KILL BJ SYKES AND JAMIE WASHINGTONOBJECTIVE #2: DISARM RED MERCURY BOMB #1 OF 2
Believe it or not, there are actually TWO ways to get to BJ and Jamie’s area near the billboard:
#1: THE STAIRWAYOnce you’ve disposed all of the men in the rooftop area, head for the door that leads to a stairway going down. Go to the door at the bottom and use the PICK LOCK option and pick it open (DO NOT OPEN THE DOOR YET!). Use the OPTIC CABLE and turn on Thermal Vision.
Listen to BJ and Jamie’s conversation until it ends. BJ will then slowly walk up the ladder and Jamie will patrol back and forth. Wait until BJ has climbed the ladder and that Jamie is walking the other way. With both men facing away, OPEN the door and then shoot the light above it to darken the area.
From there, creep up to Jamie and kill him with a knife to the back. BJ will then climb down the ladder and investigate the broken light. Creep up to him and knife him to complete the objective.
#2: THE RAPPEL POINTOn the rooftop area, you’ll notice three soldiers and a blood hungry turret anxious to shoot you down. You can actually AVOID them all! There is a RAPPEL POINT in the rooftop BEFORE the turret area.
The RAPPEL POINT is pretty well hidden but nothing a little exploration won’t do for you. When you take the RAPPEL POINT down, you’ll already be at the billboard area where BJ and Jamie are talking. Rappel down and then go around the corner (hug the opposite wall because a Wall Mine is ticking). Follow the strategy for BJ and Jamie above.
Now walk up to the bomb and DISARM it to finish all the objectives for this building. Once that’s done, Enrica will call in. Walk up to the ladder to the top (where BJ was) and look for the ZIPLINE in the middle of the billboard. Jump and slide on it to the next building.
NOTE: This next part of the game will test your skills at patience and absolute stealth. Every enemy here will be equipped with Night Vision so it’s time to get smart! The walkthrough below will show you the best possible way to kill them all (including that bastard Moss) without losing a single ounce of health!
After you ZIP to the next building, turn right and go all the way up. Climb the ladder up and then turn right. You’ll be standing on top of an elevator with a locked TRAPDOOR. Pick it open and then jump down to meet with Enrica.
+++ AREA: LOUNGE +++
After speaking with Enrica, exit the elevator and turn right and open the only door on this floor. Slowly enter the room to see TWO Night Vision soldiers walking around. Here’s the bulletproof strategy for this room:
After you open the door, put your back against the wall NEXT to the door from outside and turn the camera to see one of the soldiers walking nearby. When he turns his back quickly but quietly GRAB him and drag him outside and kill him.
For the second guard, enter the room and put your back against the wall. You should be able to peek and see him walking around. When he turns around, go up to him and kill him. Hide the body outside.
For the third soldier, he patrols the long hallway up the room. He’ll slowly patrol the hallway, so when he turns around, GRAB him and kill him. NO MERCY. With this room cleared, enter the next area.
+++ AREA: OFFICE SPACE +++
There are two soldiers in this office room. One patrols near the doorway and the other patrols the opposite side.
At the door, use the OPTIC CABLE and watch the first soldier patrolling left and right. When his back is away from you, quickly open the door, enter the room and GRAB him. Drag him outside and kill him.
For the second soldier, stay near the doorway and then rotate the camera to see the other soldier’s movements (you can also hide behind the office desk cubicles but I don’t recommend it). When he turns around, quickly and quietly approach him and kill him. Now exit this area to the next room.
+++ AREA: SERVICE CENTER/BARROOM +++
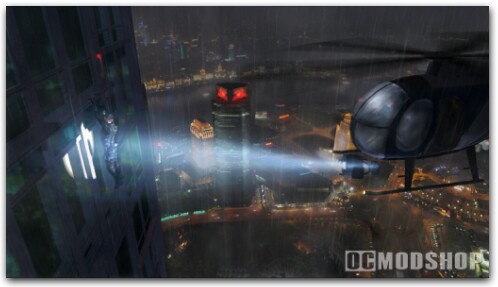
As you enter this room, there will be a Wall Mine on the wall. Shoot it and then head to the area BEHIND the bar. Patiently wait behind the bar and a Night Vision soldier will slowly emerge from the hallway.
Your best and quickest bet to getting him is to use a Sticky Shocker on him. Now go up the stairs into the hall and use the OCP on the red laser. Put your back against the wall on the RIGHT side and then peek around the corner to see another soldier.
When he turns around, shoot a Sticky Shocker on his fat ass. Now exit this area to a stairway leading upstairs. SLOWLY head up the stairs.
+++ AREA: STAIRWAY/RECEPTION AREA +++
Slowly head up the stairs and turn on THERMAL VISION to see the movements of the soldiers inside the room (DO NOT OPEN THE DOOR YET!). When the soldier patrolling nearby turns around, open the door and shoot a Sticky Shocker.
Enter the room, turn around 180 degrees and quickly shoot another Sticky Shocker on the second soldier at the other end. This will clear this area. Now exit this room to enter the final area of this part of the level.
+++ AREA: MAIN OFFICE +++
The main office has four soldiers, a turret, and Moss himself. As you head down the hall towards the main office, you will encounter a hallway with an annoying turret. This turret can be hacked but it does NOT turn it off. If you use the OCP or an EMP bullet, it creates more problems.
Your absolute best bet to getting through this area is to look above. If you look above the turret, you’ll notice that there is a glass walkway above. Yup, this means that there is an actual path FROM ABOVE!
OBJECTIVE #1: KILL CARSON MOSSOBJECTIVE #2: DEFUSE THE SECOND BOMB
Go back to the entrance of the room to find the upper ledge of the ceiling. Jump on top and maneuver your way through the gaps (use the back-to-the-wall move) as you quietly enter the main office area. From there, you can see two soldiers on the bottom floor, two on the top office guarding Moss. To kill them all, you’ll need to get your sniping skills in check.
Bust out the Sniper Rifle and start blasting them DIRECTLY in the head one by one. This will alert all of them, but if you stay in the shadow of the corner above, you can snipe all five men without problems. Once all five are dead, go to the bomb where Moss was patrolling and DEFUSE it to complete the objective.
Now it’s time for the next part of the game. Exit the room downstairs and enter the door. Place a Charge on the wall and DETONATE it from afar. Exit through the crack to finish this area of the game. WHOOO-WEEE, this section was painful to write.
+++ AREA: VENTILATION AREA +++
OBJECTIVE: NEUTRALIZE EMILE’S MEN
With all of Moss’s men dead, you don’t have to worry about Night Vision goggle soldiers. THANK GOD! But there is one disadvantage: any lights that you shoot WILL make noise.
In this ventilation shaft is a door at the other end that is circuit-locked. To open it, use one of the pipelines (of two) and shimmy to the metal ledge. Go all the way to the end of the walkway and you’ll see the circuit box on the wall.
Use the BYPASS CIRCUIT to open the door. Once that’s done, a guard will walk out. Eliminate him and then exit the area.
+++ AREA: WATERFALL LOUNGE AREA +++
As you enter the room and turn the corner, you will see a WALL MINE in the way. You can shoot it, disable it or sneak by it using the pipeline above. Before you exit outside, use the SWITCH OBJECT next to the door to darken this room. Use the PICK LOCK or BREAK LOCK option to enter the next area.
In this area are two guards and a turret at the other side of the room. You can do one of two things:
#1 – THE STEALTHY WAYWhen you enter the room, turn right and sneak behind the large waterfall contraption. Sneak all the way to the other side.
#2 – THE DEADLY WAYDo the same thing mentioned above but instead of leaving the area, HACK the turret and turn OFF its IFF function and it’ll shoot both guards down like the buttholes that they are.
Once that’s done, go around the corner to the next area.
+++ AREA: OUTER ROOFTOP +++
DO NOT EXIT THE ROOM YET and DO NOT SHOOT OUT THE LIGHT! Turn on THERMAL Vision to see two guards: one blocking the doorway and one across from him. The best way to eliminate them both without alerting them is to use the pipeline above the hall.
Open the door and it’ll hit the soldier and get his attention. Jump to the pipeline above to stay hidden. When they both walk in to investigate, use a chokehold or necksnap on them. Hide their bodies OUTSIDE in the snow. Now enter the next building for the finale!
+++ AREA: RECREATION AREA +++
Enter the next area and you will see a WALL MINE on the wall and a guard. Use the pipeline above or the WALL MINE tactic to eliminate him.
To the left or right side of this area are identical rooms with two soldiers patrolling each area. Both rooms have some sort of jungle-themed contraptions in the room. If you want to be stealthy in these rooms, you can jump to the TOP of them and sneak to the next area.
As you exit these rooms, make one last prayer because it’s time to face off against Emile! Exit the room to trigger the boss battle!

+++ AREA: LASER-FILLED ROOFTOP +++
OBJECTIVE: KILL EMILE DUFRAISNE
After the cutscene, Emile will start blasting caps at you. The only thing in Sam’s inventory will be a FRAG, SMOKE, and FLASH GRENADE.
Watch Emile’s movements and you’ll notice that he NEVER leaves his area. He moves left to right but that’s it. I think you’ll also notice the ton of red lasers, right? Here’s the fastest way to kill Emile:
As soon as the battle starts, stay where you are. Emile will start blasting and then stop to reload. When he reloads, QUICKLY make your way behind the bench to Sam’s left. When Emile moves to the left, the red laser next to the bench will be temporarily disabled.
When Emile stops to reload again, quickly move to the bench in FRONT of Sam. Next to the bench is some sort of glass contraption. Hide behind it and equip the FRAG GRENADE. Emile should be standing in the middle of the platform and blasting like crazy. Throw the FRAG grenade towards him and it should successfully kill him.
EMILE BOSS BATTLE VIDEO: I will have a streaming video of this boss battle soon. Check back here on the next update for the link!
OBJECTIVE: DEFUSE THIRD BOMB
Even though Emile is dead, you still have a ton of lasers to deal with. Did you know that you can jump on TOP of the benches and sneak on them? Of course it won’t work during the Emile battle but its something nice to know.
To disable all the lasers, there is a computer just across from Emile (it’s the spot where Sam threw his weapon during the Emile battle). Simply walk above the bench and then access the computer WITHIN the time limit to disable the entire laser grid.
Once that’s done, walk up to the bomb and DEFUSE it to complete the mission AND the game! Congrats, soldier!
MISSION COMPLETE!
Republished with permission. Original article can be found here

3 comments
if this walkthrough for the regular xbox why do you have 360 screenshots for it
thats not really a walk-thru
my bad. i didnt know there was more. you should make it more obvious. i almost missed it. its the smallest thing on the page.
Comments are closed.