
PRIMARY OBJECTIVES:
[ ] ACCESS THE UNDERGROUND BUNKER
[ ] STEAL EMILE’S CONTACT LIST
[ ] SAMPLE THE RED MERCURY
[ ] RETURN TO PUBLIC AREA
OPPOSING OBJECTIVES:
[ ] STRENGTHEN LAMBERT’S FALSE IDENTITY
[ ] REVEAL LAMBERT’S TRUE IDENTITY
[ ] DISABLE THE NASHVILLE BOMB
[ ] DISABLE THE LA BOMB
[ ] PREVENT THE BOMB’S DEFUSAL
OPPORTUNITY OBJECTIVES:
NONE
++Believe it or not, this mission can actually end up being pretty short if you decide not to complete the last couple of objectives.
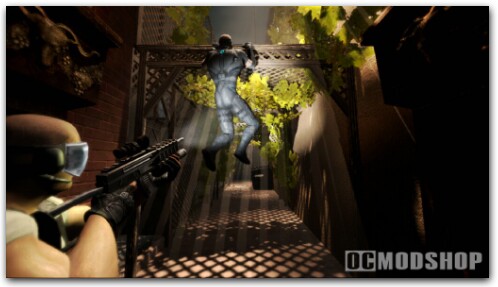
+++ AREA: OUTSIDE JBA HEADQUARTERS +++
OBJECTIVE: ACCESS THE UNDERGROUND BUNKER
Enter the building (with the open door) and head downstairs to complete the first objective.
The next set of areas in this level will mostly be corridors with cameras and lasers (not too many guards). So stealth is the key! You can complete this level in many different ways and the one I will describe is the fastest (and not-so-lethal) way, so read on!
Turn the corner to see a green laser and red laser camera. Use the OCP on both of them and then run down to the bottom of the corridor. At the end of the corridor is another red laser camera. Wait patiently in the corner and a guard will walk by. GRAB him and then hide his body.
+++ AREA: SECURITY ROOM #1 CORRIDOR +++
After disposing the first guard, use the OCP on the red laser camera and go down the corridor. Be sure to hug the walls on the LEFT side to stay in darkness. At the bottom of the corridor you will see two guards in an office and ANOTHER red laser camera. DO NOT enter this office from this area. You’ll enter it from a different path later in the mission.
Did you notice the lights coming from the floor? Under the red laser camera across from the office is a set of lights that you can disable with the OCP. Use the OCP on those lights to darken the area.
Walk around the red lasers around to the corner and exit the area. Enter the next door to the Red Mercury Room.
+++ AREA: RED MERCURY ROOM +++
OBJECTIVE #1: STEAL EMILE’S LISTOBJECTIVE #2: SAMPLE THE RED MERCURY
When you enter the room, you’ll see a red-glowing glass chamber. There’s a guard sitting at a computer desk just above the chamber and a CAMERA to the left. On the right side of the door you entered is a set of stairs that goes up to Emile’s office (with another guard inside).
Stay in the darkness and wait for the guard above the chamber to walk down the stairs. GRAB him in the darkness and knock him out. Place his body in the cold mist below.
But before you access the Red Mercury in the chamber, eliminate the second soldier stationed in the office above. Use the OCP on the green laser (or use one of the soldier’s bodies) and head up the stairs (the OTHER stairs). Use the OCP on the light and then enter the office. Eliminate the guard and then access the filing cabinet in the corner.Use the SEARCH CABINET option to complete the objective. Now go down to the red mercury room.
To enter the room, you need the KEYCODE (which can be found on the computer station above the red mercury chamber) and the KEYCODE for the sample. The KEYCODE for the door is 1429 and the mercury code is 127.
After you access the mercury, Sam will get doused with harmful gas and needs to escape. Use the VENT near the door and open it to get out. Now exit this room and make a right turn. Go around the corner and enter the next area.
+++ AREA: BOMB SHELTER ROOM +++
As you enter this corridor, there will be another door in front of you. When you enter that door, you will see a door and a CAMERA at the end of this hall. Use the OCP on the CAMERA or on the light and enter the other door.
Inside this brightly-lit room will be two soldiers looking at computers. Use the Rubber Bullets on them to knock them both out. So what exactly is the significance of this room? Well, there is a TRAPDOOR in this room that leads down to the sewers and into the OTHER JBA Headquarters building (from Mission 3).
If you decide to maintain Lambert’s cover, then this TRAPDOOR will be of use. I will give more information on this later in the walkthrough. Now exit the room back to the corridor.
When you are back in the corridor, there will be another red laser camera above. Use the OCP on it and then enter the room that it was watching over
+++ AREA: SECURITY ROOM #2 +++
In this room you’ll see a brightly-lit map and some security TV’s. There is a lone soldier in this room. You can sneak up behind him and knock him out. In the center of the room is a LAPTOP.
DO NOT ACCESS THE LAPTOP YET! Instead, exit the room using the other door. Go around the corner and use the OPTIC CABLE on the next door.
+++ AREA: SECURITY ROOM #1 +++
You will see two guards conversing in this room (this is the room that you passed through earlier). Enter the room and turn left. See those servers? Jump on top of them and then listen to the conversation (or don’t). Access the computer near where the guard is sitting and HACK it! Now comes the decision:
MAINTAIN LAMBERT’S COVERBLOW LAMBERT’S COVER
Make the right choice. Once the decision has been made, new objectives will come up. You can either do them or ignore them.
OBJECTIVE: DISABLE LOS ANGELES/NASHVILLE BOMBOBJECTIVE: PREVENT BOMB’S DEFUSAL
You have to choose which objective to accomplish. Here’s the breakdown:
PREVENT BOMB’S DEFUSALIf you don’t want to disarm the bombs (which gives favor to the JBA), go back to the previous Security room and access the LAPTOP (the one I told you not to access) and use it to CANCEL the bomb’s defusal. Once that’s done, the mission is practically over. Go back up to the area where you started the mission to complete the mission.
DISABLE LOS ANGELES/NASHVILLE BOMBIf you decide to disarm the bombs (which gives favor to the NSA), read the walkthrough below.
AREA: BOMB SHELTER ROOM
You have about 12 minutes to complete this section, but it’s more than enough time. Go back to the Bomb Shelter Room with the TRAPDOOR. Enter the trapdoor and you will jump down to the sewers below. Go around the corner and climb the ladder up to the top. You will emerge in the warehouse from Mission 3.
AREA: WAREHOUSE #1The first bomb is located outside this warehouse and the second one is located on the roof. After climbing out the ladder, enter the nearby double doors. Use the OCP on the camera and then head for the dark corner to see a red laser camera watching over the exit.
Use the OCP on the red laser camera and then quietly open the door. There are three soldiers here and two cameras outside. Use the OCP on the light above the door and then quietly head outside. Incapacitate the three guards as quickly as possible (in the dark!) and then DEFUSE the first bomb nearby.
Once the first bomb is defused, go back into the warehouse and then make your way to the roof (you should know how to get there by now).
AREA: ROOFTOPSWhen you enter the rooftop, there are two soldiers. Simply knock them both out and then DEFUSE the second bomb. Once that’s done, take the ladder going down to the alley to complete the mission.
MISSION COMPLETE!

3 comments
if this walkthrough for the regular xbox why do you have 360 screenshots for it
thats not really a walk-thru
my bad. i didnt know there was more. you should make it more obvious. i almost missed it. its the smallest thing on the page.
Comments are closed.