
MISSION OBJECTIVES:
[ ] GET THE WALKIE-TALKIE FROM THE SECURITY BOOTH
[ ] ESCAPE ELLSWORTH PRISON WITH JAMIE WASHINGTON
[ ] FIND AN ADRENALINE SYRINGE
[ ] REGROUP WITH JAMIE WASHINGTON
OPPOSING OBJECTIVE:
[ ] DO NO LET BARNHAM DIE
[ ] HELP JAMIE KILL BARNHAM
OPPORTUNITY OBJECTIVES:
[ ] FIND HIDDEN INFORMATION DISK
[ ] ALTER DEATH RECORDS
++NOTE: For this mission, Sam won’t have his Night Vision goggles and other equipment. After speaking to Lambert, Fisher will retrieve his OPSAT and will be able to recover some useful equipment later in the mission.
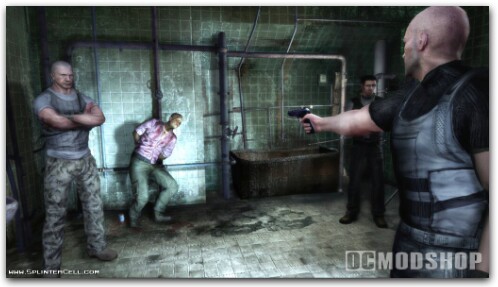
+++ AREA: SAM’S CELL +++
Dude, did you ever watch that movie called “The Shawshank Redemption”? Lots of coincidences here!
Anyway, to exit Sam’s cell, simply use the CRAWLSPACE located under his bed. CRAWL through and then jump up to the hard to see crawlspace above Sam (it sucks when you don’t have Night Vision goggles). Jump over the ledge to meet with Jamie. With only a set of Lockpicks on hand, its gonna be one killer Prison Break!
OBJECTIVE: GET THE WALKIE-TALKIE FROM SECURITY BOOTH
Use the INIT DYNAMIC BOOST option and jump to the other side. Climb the ladder to the top and then head to the pipeline. Just near the pipeline is a lamppost and a broken railing. REMEMBER THIS!
Climb the pipeline and shimmy to the opposite side. Raise up both feet and shimmy all the way to the end and drop down. Squeeze through the pipes until you reach the locked TRAP DOOR. Use the Lockpicks and then open the TRAP DOOR. Jump down, grab the WALKIE-TALKIE and then bolt out of there!
OBJECTIVE: GO BACK TO YOUR CELL
Go back to your cell and use the same method to get back. Retrace your steps QUICKLY because you only have 105 seconds! As soon as you reach the area with the pipeline, shimmy over the fence and then IMMEDIATELY jump down but DO NOT take the ladder down!
Remember the broken railing? Jump down the railing and then knockout the patrolling guard and jump your way back to your cell. WOO!
+++ AREA: VISITOR’S AREA +++
OBJECTIVE: BARNHAM
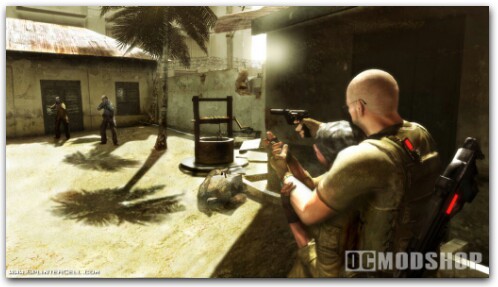
After the cutscene, Sam will have the OPSAT back in his inventory. Run over to the Courtyard to encounter Barnham and Washington. From here you have to make one of two choices:
–KILL BARNHAM–CHOKE BARNHAM
The choice is up to you.
+++ AREA: PRISON HOSPITAL +++
Yup, it’s a prison riot! Wait for the cop to come in and then a cutscene will occur. Search the body to get the cop’s gun (if you didn’t kill Barnham, Jamie will take the gun away from you) and the Lockpicks. Use the PICK LOCK option and exit the cell.
OBJECTIVE: FIND ADRENALINE SYRINGE
The syringe is on the shelf just near the beds. Grab it and exit the room. At the end of the hall use the INIT DYNAMIC BOOST option to jump to the top. Go to the other side and jump down.
+++ AREA: PRISON CELLS +++
GRAB the first cop and knock him out. If the second cop sees you, run up to him and knock him out. Just near the cells, the INIT DYNAMIC HOIST option will appear. Use it and wait for Jamie to open the door to the stairs (near where you jumped down next to the cop).
Go upstairs and run all the way to the end and jump down next to the broken railing. In the next area, a cop will try and stop another prisoner. Quickly sneak up to him and snuff him out and continue down the hallway.
+++ AREA: MESS HALL +++
As you turn the corner, you’ll see the hall on fire. Enter the Mess Hall and make a quick right to enter through the shadows. Jamie will interfere and shoot one of the patrolling cops. Quickly run up to the second cop and knock him out (or he’ll shoot Jamie dead).
After that’s done, Jamie will exit the mess hall but will be stuck at a locked gate. To open the gate, go back to the mess hall. Just near the exit is a very hard-to-see metal fence. Climb over it and then take the stairs to the top. Go to the end of the walkway and use the CRAWLSPACE to the next room.
Jump down and then knock out the guard. Use the Computer to open the gate for Jamie and to get the keycode for the door (3190). Exit the room and then exit the area.
+++ AREA: CELL BLOCK D +++
This area seems tricky but it’s really not. First, knock out the guard on the bottom floor. Now go up the stairs to the second floor and look for the broken railing with a small platform sticking out.
Jump that platform to the adjacent walkway across from you and grab the railing (another cop will patrol that area). If the other cop isn’t there, you can shimmy all the way to the right side and then climb over. There is a CRAWLSPACE just next to the bright lamppost. Enter through the CRAWLSPACE and then exit to the next area.
+++ AREA: WOODSHOP AREA +++
As you jump down, you’ll see two Riot guards patrolling the area. Pick up the CARVING KNIFE nearby and then eliminate both guards (or don’t).
The exit is blocked by a metal detector. If you go underneath it, the alarm will sound and alert the guards. If you’re trying to be stealthy, use the pipeline next to the metal detector and climb it up and over the other side and jump down.
+++ AREA: GAS CHAMBER +++
Alright, it’s time for an alternate path! As Sam works his way down the halls, he’ll see two guards conversing inside the Gas Chamber room.
OBJECTIVE: OPEN THE GAS CHAMBER LOCK
There are two ways to enter the Gas Chamber room:
PATH #1: Sam can BASH the door open to knockout the first guard. From there eliminate the second guard inside the control room.
PATH #2: Go back to the hall and enter the adjacent door. You’ll be inside a break room with a CRAWLSPACE. Enter the CRAWLSPACE and you’ll emerge at the Gas Chamber control room. Listen to the guards and then they’ll split up. Exit the crawlspace and knockout the first guard.
Enter the control room and use the OPEN CHAMBER option on the console (make sure the light turns GREEN). Now quietly head down to the door near the audience chairs and use the PICK LOCK option and enter. Go down the stairs to the gas chamber but DO NOT open the door!
OBJECTIVE: RELEASE CHAMBER LOCK
There is a Riot guard blocking the entrance (behind the door), so use the BASH DOOR option to knock his filthy pig ass out. Now go to the chamber and use the OPEN CHAMBER option to release Jamie.
Once he’s free, enter the room nearby and you’ll see a desk with a computer. Across from the computer is an exit. Exit the room and go down the hallway. A Riot guard will start shooting you (let Jamie take care of him for you).
Enter the door the guard was in front of to enter the Morgue.
+++ AREA: THE MORGUE +++
OBJECTIVE: FIND HIDDEN INFORMATION DISK (OPTIONAL)
Inside the Morgue, go to one of the open doors and you’ll find the information disk that Lambert asked for. Now exit and go back outside. Take the path just near where you entered from the Gas Chamber to a door to the other side.
Exit the area and take the stairs to the CHAPEL area.
+++ AREA: THE CHAPEL +++
Use the INIT BOOST OVER option to throw Jamie over the fence. He’ll open the door for you. Enter the chapel area.
In the chapel area are two Riot guards. Eliminate them for safety purposes. Now it’s time to escape BUT ONE LAST THING!
OBJECTIVE: ALTER DEATH RECORDS (OPTIONAL)
Enter the door at the back of the chapel and use the computer inside to alter the death records. NICE!
Once that’s done, take the stairs all the way to the top. You’ll see a pipeline that goes to the other side. Jump up and shimmy to the other balcony. Walk up to the rope to release it. This will give you a way out of the area. Now shimmy on back to the other side and then climb the rope to the roof.
At the top of the chapel, eliminate the lone guard and then use the BREAK LOCK option on the door and exit the roof. Take the stairs down and open the door back to the chapel to get Jamie. Now go back out and head down the stairs to the Parking area.
+++ AREA: PARKING LOT +++
Make your way out to the parking lot. The area is clear so no worries! Go to the end of the lot to see a large escape hole on the upper wall. Use the INIT DYNAMIC HOIST to head to the other side. Jump down to the bottom to complete the mission.
MISSION COMPLETE!

3 comments
if this walkthrough for the regular xbox why do you have 360 screenshots for it
thats not really a walk-thru
my bad. i didnt know there was more. you should make it more obvious. i almost missed it. its the smallest thing on the page.
Comments are closed.