
PRIMARY OBJECTIVES:
[ ] NEUTRALIZE ALL MERCENARIES
[ ] DISABLE MERCENARY COMMUNICATIONS
[ ] BOARD THE TANKER AND NEUTRALIZE THE CAPTAIN
OPPOSING OBJECTIVES:
NONE
OPPORTUNITY OBJECTIVES:
[ ] DISARM EXPLOSIVE CHARGES
[ ] LOCATE ENCRYPTION KEY
[ ] INSTALL TRACKER IN COMMUNICATIONS ROOM
[ ] IDENTIFY THE SHIP’S CARGO
+++ AREA: UPPER HILLS +++
OBJECTIVE: NEUTRALIZE MERCENARIES (THREE)
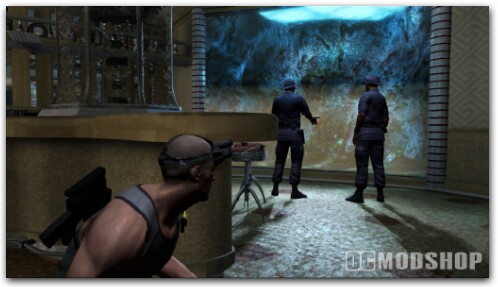
Turn on Heat Vision and look up to see a soldier patrolling the upper ledge. You have the option to either kill him or incapacitate him, the choice is yours. Sam must eliminate EVERY single guard in the whole area! DO NOT leave any guard alone!
A stylish way to eliminate the first soldier is to jump and hang on the nearby ledge. When he gets close, GRAB him and throw him down to the snow below (which is like 10 feet away, not very lethal). Take the path up the hill and you’ll encounter another soldier with a flashlight. Sneak up to him and neutralize him.
If you turn the corner and look on the right, you’ll see a short ledge that you can jump up to the top. Take this path and follow it around to the next corner. From there, you can watch the third soldier from above and then drop and kick him from above to clear this area. Now head to end of the path to a CRAWLSPACE and enter it.
+++ AREA: CAMP A +++
OBJECTIVE #1: DISABLE RADAR #1 OF 5OBJECTIVE #2: NEUTRALIZE MERCENARIES (TWO)
Before exiting the CRAWLSPACE, watch the guard. When he leaves, exit the crawlspace and take him out. Look down below to see a campfire and a tent. There is a rope that leads down to the area below and there is a RAPPEL point on the other side. I suggest taking the rope down. If you take the RAPPEL point, it leads you to the GROTTO.
RAPPEL NOTE: If you take the RAPPEL point, the walkthrough below still applies but the locations will be mixed up. TAKE NOTE OF THAT! The walkthrough I use below is if you took the rope down instead of the Rappel point.
Climb down the rope to the bottom. Eliminate both guards in the area and then enter the tent to find a COMPUTER. Use it to partially complete the first objective. Now head down the path the other soldier was patrolling and jump down.
You’ll see an active Wall Mine ahead. Carefully walk up to it and DISABLE it. Slowly walk down the path to the next area.
+++ AREA: ICE TRENCHES +++
OBJECTIVE #1: DISABLE RADAR #2 OF 5OBJECTIVE #2: NEUTRALIZE MERCENARIES (TWO)
As you emerge from the corner, you’ll see two sets of lasers, a guard, and a non-working turret. The guard will walk towards you (stay back to avoid his flashlight). Since his clothing disables the lasers, GRAB him when he turns around and then drag and knock him out near the turret.
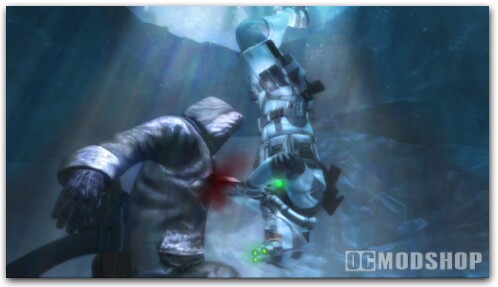
When you turn right, you’ll see the ice wall glowing red and another guard. Neutralize him to clear this area. Walk up to the computer at the end and use it. Now to the next area.
Next to the non-working is a hard-to-see path to the next area. Head towards it and you’ll see TWO Wall Mines. Disable them both and then continue forward to the next area.
+++ AREA: PORT ICE FIELD +++
OBJECTIVE #1: DISARM EXPLOSIVE CHARGE #1 OF 2OBJECTIVE #2: DISABLE RADAR #3 OF 5OBJECTIVE #3: NEUTRALIZE MERCENARIES (THREE)
You can see a large truck and the Tanker ship in the area. There are also three guards here, so eliminate them please.
Just across from the back of the large truck is a detonator. Walk up to it and use the BYPASS CIRCUIT option to disable one of the two detonators. On the other side of the area is the computer to disable the radar. Use it to partially finish the objective.
Now, do you see the red flare sparking across from the computer you just hacked? Underneath it is a CRAWLSPACE. Enter through it to emerge to the other side of the Tanker ship.
+++ AREA: STARBOARD ICE FIELD +++
OBJECTIVE #1: NEUTRALIZE MERCENARIES (THREE)OBJECTIVE #2: DISARM EXPLOSIVE CHARGE #2 OF 2
There are three soldiers here (but no computer). The second detonator is also in this area so go up to it and use the BYPASS CIRCUIT option to complete the objective! Across from the detonator is a rope to climb onto the Tanker ship. Sam cannot use this until ALL the guards have been neutralized (remember that!).
Eliminate the soldiers here in any way you want. To the right of the CRAWLSPACE that you emerged from is a small cave leading to the next area.
+++ AREA: CAMP B +++
As you emerge from the cave, you’ll see a large truck and three tents. There are also three soldiers here and a large spotlight (that’s being powered by a generator that you can switch off). Eliminate the soldiers here in any way you want to clear the area.
OBJECTIVE #1: DISABLE RADAR #4 OF 5OBJECTIVE #2: NEUTRALIZE MERCENARIES (THREE)OBJECTIVE #3: LOCATE ENCRYPTION KEY
With all enemies cleared in this area, go to the second tent in the back and use the Computer inside to disable radar #4. After that, make your way to the other tent (with a map on the board). You will find the ENCRYPTION KEY on the table to the right.
Now just across from the generator powering the spotlight is a CRAWLSPACE on the upper wall of the mountain. Crawl through and exit to the other side to the last area.

+++ AREA: GROTTO +++
As you emerge from the crawlspace, walk up to the nearby generator and PIERCE it to turn off the power completely. Walk up the path to see a swinging lightpost. The nearby guard will investigate the power outage, so neutralize him when he gets near (watch out, he has a flashlight).
OBJECTIVE #1: DISABLE RADAR #5 OF 5OBJECTIVE #2: NEUTRALIZE MERCENARIES (FOUR)
Now continue up the path to see another generator. PIERCE it and then go up the wooden bridge (make sure it’s clear). You’ll see the Computer across from you. Use the EEV to access it and to fully complete the objective.
Now there are three more guards in this area. You have different traps in this area that you can use to neutralize them. You can use the Water Attack (there’s two pools to use) or you can hang on the ledge of the bridge and then whistle and grab and throw them down. Use whatever stylish method you like.
Eliminate them all and then go BACK to the Starboard Ice Field area where the second detonator is located.
+++ AREA: STARBOARD ICE FIELD +++
Now climb the rope up to the Tanker ship. WHEW-WEE! I
+++ AREA: TANKER SHIP – MAIN DECK – THIRD FLOOR +++
INTERROGATION NOTE: If Sam gets captured, he will be tazered. SKIP the following cutscene and the use the PICK CUFFS option. Move the Analog Stick and uncuff yourself. I suggest that you NOT get caught because it’ll screw up the walkthrough below if you do.
As soon as you enter the ship, there will be three guards on the deck. For the nearest one, just grab and knock him out. There are two more on the opposite side of the deck. Use the hidden pipeline above and shimmy head over foot and simply use a chokehold or necksnap to eliminate them. This deck should be clear for now.
Go to the right side of the ship (starboard). You will see a red door entrance, DO NOT GO IN THERE YET! Shoot out the light next to it to darken this area.
OBJECTIVE: IDENTIFY THE SHIP’S CARGO
Let’s get this objective out of the way first. You need to go to the ship’s Holding area to identify the cargo. The shortest way to get down there is this:
Take the stairs all the way down from the starboard side of the ship (the stairs in front of that red door). At the very bottom of the stairs, you will see a CRAWLSPACE just near the open doorway. Can you see it? Enter through the crawlspace to emerge to the ship’s Holding area. EASY.
When you exit the crawlspace, GRAB the first soldier on the ledge and INTERROGATE him to complete the objective. Now go back to the crawlspace and make your way back to the top of the ship.
ALTERNATE STRATEGY:Another easier way to find out the ship’s cargo is to get caught (as in tazered) by the enemy. After Sam is interrogated, uncuff him and then head for the crate across from where he was sitting to find the contents of the cargo. I URGE you to NOT take this strategy!
+++ AREA: CREW’S QUARTERS – THIRD FLOOR +++
OBJECTIVE: NEUTRALIZE THE CAPTAIN
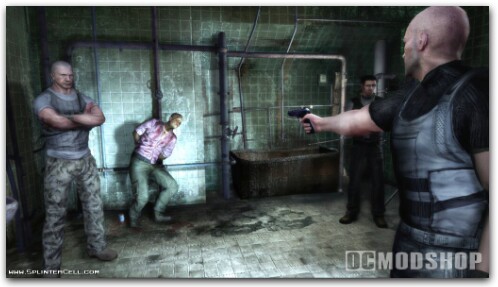
Go back to the top of the ship and enter the ship from either side. You’ll be in the Crew’s Quarters where the captain is located. I suggest shooting out EVERY light in the area for safety purposes.
As you enter the corner, you will see a soldier patrolling just outside the hallway (you’ll also see a flashlight sitting on top of an electrical box). There is also a hidden CRAWLSPACE in this room (which you will use after meeting the Captain).
Look above to see a red pipeline. Use the pipeline to eliminate the soldier. There are two more soldiers here. Lure them out and then eliminate them one by one. With the area cleared, you can now head to the captain’s room.
After talking with that dickhead captain, it’s time to defuse some bombs. He gives you 10 minutes to disarm four bombs that are planted in the Engine Room. Don’t panic! It’s more than enough time. But how exactly do you get to the Engine Room without having to go from floor to floor? Read below.
+++ AREA: ENGINE ROOM +++
OBJECTIVE: DISARM FOUR BOMBS
Remember that hidden CRAWLSPACE I told you about just near the red pipeline? USE IT! It takes you DIRECTLY to the Engine Room! See how easy that was? Exit the crawlspace and then take the ladder down to the engine room.
There are four bombs, three soldiers, and three cameras in this room. Don’t worry about the bombs yet. As soon as you come down from the ladder, look to your left to see a Camera above. Use the OCP on it! From your position, you can see the soldiers below (some of them).
Use Sticky Shockers on them and then eliminate the third one. Now it’s defusal time. There are four bombs: two on the floor (one on each engine), one bomb just across from where you emerged from the ladder, and the last bomb is on the opposite side on the upper ledge.
After defusing the first one, the Captain resets the timer to three minutes. That should be more than enough time to defuse them all. Once that’s done, go BACK to the Crew’s Quarters using the ladder and CRAWLSPACE that you came from.
+++ AREA: CREW’S QUARTERS +++
As you enter back to the Crew’s Quarters, exit this floor back outside. The Portside door is locked so you have to go to the Starboard door.
Before you open the door to go outside, turn on Thermal Vision to see a soldier behind the door. Use the BASH DOOR option to smack him down the stairs. Two other soldiers will block the way so use the pipeline and sneak past them (or eliminate them). Head on over to the Portside and take the stairs going up to the top.
+++ AREA: TOP DECK – COMMUNICATIONS ROOM +++
At the top of the stairs is a turret. You can disable the turret by jumping from the ledge next to it. There are two doors here: one that leads outside and the other leads into the Communications Room. Let’s go to the Comm. Room first, shall we?
AREA: COMMUNICATIONS ROOM
OBJECTIVE: INSTALL TRACKER IN COMM. ROOM
As you enter the Comm. Room corridor, you’ll see a soldier patrolling in a brightly lit area. Wait for him to enter the Comm. Room and then shoot out the lights in the corridor.
Head for the Comm. Room and turn on Thermal Vision to see inside. The patrolling soldier will walk back out, so turn around and then smack him from behind. Now enter the Comm. Room and you will see two more soldiers. One will emerge from the room on the right and the other stands idly near the console.
Knock out the first guard and then smack the guy standing in front of the console. Access the console to install the TRACKER. Now you only have ONE objective left so head back outside and exit the ship using the door on either side.
+++ AREA: TOP DECK – OUTER AREA +++
When you exit outside, you will see a soldier patrolling the area and a Wall Mine in the corner. In the deck above, there are three soldiers, two turrets, and two more Wall Mines (not in that order).
There are various fun ways to eliminate the guards in this area: You can use the good old fashioned trick of jumping over the railing and then GRABBING them and throwing them over, you can be sneak up to the turret (the first one) and HACK it’s IFF system, you can shoot the Wall Mine when a soldier gets near, OR you can do neither! It’s up to you.
OBJECTIVE: COMMANDEER THE SHIP
The door you need to enter is right next to the second turret. Incapacitate the guard that slowly walks by (shoot the Wall Mine for some fun times) and then HACK the Turret from afar or use the OCP on it. Head for the door at the other end and enter.
MISSION COMPLETED!

3 comments
if this walkthrough for the regular xbox why do you have 360 screenshots for it
thats not really a walk-thru
my bad. i didnt know there was more. you should make it more obvious. i almost missed it. its the smallest thing on the page.
Comments are closed.