

Tram Station
Get out and go see the wounded gal and let her go peacefully. Pick up the Kinesis Module and now you can move objects. You pick them up by aiming and once you have them you press the shoot button to throw them. There is no limit to how much you can use it.
There is a med kit among the all too deliberately-placed body bags, there is a store, but first move the crates in the hallway and pick up the Schematic. These add items to the store; this one adds a Flamethrower to the store. Sure, you could sell all your large med kits or not get the suit upgrade, or just wait, which is cool, trust me.
Security Station
Keep going enter this crossroads in your journey. There are creds on the floor, a box in the little room, a locker, and another store. Just save your game at the station and hit hay if you’ve played non-stop up to this point.
Main Lab
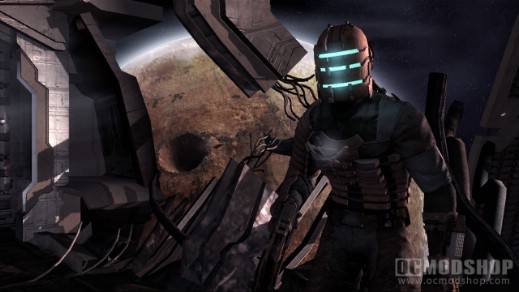
Moving right along, Head up the middle door to the Main Lab, labeled “Research Wing” over the door. You are told how to use the alternate fire for your gun, and for the Cutter it’s a horizontal cutting angle. Go down the hallway and you’ll hit a broken door. There is a recharge for your stasis on the wall, and then some ammo in the nearby dead bodies. Slow the door and go through.
On the wall to the left is a box with creds, then go around the little wall to find some ammo. When you try to move up the room, an alarm goes off and then the infected appear. You can run any direction you like, but there are two from both sides that appear, but not four at one time; I advise making your way to the other side of this upper area and fend them off, but don’t take the lift down just yet. Once you take care of them, stay up here and you should hear one more monster somewhere. He’s below you, so take him out, then find the lift at the opposite end of the walkway to go down there.
There is a recharge to the left, and the door to the left of the lift is open, and inside there are lockers and a box to shoot. Once you come out and try to advance up the room, four more enemies will use the vents on the walls to ambush you. You can either run to the bathroom and hide, or just use your fighting skills to fend them off; don’t forget you have two powers to use, stasis and kinesis, and any guns you may have bought.
*NOTE: Fans from broken vent panels make for nice weapons, if you can find them.*
After you fight them off, there are items around the perimeter of the room, even in that door by the lift that was locked. In the bathroom is an audio log and in the middle room is a video log. Also in the middle room is a shelf that prevents access to a “hidden” area. Just use kinesis to slide it over. Inside there is a text log, a gold semiconductor, and two lockers of items; the conductor is sell bait. Now just go to the corner room by the lift for items in the lockers and then save.
Bio Lab
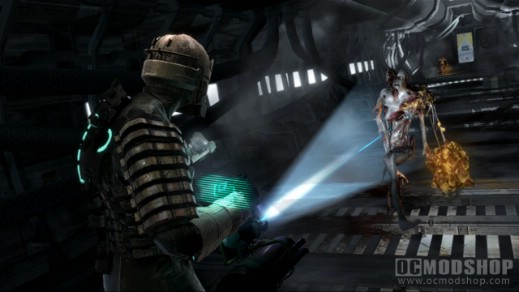
Go in and forward to watch a bit of a scene at the window; not sure if you can save this guy. Anyway, go in and it’s safe upon entry, but when you look to the left and see the box to shoot on the ground, you’ll meet the new enemy. Let’s call them “babies” for now, and I guess they have guns on them or something. It’s best to use the horizontal firing mode (alt fire), and you can only shoot at one of the three arms when they are out. When the arms are retreated you can do nothing. Just shoot the arms and the thing will die. Shoot the box, grab the energy by the doc, then another in the corner, and then take the lift up. There is one more baby hiding by the door up here, but you don’t have to move far from the lift for him to come out, and then if you notice the orange glass on the right, another baby will bust out of there when you get close. Kill them both and go through the door.
Grab the thermite, energy, and the power node from the wall box. Go out and back to the broken door. Freeze it and go through, but be ready for a quick fight with two monsters; use stasis on both since the recharge is right there on the wall. Return to the security area (look in the body bags for an item I missed earlier), use the store, and then save.
Now may be a really good time to buy a new gun, since guns don’t take up a slot in your inventory. Guns are set to the d-pad for easy access. I say get the Line Gun, or Flamethrower, or both. If you have so far not struggled with the “more than two enemies” encounters, then perhaps you are fine without them. Still, now is a good time to at least get the Line Gun. It’s alt fire is a timed mine that uses the same ammo as the normal fire.
*NOTE: Line Gun uses Line Racks while the Flame gun uses Flame Fuel, in case you were wondering. So no, plasma energy does not work for all guns. This means if you want the extra guns, probably need extra item slots via the upgrade for the suit if you don’t already have it.*
*NOTE: I don’t care much for the flamethrower, but it does help for big fights with many enemies.*
Imaging Diagnostics
Save and go through to the next area. Despite the sound, just keep going until you run into the poor fellow who is obviously just bored waiting for death. Pick up the ammo in the corner, recharge, and go through the door.
Quick scare and then feel free to use the bench to upgrade your line gun. You may realize that power nodes must be spent in empty spots in order to reach the remaining good spots, but for now we can upgrade the damage for the line gun right off the bat. Then come around and use kinesis to move the tank all the way to the left. Once you move forward you have a chance to test out the Line Gun on two leapers.
After that, go left and into a small room where someone is freaking out on the other side of the table. Go counter-clockwise around the table, picking up the two items, then pick the power node out of the box, and then be ready for the monster to surprise you out of the vent.
Come back out and notice that the lift and other door are both locked. Well, look on the ground and there is a block. Get on the side of the lighting bolt symbol and pick it up. To the right of the lift is a slot on the wall to insert the block and power the lift.
Take it up and if you didn’t position the tank into place earlier, move it so that you can walk across. A leaper comes on the vent in front of you, so get him while he’s on the wall, and then when you try to go right there is normal enemy out the wall. Pick up their items, use the recharge station, and then move the tank to this side to walk over. Use the Cutter to shoot the box to the right of the door and then save.
Zero-G Therapy Hallway
When you open the door in front of you, you’re outside of the ship. A timer appears on your back to tell you how long you have before you die. Don’t worry for now, there are just two items in lockers to grab, then a quick look at the view, and then go through the other door. Of course it takes about two seconds through a door before it closes again too.
Zero-G Therapy
Open the next door and you’re in the first zero-g area. You must aim like you would use your other two powers, then press the jump button (Y or TRI) while aiming to leap. Use your Cutter here so you move quicker. All you can do is go to the opposite platform, so get there however you wish. Once to the locked door, grab one of the many power blocks and stick it in there. Go in for creds on the ground and two lockers, then the Shock Pad.
Go back into the chamber and a single leaper appears from under the platform with your exit. Just use kinesis to grab a cannister and shoot it at him while he’s on the side wall, then get back and go out.
Enter the outside area ready to fight one enemy, then another when you’re through the other door; both are hard to hear because there is no sound in space, or music apparently.
Go through the door to be in the Diagnostics area, save, use the recharge, and be sure to move the tank so you can get across. When you are near the lift, be ready for one enemy through the vent, and when you get on the lift there is a leaper to the right on the wall.
*NOTE: Feel free to use that power node you picked up at this bench if you want to. However, I think you should save it, trust me.*
Head back to the hallway with the dead guy, but have your Cutter set to horizontal ready. Look at the doorway to the hall for little crawlers to swarm after you. Shoot them, or use your fire, and if they get on you you’ll need to press the button displayed to shake them off. After that, use the recharge and head back to the security point.
That schematic from way back adds Pulse Ammo for the Pulse Rifle. If you have the Line Gun and the Flame gun, no need to buy the rifle at the moment unless you really want to. Remember, if you have too much energy and you like the Line Gun better, you only need two spots for energy in your pack. If you haven’t used a med pack in a while, just keep three small ones. Then use the Thermite Bomb on the barricade and then save your game.
Clinic
Approach the door and Hammond calls you, then go in for a video log on the ground. After that’s over, go up and through the door. A box to the left, then go through the door and be ready for two babies to attack from directly ahead of the door; remember, only hit the arms. There is ammo to the right by the dead guy, ammo by the power block, and the items in a room with lockers; there is also a recharge station if you need it. Just take the power block and stick it into the slot by the door if you want the lights turned on quicker. Then go through when done.
Emergency Room
Be ready for a baby, then a normal enemy when you step inside, both will be in front of you. When you get to the corner, two morphs from the right and one from behind you.
You may have noticed that locked door. Well, beside it is a panel that will ask if you want to use a power node to get inside. You should have one if you didn’t waste it at the bench on your way back. No big deal, there is just ammo and a schematic for Line Racks.
Keep going and when you hit the second half of this area, to the left in the corner is an audio log. Now go up along the beds and toward the end a few monsters will ambush you from both sides. Use the line gun to kill the one in front of you, then run to the end, turn, and kill the other two. Items are to be found with a schematic. Come back, go through the door, watch the eerie scene, and then go around and pick up the text log on the floor. Save and go through the next door, pick up audio log, listen, kill baby at the corner, and then take the elevator down.
Morgue
Move forward and keep an eye on the window. Eventually an “infector” will drop down and turn the Captain’s body into a morph. The objective quickly changes to tell you to kill him, but if you have the Line Gun with a power upgrade, it should just take two hits to the leg to take him out, then about two to the infector to take it out. Then you are free to collect the items about the room: text log, creds, RIG, creds in a body drawer on the wall, more creds, a med pack, and a power node. Then you take the door next to the exam room to take a lift back to the start of the clinic.
Head straight into the starting room to face another Super Slasher, same as the Captain. Now head back to the Tram with no fear of enemy encounters. You can save, shop (nothing you should need so store items if anything), and then back on the Tram to end chapter.
*NOTE: Stasis packs just refill your stasis, they are not the power itself.*



8 comments
Seems 2 b written in a hurry. Vague and coarse. This wkthru shows the hardest way 2 go thru d game in a BIG hurry. Seems 2 b written jst 4 d sake of putting it up. A sad waste.
I can see you are playing game on easy.
ignore the critism, i found it really helpfull, it also saved me from a couple of scares :P, anyways, really helpfull, thanks, now i've got the military suit and a fully upgraded pulse rifle and line gun. time to go kill me some necromorphs….
Thanks for the walkthrough its really helpful :D
"You shouldn't have to warn us but you did?" isn't this a walkthrough? :P
Great walk through, helped loads without being OTT.
chap eight it took a few tries but I figured out an easier way to do the engine room when you use the blast doors as a shield they can be pushed forward till your parallel with any of the six power boxes and you can shoot them safely from behind it the only problem is that you can't drag them back very well and ya might get burnt if you run all the way back to do the other side
This has to be the worst written, most abstract "Walk-Through" ever written.
Comments are closed.