
You wake up in a medical bay on the G.F.S. Olympus, and you finally get the PED Suit.
Leave the room and try out your new hypermode by shooting the blue crap on the walls. Your healing powerup is Phazon now, and needs re-scanning. Go to the other end of the hall and get into the elevator shaft. Activate the elevator and ride it up. Follow the hallway and stop at the save station on your left.
You are now on the command bridge, so make your way to the Aurora unit (through the middle of the three doors at the top level of the bridge). Head up the elevator and through the doors that open for you. GO up to the pedestal and interact with the middle panel. You are presented with another cutscene and are then on your ship. Head off to Bryyo.
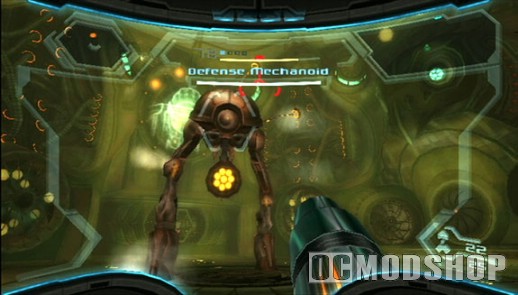
Visit Scenic Bryyo, Land of Lava
Go straight through the doors and into the next room. It appears that someone is messing around with the locals, and you’ll have to deal with them. Go through the hall, and then across the ice bridge. Oh, and kill some of those freakin’ hornets.
Drop down and turn around and yank the lower block so you have steps back up. Use the door to the next room and go to the platform on the left and keep going until you reach a glowing orange symbol in the ground. Turn left and get up onto the ledge by using the step, and then head to the other end of this raised area.
Jump down onto the ledge with the orange-and-green symbol door. Head to the ledge on your right and then to the one with the pillar in the middle of the room. Transform in to a morph ball and go through the glowing orange opening. Go around until you fall through another glowing opening and lay a bomb at the far en
Take out the blue swarms by hitting the green or purple spheres they make when they fly around in a circle. Take a left and go up to the door with the two symbols. Tur around and jerk the wall down to form a makeshift ledge. Jump onto this new ledge and then climb up to get to the platforms you just lowered. Go to the furthest platform so you can get to a higher part of the middle of the room. Jump onto a ledge in the middle, morph into a sphere and go into a glowing opening and lay a bomb when you are done sliding down.
The door with the two symbols opens up. Go to the door and grapple the little ball in the tunnels until it is out. Enter the glowing hole in the middle of the wall and go right. Once you get out, go through the door and get an Energy Tank.
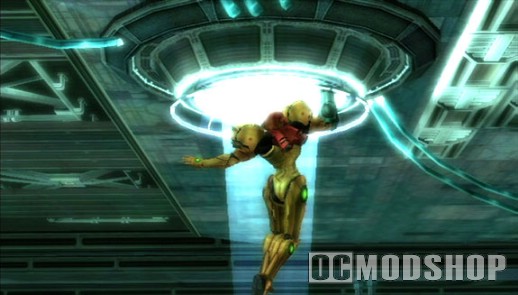
Grapple-rip the panel off the wall to get some Lore. Head back into the tunnel and go to the other side. Try to scan the Suicide Bats and then shoot the missile plate off the door and go through. Follow the hallway around and go into Hypermode to shoo the Phazon stuff.
Go through the opening you just made and then go through the door. Drop down to the bottom of the room (where the busted statue is) and take out the mutant lizard-things. Go through the opening you made during this fight and then turn left to get some Lore, and then right into the next room. Drop down, turn around and do the Hokey Pokey. Bomb the grey rock with the orange glowing lines.
Go through the tunnel and drop down. If you get enough of the glowing worms stuck on you, then you can float up and steer around a bit with the nunchuck. You can also use a bomb to get them off if you want. Avoid the dropping green liquid above you, though.
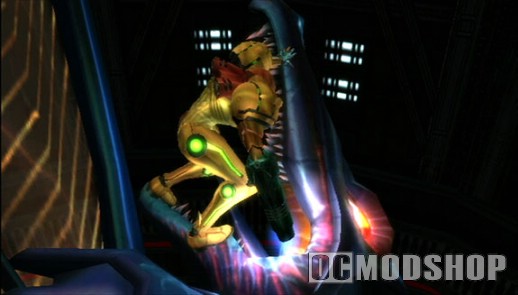
You can get a Missile Expansion by going to the left. Head to the right to go out the other side and use your grapple beam on the statue to reveal a bit of yellow liquid (which explodes when you shoot it). Explode up some yellow liquid with a fully charged shot. In the next room is the Swing Grapple. Exit the room and do your best Swinger impression across the gap. Head up to the door and exit.
You can now navigate the broken statue room freely. Hug the left wall and go forward until you reach a gap and enter. Use the ledges on the left to climb up. Jump from the top onto another platform, and now you’re above the entrace you used to come through. Shoor the floating fireballs and then swing across.
Rip all the panels off the wall and use the morph ball tunnels to get up. Go through the door and backtrack through the hallway. You’ll see a status similar to the one you destroyed getting to the swing grapple, so blow this one up, too. Jump into the alcove you just cleared up and jump across and follow the tunnel. Here is another Missile Expansion, so grab it.
Drop down, turn left and keep going through the hallway into the next room. You are back in the enormous room with the orange and green symbols. Use your grapple beam to get to the door you haven’t used yet (on the ledge with the orange symbol on the ground). Destroy the suicide bats and swing across the crashed ship.
Bomb the cracked plate on the left wall (since the door doesn’t work yet). Go through the tunnels an do straight at the fork rather than up. You’ll be in a room with a floating energy thing, which you can take out with a fully charged beam (anything less will ricochet off). One of the wallw has four white tubes near the top and glowing trianglar shapes. Take out the tubes with either a charged shot or missile and go throug the wall you just opened. Grapple the targets, going by rows (not by columns) and a big thing will come out of the floor. Interact with it to get the local map.
Leave this room by the door behind you, then go into the morph ball maze again. Now take the upper fork, and follow it to the top of the ship, avoiding the electric arcs, to get a MISSILE EXPANSION. You’ll have to use bombs to get higher in some cases. The hornets here need their tails yanked off to die, so do that. Head back to your ship, deal with the fight on the ice bridge, save, and fly to Bryyo Fire.
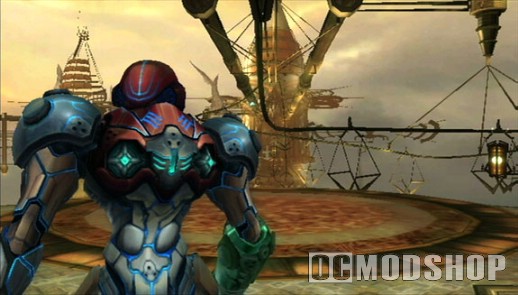
Once you get off your ship, note that Fuel Gel is everywhere (which looks like lava), explodes when shot and can be frozen. This stuff will be a piece to several upcoming puzzles, so get familiar with it. Go through the door and into the next room with a massive metal wheel and stream of fuel gel. Shoot it with a fully charged shot to make the disk retract from the wall, and do the same with the other one.
Go to the other end of the hall, turn right and through the door. Take out the enemies in this room, go to the left (don’t drop down: there’s Fuel Gel everywhere). You’ll see a door with an unreachable ledge, so turn right and shoot both streams of Fuel Gel to make a platform appear. Climb up to the door and go through.
Turn left and yank the wall panel to get some Lore. Go through the morph ball tunnel in the wall. There are some more of those floaty-worm things. Go all the way up and left first and there’s a Missile Expansion. Go back out and to the lower platform on the left.
When you get out, turn left and jerk the lever to your left. Turn around and shoot the door with a missile to open it. Follow this hallway and go into Hypermode to take out the enemies and fruited Phazone vines.
Now your suit has overloaded! Keep hitting A until the red bar at the top of the screen empties. Traverse the gap, turn right and head through the door. The next room has a bunch of teleporting hellhounds (go to the center of the room for them to spawn). Take out all the beasties and jump onto the low ledge.
Shoot the Fuel Gel and then bomb the slot (and get the Lore). Jump onto the massive platform that pops up, take out the waspes and then jerk the grapple targets. Now jump onto the platform in front of the hole in the wall. Pump the switch, then go through the morph ball tunnel on your right. Shoot the Fuel Gel streams and tehn go through the tunnel in front of you (not the one used to get in here). Shoot the streams, bomb the slot, then use the tunnel you came through to leave.
Make your way back to the top of the central platform, take out the wasps, then grapple the target on the left of the green ledge. Shoot the stream, then the one that appears. Go onto the ledge you cleared up by way of explosion, and enter the morph ball hole on the right. Make your way through the maze, bombing blocks and enemies where appropriate, and come out the other side. Another device that needs shooting and bombing is ahead and to the right, so deal with it.
Jump onto the platform, then to the right with the green ledge after taking out the enemies. Go through the door. In the next room, there is a rotating thing in the ceiling that is spewing fuel gel. Shoot the streams when it is facing left to drop a platform you can safely step on, and get the MISSILE EXPANSION. Go to the door across from you, and into the next room.
Use the save station on your left. Then exit this room and go through the next one. The next room has streams of fuel gel coming out of the ceiling, so time your passage through, to the door at the far end. Shoot the glowing things on the ceiling and floor, but do not step through until they are done exploding. Go through the door at the other end. Go to the left, and into a big room. Deal with the pirates, go into hypermode if need be, then prepare for the boss fight.
Borrupted Rundus Boss Fight
When his armour is on, use missiles or charged shots to break it. When it is, and there are white spots around his head, grapple the armour off, and wail on him with your Phazon beam in hypermode. If he is sliding around a la Iceman, just used regular shots. If he freezes you, tap your jump button to get out. When he fires large ice blocks at you, either dodge or shoot them. They often have health inside. The ice pillars all around you provide nice cover for both of you, so be sure to take that into account. He dies fairly easily for a cryokinetic badass.
You now have some Ice Missles! Take the elevator down. To cross the Fuel Gel-filled hallway shoot the bottom with ice missles to make platform. In the next room use the pump to your right to start the Fuel Gel streams, which you can then freeze to make platforms.
Make your way to the next door and go through. Interact with the panel ahead, then scan the hologram that appears to find out that you can’t do anything here. The ice missiles were worth it. Make your way back to the big room where you fought Rundus. Leave through the door, and go through the hallway to the next door. You’re back in the room with the falling fuel gel streams. You can now shoot them with ice missiles at their source to stop them so you can get through.
When you get to the middle of the hall, you have two choices. You can either go left after freezing the fuel gel stream to get a shortcut back to your ship, or you can go straight ahead to get a couple of expansions. I’d prefer to use the shortcut and then backtrack with the new missiles. You have to freeze the fuel gel stream since it never shuts off. Then get into morph ball form and jump into the stone lizard’s mouth. You” end up at the other end of the shortcut.
You can take this opportunity to go back to your ship and save, or you can go after the goodies. When you emerge from the shortcut, take a left, and enter the room. Take the door on the left, and go to the next room. Go into the morph ball tunnel, then float yourself onto the lower left platform. Go to the left, take the elevator down, then go through the door. Go through this room to the next one. Here, make your way to the top of the central pillar, then the door at the top of the room. Go through it, and you’re back in the room with all of the fuel gel on the floor.
Jump to the round platform, and go left first. Make ice platforms on the surface of the fuel gel, and follow the hall to get a MISSILE EXPANSION. Turn around, go back to the round platform, and then make your way to the white door you see. Shoot it with a missile, and go through. Shoot the glowing red bits on the tendrils coming out of the ceiling to activate swing points, and make your way to the other end of the hall.
Go through the door, grapple the thing to your right to lower a ramp that will allow you to go up and down here, and get a MISSILE EXPANSION. Now make your way back to your ship, save, and fly back to the first Bryyo landing site. First head over to the place called “The Grand Court” on your map, so you can get the MISSILE EXPANSION behind the white door to the right of the entrance. Then head over to the place called “G.F.S. Theseus” on your map.
Once you get inside the wrecked ship, head for the door opposite the one you came in by, and go through. Deal with the enemies, freeze the streams of fuel gel into platforms, and go to the statue. Jump into the bomb slot on his chest and drop a bomb. Once you pop out at the bottom of the shaft, use an ice missile to go through the door ahead. In this next room, take out the hell hounds, and then we have a puzzle. The statue is tethered to the wall in four places, all of which need to cut.
You can do this in just about any order, so I’ll just list them.
1. The bomb slot on the floor in front of the statue will cause it to crack the wall one of the tethers is attached to. Shoot the yellow crystals with a fully charged blast to burn the tether.
2. To the right of the statue there is a pool of fuel gel with a being fed by a stream of fuel gel. Freeze the stream, then go into morph ball form and follow the maze until you see a hole in the wall above you. Go into it, and lay a bomb at the end.
3. Stand in front of the statue, then turn around. Shoot the stream of fuel gel coming out of the big circular part of the wall.
4. Stand in front of the statue, and turn around again. To the right is a black rocky bit of wall with one of the tethers growing out of it.
Shoot the wall with a missile, then go into the hole you made and shoot the yellow crystals you see. Once the statue is completely free, bomb the slot on the floor in front of it again. As soon as you can move again, go into the hole in the floor that just opened up, and through the door you find there. This room is a giant vertical shaft, and unfortunately, you’re at the bottom of it. Drop down, and bomb the cracked arm of the broken statue to get an ENERGY TANK.
Climb back up to the entrance, then shoot the yellow crystals growing on the statue to the right. Swing across the gap, then jump onto the ledge to your right, and use them to get to the bridge that just lowered. Cross it, and then use the ledge on the left to climb up to another place to stand that faces across the shaft. Shoot the crystals you see in the alcove across from you, as well as the ones on the higher ledge to your left. You might have to back up a bit to see them. Use the grapple point that just lowered to swing across, then turn left and climb the stairs until you’re on top of the broken pillar you just lowered.
Cross the bridge, shoot the debris with a missile, and go through the door on the left. In this room, turn left and try to enter the elevator. And get ready to take out a lot of enemies. When you are done, interact with the panel that popped out of the floor, and select the up arrow. Then take the elevator up. Jump the gap, then shoot the cover on the glowing vent, then morph into a ball and go in. Take the energy cell out of the wall to start on deactivating the security system.
Use the glowing vent to get down again, then jump across to the big things in the middle of the room. Jump onto the green glowing ledge, then turn left pull the ledge out with your grapple beam then jump across. Turn right and jump, then right and jump, then straight onto the platform with a couple of boxes and a morph ball hole. Go into the hole, through the tunnel, then use the switch on the left. Leave via the tunnel, and then drop to the bottom of the room. Use the panel you used to raise the platforms in the middle of the room, lower them, then land your ship in the middle. Go back to the panel and use the button in the middle. SHIP MISSILES acquired.
Go into your ship and save, then fly to Bryyo fire. Head for the room where you fought Rundus (it’s called “Temple of Bryyo”, on your map). Take out all of the flying pirates, and then grapple the targets on both of the satellites to get rid of that jamming field that’s blocking your ability to call in your ship. Call in an air raid, and go down the elevator you just cleared off. Go through the hall, take out the shielded hovering drones, and then call in another air raid when you get to the room with the view of the seed. Head back to your ship, and fly to Thorn Jungle Airdock. Once you land, go through the door to the next room. Deal with the enemies, then shoot all of the yellow crystals you see.
Hug the right wall, and blast the plate off the door with a missile. Go into the room to get an ENERGY TANK. Leave, then jump on the ledge to your right as soon as you reach the main hall. Jump across the gap, then go into the morph ball tunnel. Once you emerge, activate the switch behind you to the right. Then leave via the tunnel, and go through the door to your left. After dealing with the pitiful enemy presence in this room, take out the satellite and get your ship to bomb the big wall in front of you.
Take out the enemies that show up, the berserker knight is just like the berserker lord only easier, then go through the door. Deal with the enemies in this hall, then go to the next room. Take out the fliers, then get ready for a boss fight.
–Boss fight-
Korakk Beast and Hussar Nail the Hussar with your beam, and after a bit he will fall off and die. That was the easy part. The steed is now on a rampage. Shoot its mouth, and when it is dazed and its underbelly is glowing, bomb that. When it falls to the ground after that, slid behind it and jerk its tail with your grapple lasso. He will then rear up, and you can nail him in the chest. Repeat until dead. -End Boss fight-
For defeating this boss you get. absolutely nothing!!!!! Very annoying, but not impossible to live with. Go through the door to the next room after defeating the pirates that want vengeance. Go to the right, take the missile plate off of the door, go through, and save. Then go to the door at the other end of the hall. Definitely open the lore panel right in front of you, because behind it is a MISSILE EXPANSION.
Go ahead and try to bomb the generator right now, it just won’t do any good. The game will then tell you to take out the ack acks (which, if you don’t know, is RAF slang for anti-aircraft guns) that shot at your ship. There are two of them. Try to go back the way you came, and some enemies will show up, so killify them. Go through the door to the right. There are some tanks of fuel gel in front of you overhead, so shoot them.
Jump onto the green ledge on the right. Jump the gap, take out the pirates and the turrets, then go through the door. Go through the hall, taking out turrets along the way, and into the big part of the room. One of the ack acks is here! To destroy it, grapple pull the hatch underneath, then shoot the fuel gel tanks that pop out. It’s a bit annoying to find the one that pops out, but if you have a good sense of direction you should be fine. The thing goes kaboom, as it should, and then go through the door that just got de- shielded.
Take out the turret, because having things shoot at you is annoying, then follow the hallway around to the next door. Go to the left, grapple the thing on the thin side of the wall, then go back to the entrance and go into a morph ball tunnel. Follow it around and up to get a SHIP MISSILE EXPANSION.
Go through the door, then follow the hallway and watch out for mines. Go through the door to find the other ack ack! Here you have to jerk levers at the tops of ledges, and there will be an endless supply of flying pirates to undo your work. Shoot them if they’re getting bothersome, otherwise ignore them. Once you pull all three levers, shoot the fuel gel cans, and this cannon is history.
Leave this room via the elevator down, then the door. Follow the hall around, then shoot the fuel gel cans when they are right above the fence across the gap in front of you. Cross the bridge, use the pump station, then take the morph ball tunnel to your right to get a MISSILE EXPANSION. Drop the rest of the way down, then take the door to end up in the room with the view of the other generator. Now that the ack acks are mangled messes, bomb the generator. Then head back to your ship and fly to the landing area that just opened up, Bryyo Seed. Once you land, hop the tentacled platforms to the door, then go through. The barriers can be destroyed by a charged shot in their glowing blue centres, so do that, then go through the next door.
-Boss fight-
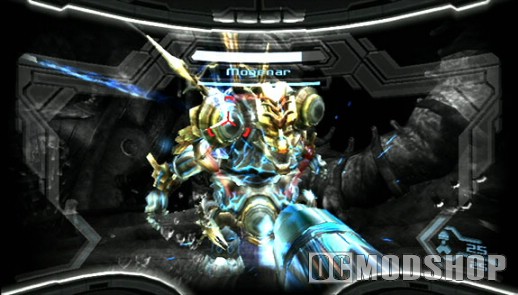
Mogenar This boss is long and tedious, but not unbeatable. He has 4 red orbs, all of which need to be destroyed one at a time. Three are on his chest, and one is on his back. Take them out. When one is all the way destroyed, shoot at the glowing hole you made with your Phazon beam as much as you can. It will explode, taking a quarter of his health off each time.
After you destroy one and use your Phazon beam, he will start charging at you with new shoes that make him invulnerable. Weird, but bomb the shoes in morph ball form, then resume the routine of shooting at the red orbs. The best way to get the one on his back is after he charges and is facing the wall for a bit.
He causes shockwaves by jumping, or he’ll send a line of Phazon at you by stomping his foot. Dodge both.
When he fires glowing green hands, shoot those, you can get health. When he pauses in the middle of the room and grabs at orbs to either side of him, SHOOT THOSE ORBS! If you don’t he’ll make it more difficult for you to destroy the ones that are on him. Whenever his chest swirls green, the orbs that are partially destroyed will move around, so keep that in mind. He has a number of projectiles, like a Phazon beam from his mouth that sweeps the ground, and He also has an attack where he slams his fist into the ground and it starts raining Phazon boulders. When he does that, just don’t stay still for too long. Keep hitting the spots, and he should be no trouble. -End boss fight-
You’re not quite done here, you still have to take out the seed. Go to the centre of the arena to get the HYPERBALL. You can now shoot Phazon arcs at enemies while in morph ball form, and it homes. Sweet! Use it on the fruits around you, then tap A to send the extra Phazon at the big eye at the top of the room. You automatically end up on your ship, so fly to Elysia.



2 comments
this game amazing, walktrough SUCKEY
yeah this walkthrough has things placed in the wrong places in order of when to do them
Comments are closed.