

*NOTE: Easy to kill shielded enemies by aiming at their guns. It’s a small margin of error, but it’s your only shot.*
Head up to the right and snipe the elite, kill anyone nearby, swap out your pistol for a plasma rifle if you want, and then move along a narrow ledge to snipe the grunts in a lower area.
Move up with your ally to a raised area overlooking a compound. There are initial enemies in the area, including about 3 elites, then another group will be dropshipped, and there will be jackals at the back. All you can do is snipe anything that moves from this raised area, and when things are quiet move along the right side to the building and from the walkway finish off the rest with help from your pal.
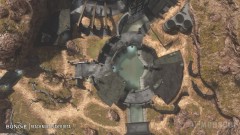
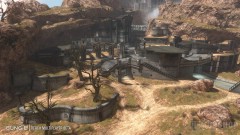
Once clear, head behind the bigger building and through a doorway to the next area, and you want to quickly clear a path to the middle silo walkway so you have 360 degree cover and movement. Priority #1 is the turret gunner, but your friend may handle that for you. Then just pick off the grunts and few elites.
Heading down the path may be one or two stragglers. At the end of this brief canyon you’ll see a huge monster barreling in your direction. You can run back if you want, maybe even run back and hop onto the ledge on the right side of the canyon if you like, but these beasts are not that hard to take down with headshots, and if you move fast enough you may even be able to run up to the open area and hop to the left on the rocks where they cannot touch you. There are two, but not being killed by the charging one is the key. Frag it, shoot, it will die with not much grief. And yes, there is another, but again the rocks on the left as you enter this spot is an ideal perch.
Follow your friend until you see the compound under attack, and if you came up the second path you can run up to the higher grounds for sniping. Lots of tangos all over, and with 5 allies it shouldn’t take long to clear it. Don’t miss the jackals on the roof and move into the center of the complex for the checkpoint.
Temporarily grab the rocket launcher from the ammo cases and get ready for the first dropship at the back. Don’t try to shoot down the phantom, just dodge its attacks and try to blast all the troops it drops with a shot or two.
Phantom #2 drops more enemies at another end of the compound, so swap out your empty launcher and use the DMR for sniping the grunts, but watch for those pesky elites that like to appear in unexpected places. Phantom #3 drops jackals and such at the point where you entered, so picking them off won’t be too hard.
Then just follow your squad up the riverbed until you hit the dam. Feel free to open fire on maybe the guys to the right, just be sure than when the heat is on you are taking care of the turrets in the central platform; keeping grunts off of them. Clear the bridge and cross over.
There are three turrets to use, two facing the facility and one facing the bridge. Use the ones looking to the structure to clear the incoming tangos and detach each gun when you can’t be still. Move into the buildings when the covenant are hiding and your team should follow.
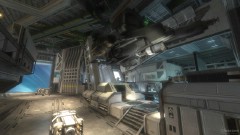
When the place is clear, there will be more dropped behind you, so watch those steps. And when the minions are clear, one more phantom will fly in. This is your queue to run to the platform for the bridge facing turret. Wait for the right side of the phantom to open and open fire on the 2 hunters before they drop. Aim high on them and hopefully they miss you badly for a long streak or you’ll need to detach and go mobile. Keep your distance from them if you are lugging around a turret, and just aim high.
When clear, follow your team past the open gate and up the path to the jagged area. Lots of enemies all over that will be moving, so you just have to move fast and take out whatever you see. Used the raised areas and that’s about all I can offer here. Flanking is optional, more like a last option if low on ammo. And the second raised spot (if you’ve stuck to the middle) should have some ammo for ya. Clear your way to the end and move up for a scene.


