

The bathysphere will drop you off at dingy little dock. Climb up the stairs and around the column to find a vending machine and gene bank (where you can swap out your equipped plasmids).
Climb over the debris and continue through the door ahead of you. You’ll see a spider splicer up ahead of you, but you don’t have to deal with her just yet. Continue through the door at the end of the hallway, which takes you out into a large open area with a wharf, multiple splicers, and a big daddy/ little sister. Let the big daddy deal with the splicers for now.
Head down the ramp into the lowered area in the center of the room. Immediately underneath the ramp is a turret – go ahead and hack it, it’ll help when you fight the big daddy. There’s another turret underneath the wharf on the far side of the room – same deal there, zap it and hack it. Immediately behind that turret is an audio-diary (Bathysphere Keys).
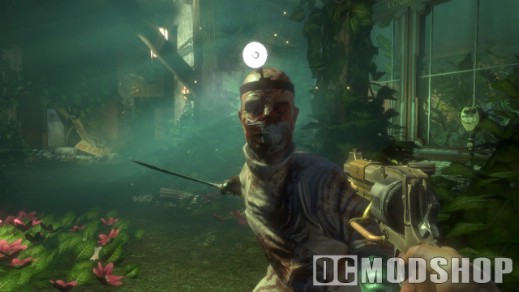
Now that you’ve got the security system on your side, you can take out the Big Daddy. This one is a Rosie (armed with a gigantic rivet gun). Try to keep her in the center of the room where your two turrets can shoot at her. Harvest or rescue the little sister, and head up on to the wharf at the south end of the dock.
Continue through the door and turn right at the end of the hall. This takes you to a balcony type area with a gene bank and a Gatherer’s Garden. Unfortunately, if you look to the left, there’ll be an RPG turret launching rockets at you, as well as several splicers you’ll have to take out. Use your telekinesis plasmid to toss the rockets back at the turret and destroy it. Clear out the splicers, and head to the GG to spend your ADAM. Head down the stairs towards the giant “Fontaine Fisheries” sign.
To the east of the GG and gene bank machines are two holes leading to a lower area. Go through the right one and drop down to the lower area. Zap and hack the camera, and look in the other alcove – you’ll find some loot and a deactivated security bot for you to hack. To get out of this area and back up to the balcony, you have to jump out of the hole in the west wall, down into the water, and climb up the stairs.
At the Fontaine Fisheries sign, continue going down the stairs into the flooded area. Turn right and head around the corner. Continue following the hall until you get to a gate protected by a combination lock. Hack the lock or open it with the code 5-3-8-0 and continue through. There’s an audio-diary (Timmy H. Interrogation) and some other loot here. You can use your telekinesis power to grab the stuff through the gate at the back of the room. Head on back up to the Fontaine Fisheries sign when you’re done.
Stock up at the vending machine, and then climb over the boxes leading to Fontaine’s Fisheries and head in. You’ll enter a room with a dead lady and a bunch of health and ammo. Pick up what you need, and then activate the door at the far end of the room to ask for entrance. Peach Wilkins will answer the door, but he won’t let you in until you do a favor for him. He wants you to head up to the wharfmaster’s office in the upper wharf and grab a research camera for him. Unfortunately, before you can go, a spider splicer appears. These guys are very tough, they can scramble up walls and across ceilings and move very quickly. Do what you can to stay alive, but don’t sweat it, as Peach will send the security system after the splicer, chasing her away. He sends out a grenade launcher as a parting gift and sends you on your way.
Follow the quest arrow back out of Fontaine’s Fisheries, up to the balcony with the machines on it, and turn right. The gate to the upper wharf should now be open. Kill any splicers you find, and head on through.
Turn right after passing the gate, and then immediately turn right again. You should see a section of metal grating on the ground that’s broken inwards. Follow the crawlspace to the end and you’ll find an audio-diary (Fontaine Must Go) and some loot.
Continue on up the stairs to the upper wharf area. You should come to a sliding door which leads to a little room with some proximity mines and other ammo. Keep heading forward. You’ll enter a larger area with a big daddy/little sister and some splicers. Take out the splicers, and head to the fish cleaning table directly across from the door where you entered. On it is an audio-diary (Finding the Sea Slug). Go through the archway towards the wharfmaster’s office – there’ll be an RPG turret there, zap it and hack it as it will come in handy when you fight the big daddy. Kill the big daddy (use your proximity mines if you want to) and rescue or harvest the little sister. On the ground on the west side of the room (near the hole the little sister crawls out of) is another audio-diary (Masha Come Home). Remember the code 7-5-3-3, you’ll be able to use it later. There’s another audio-diary (Picked Up Timmy H.) on the corpse by the hole – it also has a code, 5-3-8-0, but it’s for the interrogation room and we’ve already been there.
Head through the archway towards the wharfmaster’s office. Watch out for the camera at the top of the stairs – it’s too high up for you to hack it, so just zap it and run. There’s an audio-diary (Watch Fontaine) by the vending machine at the bottom of the stairs. Run up the stairs, you’ll see yet another camera on your right – this one hackable. Continue down the hall and into the alcove on your right. Whack the lock of the door, and immediately duck for cover into the right corner, just past this desk. This will give you cover from all of the turrets which will be trying to kill you – an RPG turret in the right hallway, a machine gun turret in the hall straight ahead, another RPG turret in the center of the south wall, and yet another machine gun turret in an alcove in the SW corner of the room. There’s also a camera above the last RPG turret. Destroy or hack them all (remember to use your telekinesis plasmid on the RPG turrets), and search the room and corpses to find some nice loot.
Crouch and head through the crawlway in the SE corner of the room. There will be a camera directly above you when you enter the room, but it’s too high to hack, so zap it and grab some cover at the other end of the room. There you’ll find a safe, a nice selection of ammo, and an audio-diary (Have My Badge). Head back out when you’ve got everything.
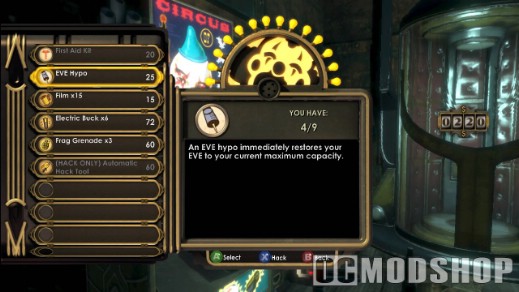
Break the lock off the door in the SE corner of the room, and head through the hole in the wall. Pick up whatever ammo you need and swap out your plasmids and tonics at the gene bank (if you want to). Turn right and head down the hall, past the Vita-Chamber. At the end of the hallway will be a small office, with the research camera sitting on a desk. This will update your objectives – Peach wants you to snap some photos of three different spider splicers and bring them to him before he’ll let you into Fontaine’s Fisheries. Take a photo of the splicer through the window for your first shot. Note that you can check out the Researching Enemies guide above if you need more info on how to use the camera.
Head back out of the office and down the hallway. As you turn the corner past the Vita-Chamber the wall should explode out, and you’ll have to kill a couple of splicers. Hop through the hole in the wall and onto the tarp thing – there’s a plasmid (Security Bullseye) there for you to grab. Kill the splicer beneath you, zap and hack the security camera, and pick up any ammo you need from the bandito. There’s also an audio-diary (ADAM Discovery) on top of a crate along the west wall.
You’re now in the room that was on the other side of the blocked door from where you fought the last big daddy/little sister. Basically what we have to do now is take three pictures of (different) spider splicers and take them back to Peach Wilkins. You should have one already from the wharfmaster’s office, and we’ll get the other two on the way back to Fontaine’s Fisheries. Continue through the south door, and pick up the audio-diary (Eden Leaking) immediately in front of you. Head through the door into the tunnel, and hack the camera on the right wall. There’s an audio-diary (Fontaine’s Smugglers) on the bench immediately beneath the camera.
Head right at the intersection and go into Jet Postal. Kill the splicers, and look on the table immediately to the left of the entrance for an audio-diary (Death Penalty in Rapture). Continue into the back room – there’ll be a spider splicer crawling around on the ceiling. Snap a photo or six (that’s 2 out of 3) and take her out. Zap the camera in the corner (it’s too high to hack) and grab whatever you need from the shelves. Also, the vending machine in this room sells film, so now is a good time to stock up, since the initial supply you get with the camera runs out very fast.
Head into the Fighting McDonagh’s – there will be several splicers and a little sister/big daddy here. Stock up at the vending machine, switch out your upgrades at the gene bank, and kill the big daddy when you’re ready. Head up the stairs into the main area of the bar – there are two audio-diaries here. One (Smuggling Ring) is on a table near the 123 Beer sign, and the other (Working Late Again) is on a table near the window looking out over the city.

Head through the door behind the bar by zapping the sparking door switch – this leads to the wine cellar and storage area. Kill the splicers, and head through the door directly across from the entrance. In the corner of the room is a desk with an audio-diary (Rapture Changing). Go through the crawlspace into the little closet, and zap and hack the turret. Open the safe for some nice loot. Head back into the main cellar area, then break through the grate into the crawlspace at the other end of the room. Following the crawlspace to its end will take you back out to the entrance to the bar, and you’ll also find another audio-diary (Meeting Ryan).
Head to the upstairs section of the bar, and clear out any splicers. Walk through the door that’s directly in front of you at the end of the hall as you climb up the stairs – this will trigger a spider splicer spawn behind you. Snap a photo (3 out of 3, booyah) and kill it.
Head back into the room at the end of the hall. There’s a safe and some other loot at the back of the room.
Head up the second set of stairs, to another hallway with two rooms. One of them has a combination lock – you already got the code from an earlier audio-diary, it’s 7-5-3-3. Head in and you’ll find a rather depressing pair of corpses, along with an audio-diary (Saw Masha Today). If you walk towards the money in the corner of the room, the painting will blow outwards, revealing a new gene tonic (Shorten Alarms).
Zap the shorted-out door switch on the other room on the top floor of the bar. Inside is a splicer, some loot, and another audio-diary (Arresting Fontaine).
Go into the bathroom at the foot of the stairs. You can kill the splicer inside by zapping the water. You can pay 5 dollars to get into the bathroom stalls, which each have some ammo and other loot inside.
So now we’ve got our three spider splicer pictures, and we need to head back to Fontaine’s Fisheries to give them to Peach Wilkins. Follow the quest arrow back out into the tunnel, and kill the splicer and his turret. Head through to where you jumped down from the wharfmaster’s office. The gate will now be open, letting you back into the upper wharf. Keep following the arrow down the stairs until you get to the balcony area with the Gatherer’s Garden and Gene Bank machines. The spider splicer that tried to kill you earlier at Fontaine’s Fisheries will be waiting for you, so if you’re missing a spider splicer photo now’s your chance. Note that this splicer seems to be a lot tougher than regular ones. There’ll also be a free gene tonic (Wrench Lurker) sitting on the railing near the machines.
Head down the stairs and back into Fontaine’s Fisheries to talk to Peach. He’ll let you in, but makes you give up your weapons by putting them into the Pneumo past the door (you’ll get them back, don’t worry). Drop by the Gene Bank and make sure you have Incinerate and Electrobolt slotted, as you’ll need them shortly. Use incinerate to melt the ice on the floor and pick up the gene tonic (Focused Hacker).
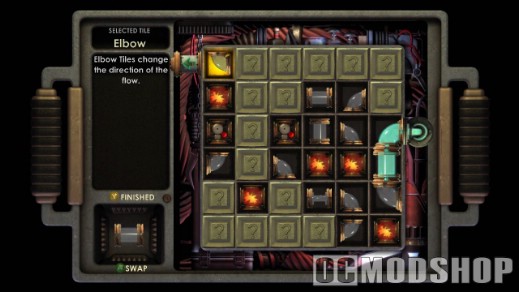
Head through the door and down into the open area. You’ll be ambushed by Peach and his men – unfortunately you have no weapons but your wrench, but you do have your plasmids, so make use of them. Try to hack all the security system elements you can to get them on your side. You can also lure the enemies into the pool of water on the right side of the room and zap them with electrobolt. If you die you’ll respawn at the Vita-Chamber just outside the entrance to Fontaine’s Fisheries. Once Peach dies the doors at the back will open, revealing several more splicers and a turret. Kill them. You will earn the “Defeated Peach Wilkins” achievement for 15 GP after you kill him.
Search the side freezers for some extra loot. You’ll have to use your incinerate plasmid to open the doors and free up some of the goodies.
Head down the stairs at the back of the room and pick up your weapons from the pneumo. Note that you will get all of your weapons back, but a lot of your ammo will be missing. This is normal, it’s not a game bug (thanks to Dominick P. for confirming this). Continue on down to the bottom, and you will find your very first Power to the People (i.e., weapons upgrade) machine. Choose carefully, since the machine can only be used once.
Search the freezer to your left as you come down the stairs. At the back of the room is a safe, and on a table next to the safe is an audio-diary (Putting the Screws On).
Head into the west freezer, where you’ll see a brief ghost cutscene. Use your incinerate power to melt the ice blocking the exit at the back of the room, and head through. You’ll get a radio transmission from Atlas, and then you move on to the next level.

