In Hope Springs we did the beacons first, mostly because the enemies were all pretty tame and there was not much of a need for drop points.
In Green Bay, the island to the west of Hope Springs, we will go for all the Cell strongholds first.
And perhaps while on the Cell Zones we will also free up some AU’s.
Cell Zones: Green Bay
Let’s start to the far south, in the fun fair. Clear the entire area, noting that some guys have grenade launchers. Be sure to pick one up. And I’m sure by now you have enough strength to pick up the turrets (yellow dots on the radar) and carry them like normal guns, not even slowing you down, but you can’t grab ledges. And defending the point with a turret (it respawns) is quite easy, and again, you can’t sit on the symbol and expect to faceroll to victory – move.
Few Agi. Orbs about the entire park, need level 5 agility for the Hidden Orb on the lighthouse, and hit up the orbs on the buildings on the west side of the beach. There is even an AU for the Gym Beacon if you want to get it now, and in fact I expect you to. Not hard, just clear to it and don’t miss the Audio Log in the little domed structure in front of it. Lastly, there is a Hidden Orb at the west entrance to a little tunnel which is near the cluster of buildings at the west end of the beach.
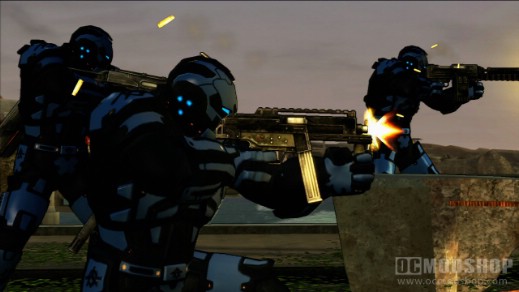
Now bring up the map and head to the next southern Cell Zone, which is at the top of some very tall buildings. There is an AU up here for the Gym Beacon as well, but this beam needs help which we will cover later. For now, just get up there, clear enemies and take cover. They have sniper rifles and grenade launchers so for most of the rest of the game you can’t be a stationary target – move.
May as well clear a path up to the AU if you follow the ramps and link it. Before you trigger the zone, head SW to the missile turret and try not to lose it, it’s a hot knife through butter while you got it. The enemies got everything, so take the high ground and reign down missiles, just careful where you aim.
Like before, this stronghold is tied to another, so head north and hop down to the street. Clear the area, mainly the turret nest, but it’s up to you if you want to take the turret mobile or leave it in place. You’re a sitting duck if you don’t detach it, so it’s best to take it. The zone is on the street corner, but collateral damage is okay here, and you can literally fall back to safety below if needed.
To the west, on the street in front of a parking garage, you’ll be in a mess just clearing the area. Snipers all over, so you have to hunt them down and kill them. You’ll find a Hidden Orb and two tough Agi. Orbs on top of the tall west building; both orbs are on top of antennaes. Clear the streets, including the turret gunner on the over-hang, and then climb under the sniper on the bridge to get him. While up here, hit the metal plate to clear a path for the apartment beam so that the Gym Beacon has two AU’s up and running.
The Cell Zone in front of the police station can be real tough if not done at night with the assistance of freaks. You go incoming from the left, right above, and on the streets. You’ll have to take that turret mobile on the roofs.
Next hit the Cell Zone to the NW, but don’t miss the Audio Log near the antennea on a nearby roof. There are several turrets in the surrounding areas of the zone on the street, so feel free. The enemies you take out for the defense are spread out, so stay mobile and you’ll have to move to the west to finish it off.
The other half of this stronghold is to the east, but there is also a very deadly AU that must be taken, the Cell are just too pesty from it. It’s one for the Radio Station. Make sure to get the bad guy under the AU.
Back to the Cell Zone, it’s one of the most deadly to approach, with snipers and two turrets. North turret is priority #1, and the snipers are not hard to take out, especially if you take them out going north to south. This should let you clear the second turret easier, by clearing the snipers before this one. Clear the areas around the turret, including the mouth to the street, and grab the Hidden Orb just under this southern turret, which is a little south of where the zone is marked on the map.
Defending the zone is heck if you don’t take the high ground, otherwise it’s very easy. Again, they spawn at both sides of the alley, so you have to move. And if you don’t have the bright idea to jump into the helicopter blades, head to the last zone to the east.
The zone at the NE of the Green Bay is in front of the Royal Vista, and it is covered by snipers and a missile turret. Clear the area, the roof at the back, grab the turret, and unload on the Cell when you defend.
Now head to the second half of Green Bay, the mostly abandoned island to the north. We’ll start with the stronghold to the west. The first one approaching the island is very easy, you can just camp on the garage roof; it’s clearing the area before the defense that is most difficult. If you want that orb on the pole, you need at least level 4 agility. Watch the hole in the bridge up ahead.
Then approach the mansion on the island, which has a missile turret and two grenadiers on either side. You’ll notice a new type of cell here, they almost look like Agents like you. There’s at least one at the back of this area, and you want to clear all of it before hitting the zone. When you want to do the zone, be sure to grab the missile turret.
This Cell zone is the hardest yet, as you must watch for incomings all over, there are a lot to kill, and they switch to grenades toward the end. If you didn’t have the missiles this would be pretty tough.
Don’t forget to hit the AU for the Radio Station and grab the Audio Log on the top level of the mansion. Now head east to the middle Cell Zone, which is also by the plate blocking your villa beam, so hit that on your way to the shanty town zone.
The Cell Zone in the middle is set in a shanty town, so clear the Cell while avoiding civilians. May as well grab the Renegade Orb here as well as the Hidden Orb under a house on the east end of the town, on the cliff. Head north to the last zone and AU.
The lighthouse is heavily fortified from the rocks all the way to the top, so you must clear it all. One thing to watch out for are the big guys with rocket launchers, straight line shots, and cluster grenades. You want to pick both up and save at least one of each to store away. There are also shrapnel grenades. Most likely all of these could have been picked up sooner, but oh well.
The Cell Zone is not too bad, you can always fall back to the front for cover. And two big guys will appear as the last wave. For the AU at the top, you can climb the rock until you hit the platforms on the back of the lighthouse, then hop them to the top (there are no tricks, it’s straight jumps). Two guys up at the top. Link the AU and then use the chip in the over-hang to jump to the Hidden Orb at the tippy top. Be sure you link the AU before you dive for the cove of water to the east.
That should do it for all the Cell Zones in Green Bay.