On your way back to land, cross the broken bridge and there is an Agi. Orb at the top of the front of the bridge. Confiscate a vehicle and head northwest to the AU at the very north of this section. I kinda over-shot it and hit the building a little to its north, and from there I just when Agi. Orb hunting to the west, hitting a Hidden Orb in a broken vent. I hit the building with the dome, which has two on it including at its back, and from there I hit the ground and climbed the building across the street from the north or west side.
On this little block there was a Renegade Orb that kinda hit a dead-end, so it wasn’t too hard to catch. Heading south, I crossed the street and grabbed orbs at the corner of where the Cell Stronghold point was near. The idea is that I’m only going to circle this open square area. So now that we are as far as I want to go, let’s head back to the AU to the northeast. You should only cross the street to go north so that you hit the block to the east of the square – I know it’s tempting to go south for all the orbs, but let’s stick to the plan.
I won’t go over all the details, just that after getting all I could see, my total of Agi. Orbs was at 98 once I hit the AU. The block with the first AU has about 6 or so tricky ones, meaning you’ll have to look a little harder than just up (mainly one just off the ground in the alley and one on the side of a building south of the AU). Of course don’t forget to active at the AU.
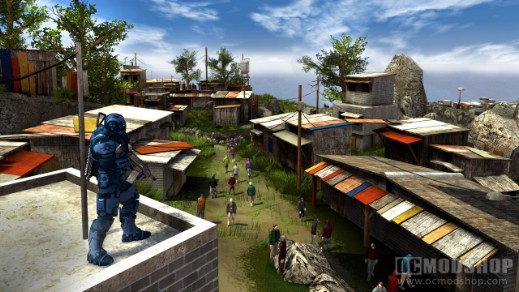
The second AU is to the northeast, and the best way to get there is to go south and get on the freeway that runs north along the east side of the city. It goes right next to the AU. There is an Audio Log directly under the freeway where it is nearest to the AU, and there is a Hidden Orb above the entrance to the tunnel just to the north.
Getting to the AU is another story, it requires you to first get into the quarry, which you can drive to or get inside the freeway tunnel and hop through a hole and use the blue pads. When in the massive quarry area, there are at least 5 Aorbs that are a little tough to get. Once you’re ready to hit the AU at the east side, just hop up to the very end of the path, hop the rocks, and you can turn on the AU.
*NOTE: At night, I must admit that it’s one of the more impressive sights in gaming to stand in the middle of the quarry and see hundreds of freaks all over the place. Something to consider sticking around to see.*
The third AU is to the north of the quarry, and approaching from the second AU you should run into a large metal plate with a health bar. Blow it up with a frag or two to pop a hole in it. Then proceed to clear the building below of tangos. There are two orbs as well as an Audio Log at the back.
Now to get to the drop-zone, go south and get a ride, then hit the entrance to the quarry and go to the east side of the circular part. Hop out and hop into one of the holes.
This defensive battle is the toughest yet. There are a few columns around the beacon that will be occupied by big freaks who do spit. There are only four spots they take, and it would be best if you could just sit in one and pop them as you see. But if you are not on the ground then all the ground freaks will attack the beacon. It’s a juggling act between hopping up to smack the attackers and running on the floor trying to mop up what you can. You’ll note that the grenades here are UV, which are strong against freaks only, so you may as well grab some.
It gets tough closer to the end, and will be near impossible if you jump to a column and miss. Once things get too hectic, hit the barrels on the sides. But once you hold off long enough, you can reload and hop out in either direction. Getting back south to Hope Springs is a long walk, so just get going.