Now we’re going to shift focus to Cell. Your first mission was to take one of their zones, and we did. We’ve since only done the freak zones, so now let’s clean up the Cell strongholds.
There are two at the pier, flanking the first zone we did. So let’s do the one to the west of it. Heading there, clear it of Cell and then go collect all the orbs you can, including a few on the ship, but watch out if you climb the cranes and follow, you may leave the area and cause the Cell to respawn.
When ready, call for help and defending the zone should be easy, it’s just a few waves of enemies.
Now feel free to hope the tall cranes and make your way east, even going back over the container area for the ones you missed the first time; even doing the racing orb near the street if you missed that the first time here. You want to at least hit the silos to the east of the containers because there are a few orbs, including a Hidden Orb on the ground and an Audio Log, both at the middle silo.
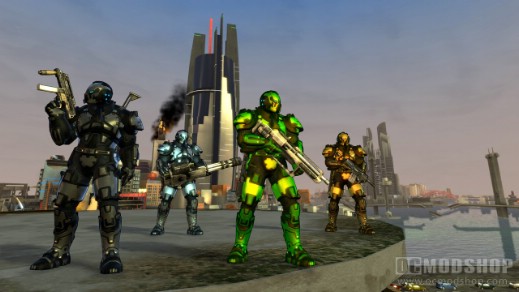
*NOTE: There are tall cranes that seem to not have easy ways up unless you can jump really high. That’s true, but you should be able to get on the beams and do this jumping whirl to get the next beam. I believe there are at least two of these kinds of cranes in the pier.*
When you reach the eastern pier Cell zone, feel free to hunt down orbs, maybe even the ones along the line of rooftops going back west, then clear the area of Cell. When you activate it, there will be about four waves in total, two from one side, two from the other. It’s only difficult if you stay in the open and let them gang up on you. Use all the gas cans you want.
Call in a drop for weapons and a car and head north. This one is on the roof near where we hit an AU. It’s only hard to defend if you stay in the middle, so clear to one side and double back to clear the other side.
The next zone is west at the corner of the square we visited earlier. It’s a tough clear just to defend, and then you have to defend from all sides. But there is enough cover to hide behind if you get rattled.
The last zone does not trigger a drop point because there is another you must hit in order to create one. It’s to the northwest, on a tall cluster of rooftops. Up here you will deal with snipers and a ton of guys just hanging around. There are also a ton of orbs, even some below the rooftops near where the zone is. You can circle around to clear the roofs and grab as many orbs as you can.
Come back and begin the defense. Kill the guys that spawn near the zone first, then use the bridge to the other roof as a choke point, just don’t forget that quite a few will spawn at the doors nearby. When it’s just the guys across the bridge left, rush in and clear em out.
Now if you check the objectives on your map you’ll see that you have done all the Sunburst beacons and Cell zones for Hope Springs.